Quickly Editing Media Files in Word and PowerPoint Documents
Sometimes you need to edit every image in an Office document quickly: for example, to review the screenshots in a report and redact information that should not be published. Doing this through the Word or PowerPoint interface is awkward. Images are scattered across pages and slides, making them easy to miss, and extracting, editing, and reinserting each one becomes a separate repetitive task.
A more practical approach is to work directly with the document's internal media rather than treating it as a single opaque file. Modern Office formats (.docx and .pptx) are ZIP archives. Open one as an archive in 7-Zip, locate the image folder, edit the images in your usual graphics editor, and put them back using the same filenames.
A quick workflow for DOCX
First, make a copy of the document. This matters: if something goes wrong while editing the archive, returning to the original is easier than repairing the file structure manually.
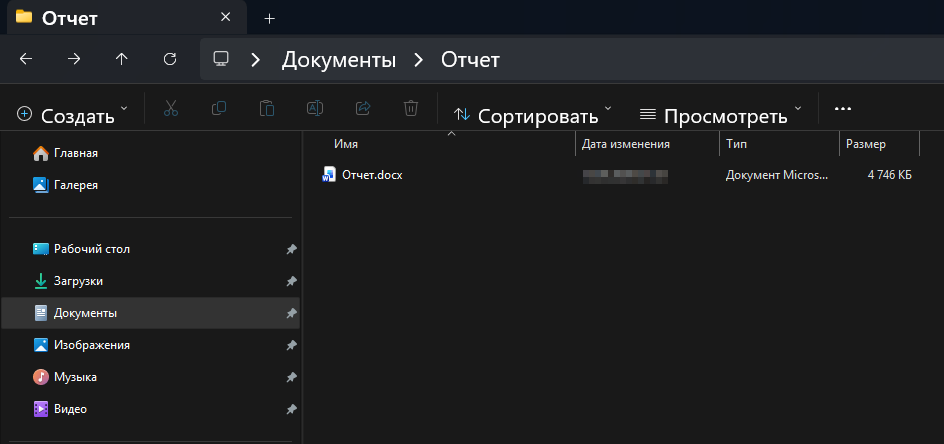
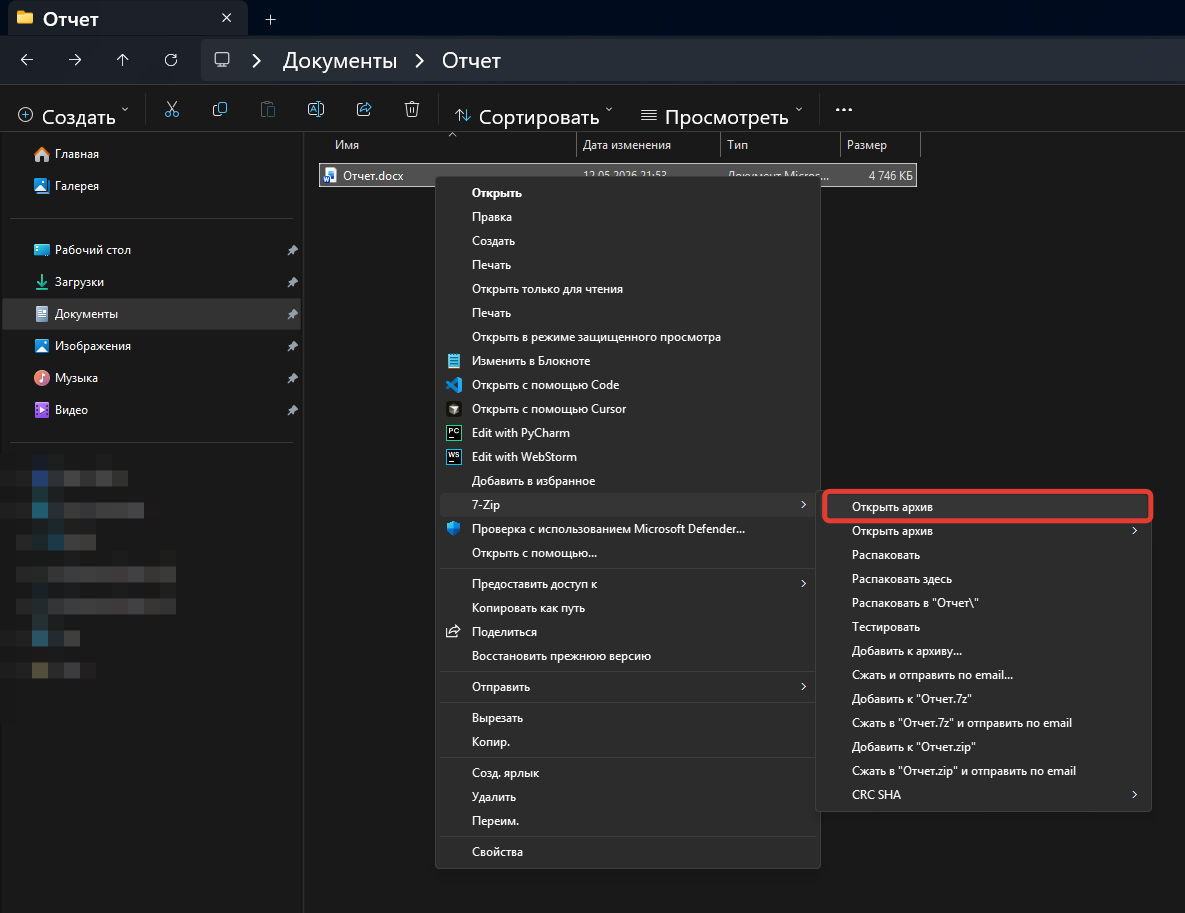
Right-click the copy and select 7-Zip -> Open archive. You do not need to rename the .docx file: 7-Zip can open this format directly as a ZIP container.
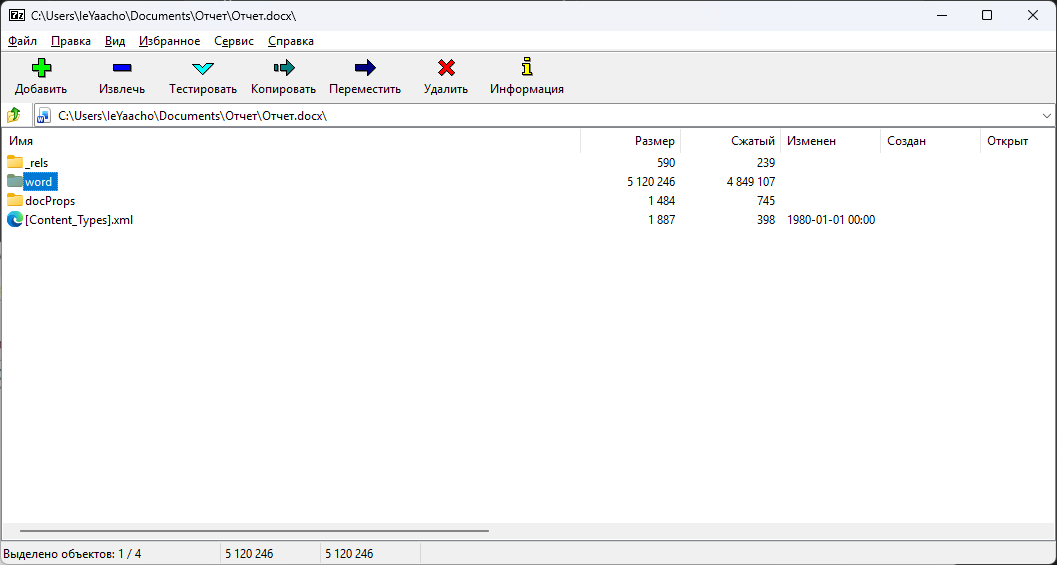
In Word documents, images are stored in word/media: open the word directory, then find media inside it.
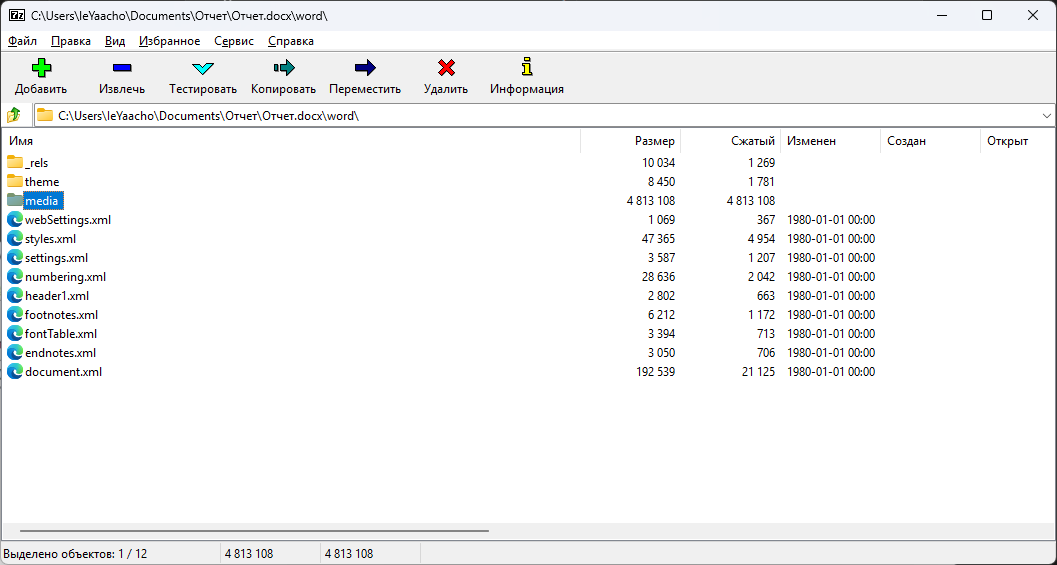
Extract the media folder next to the document or into another working directory.
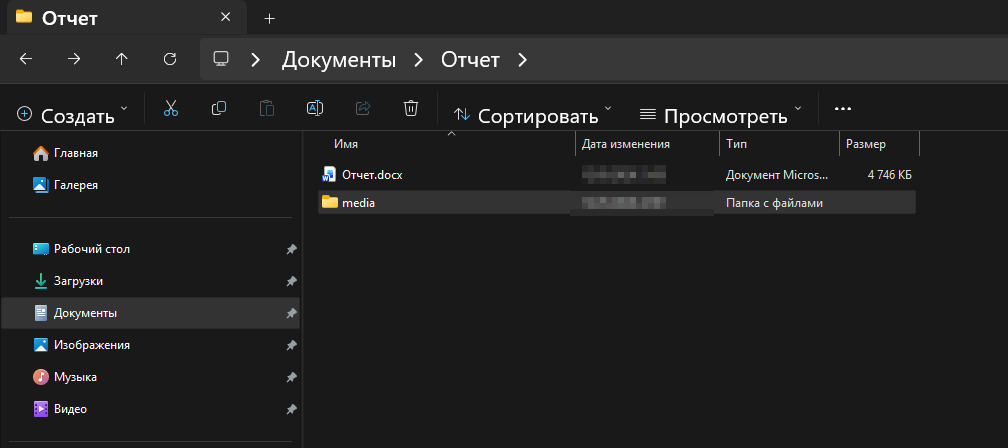
The extracted folder contains all the images embedded in the document. Edit the images you need in your preferred editor and save them under the same filenames.

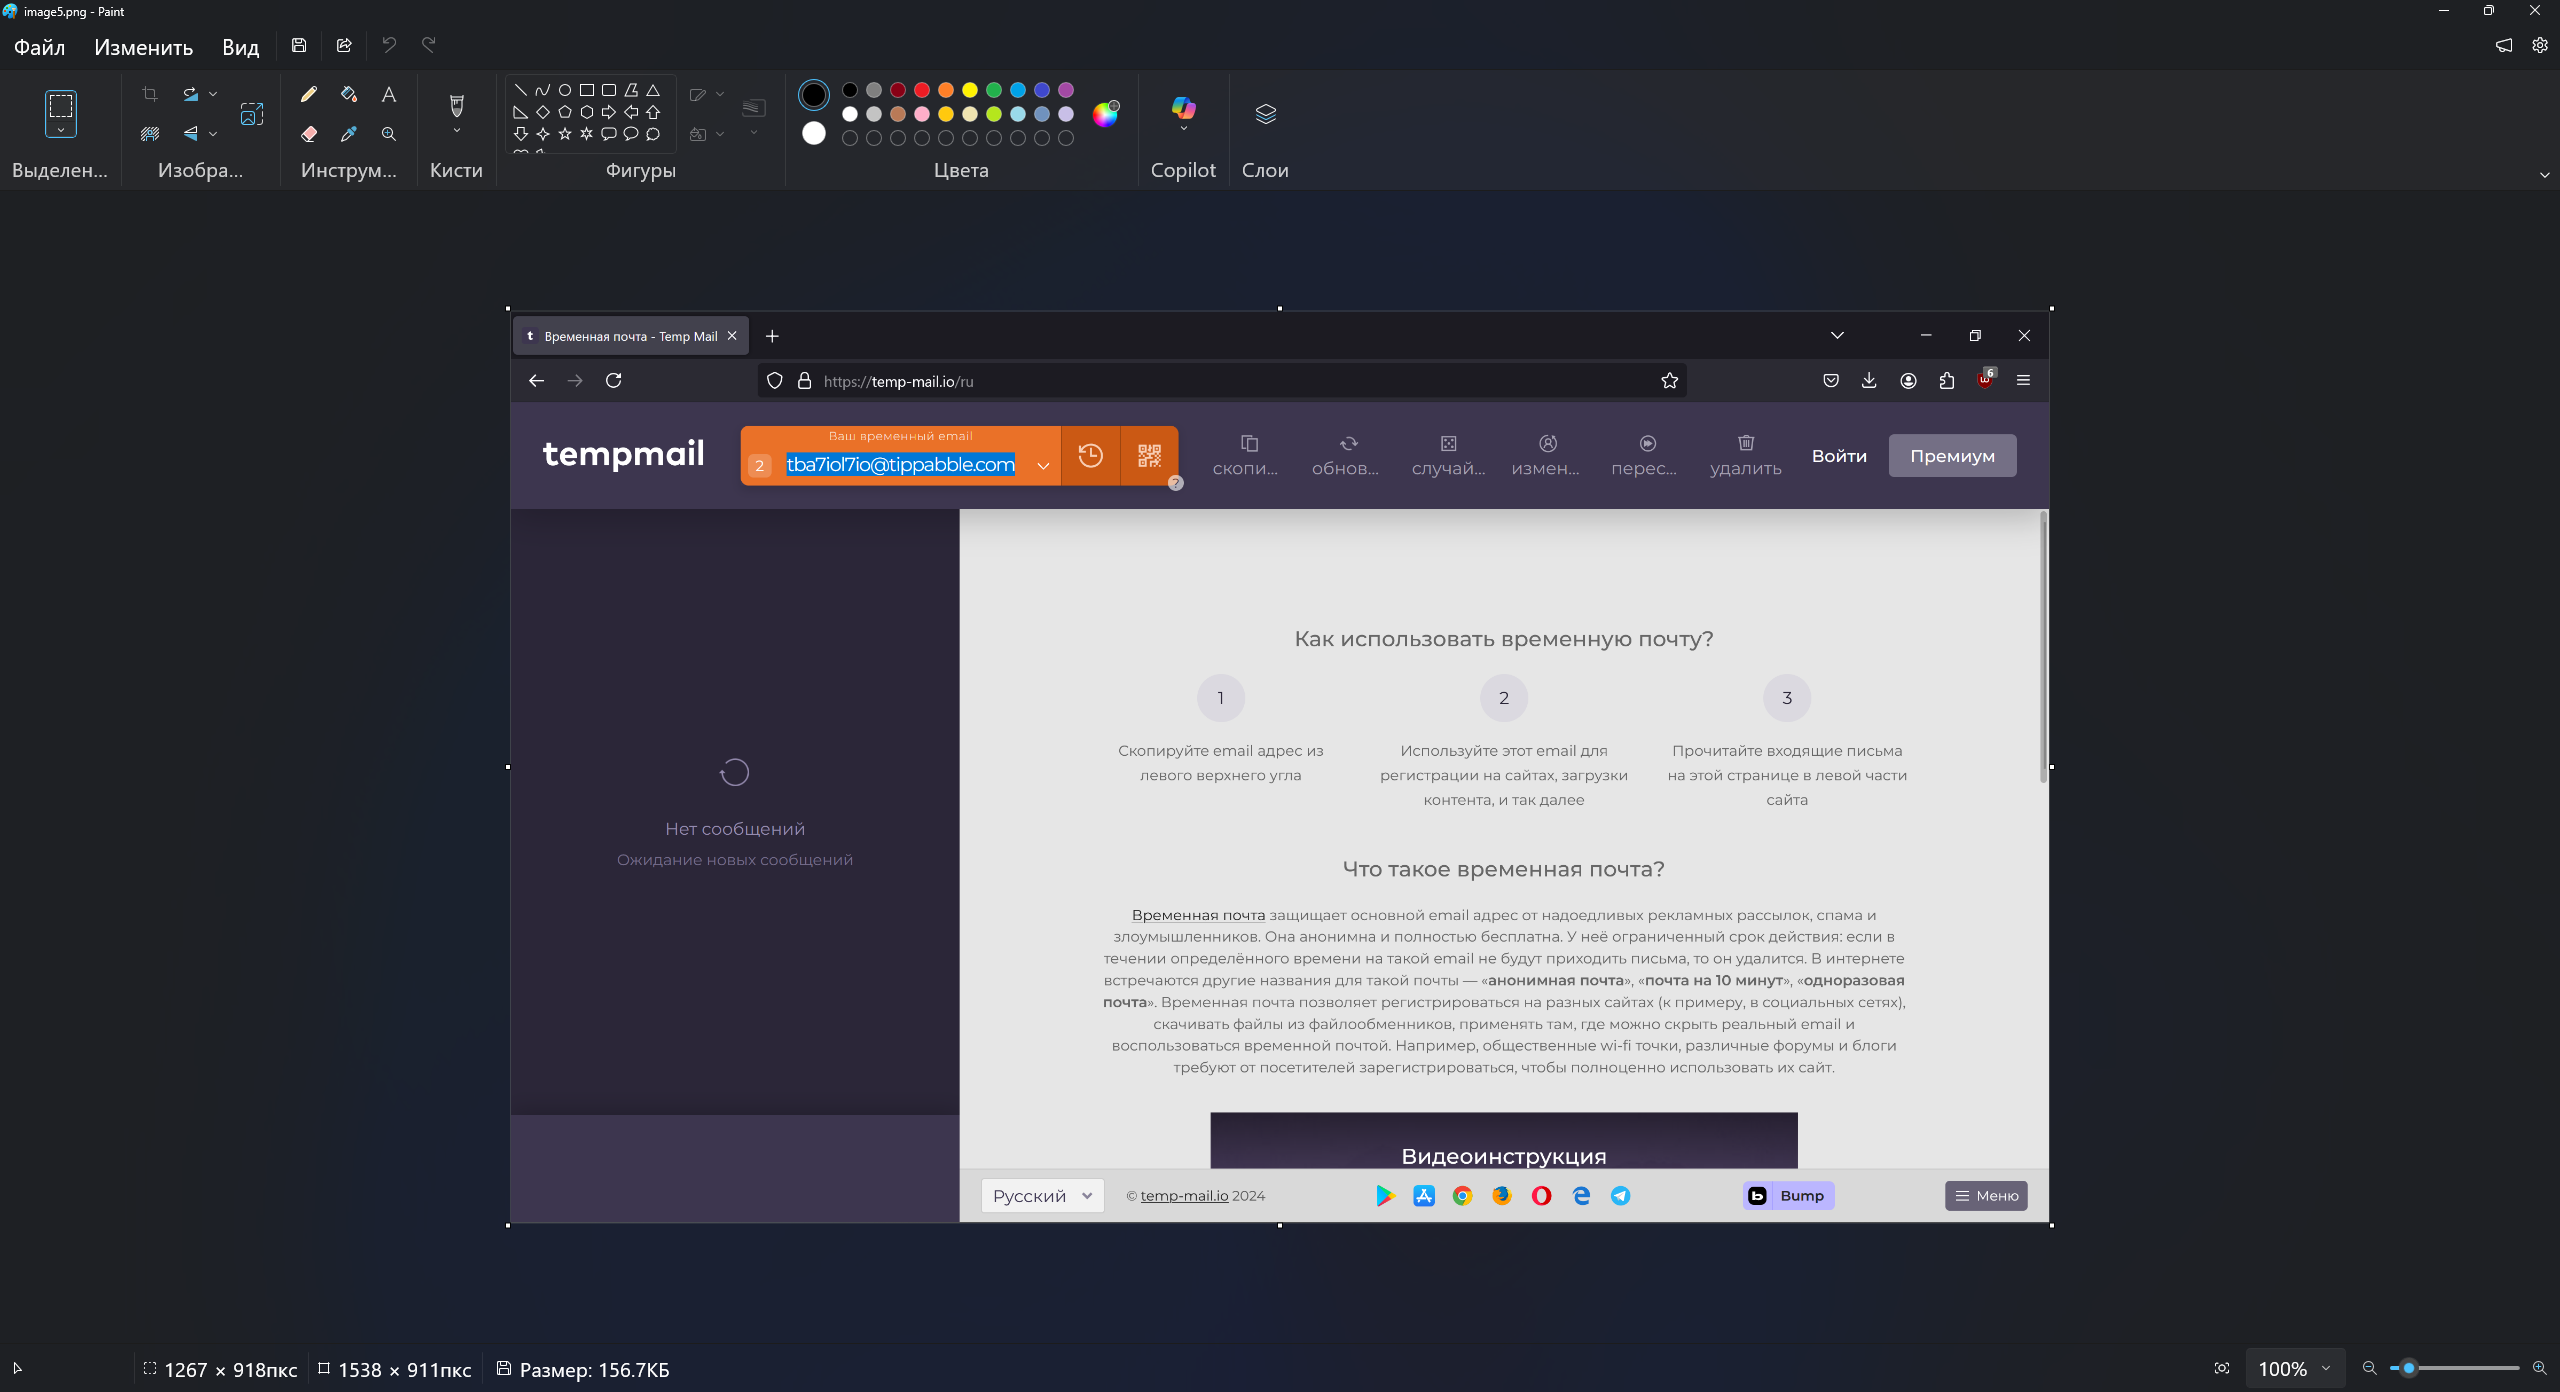
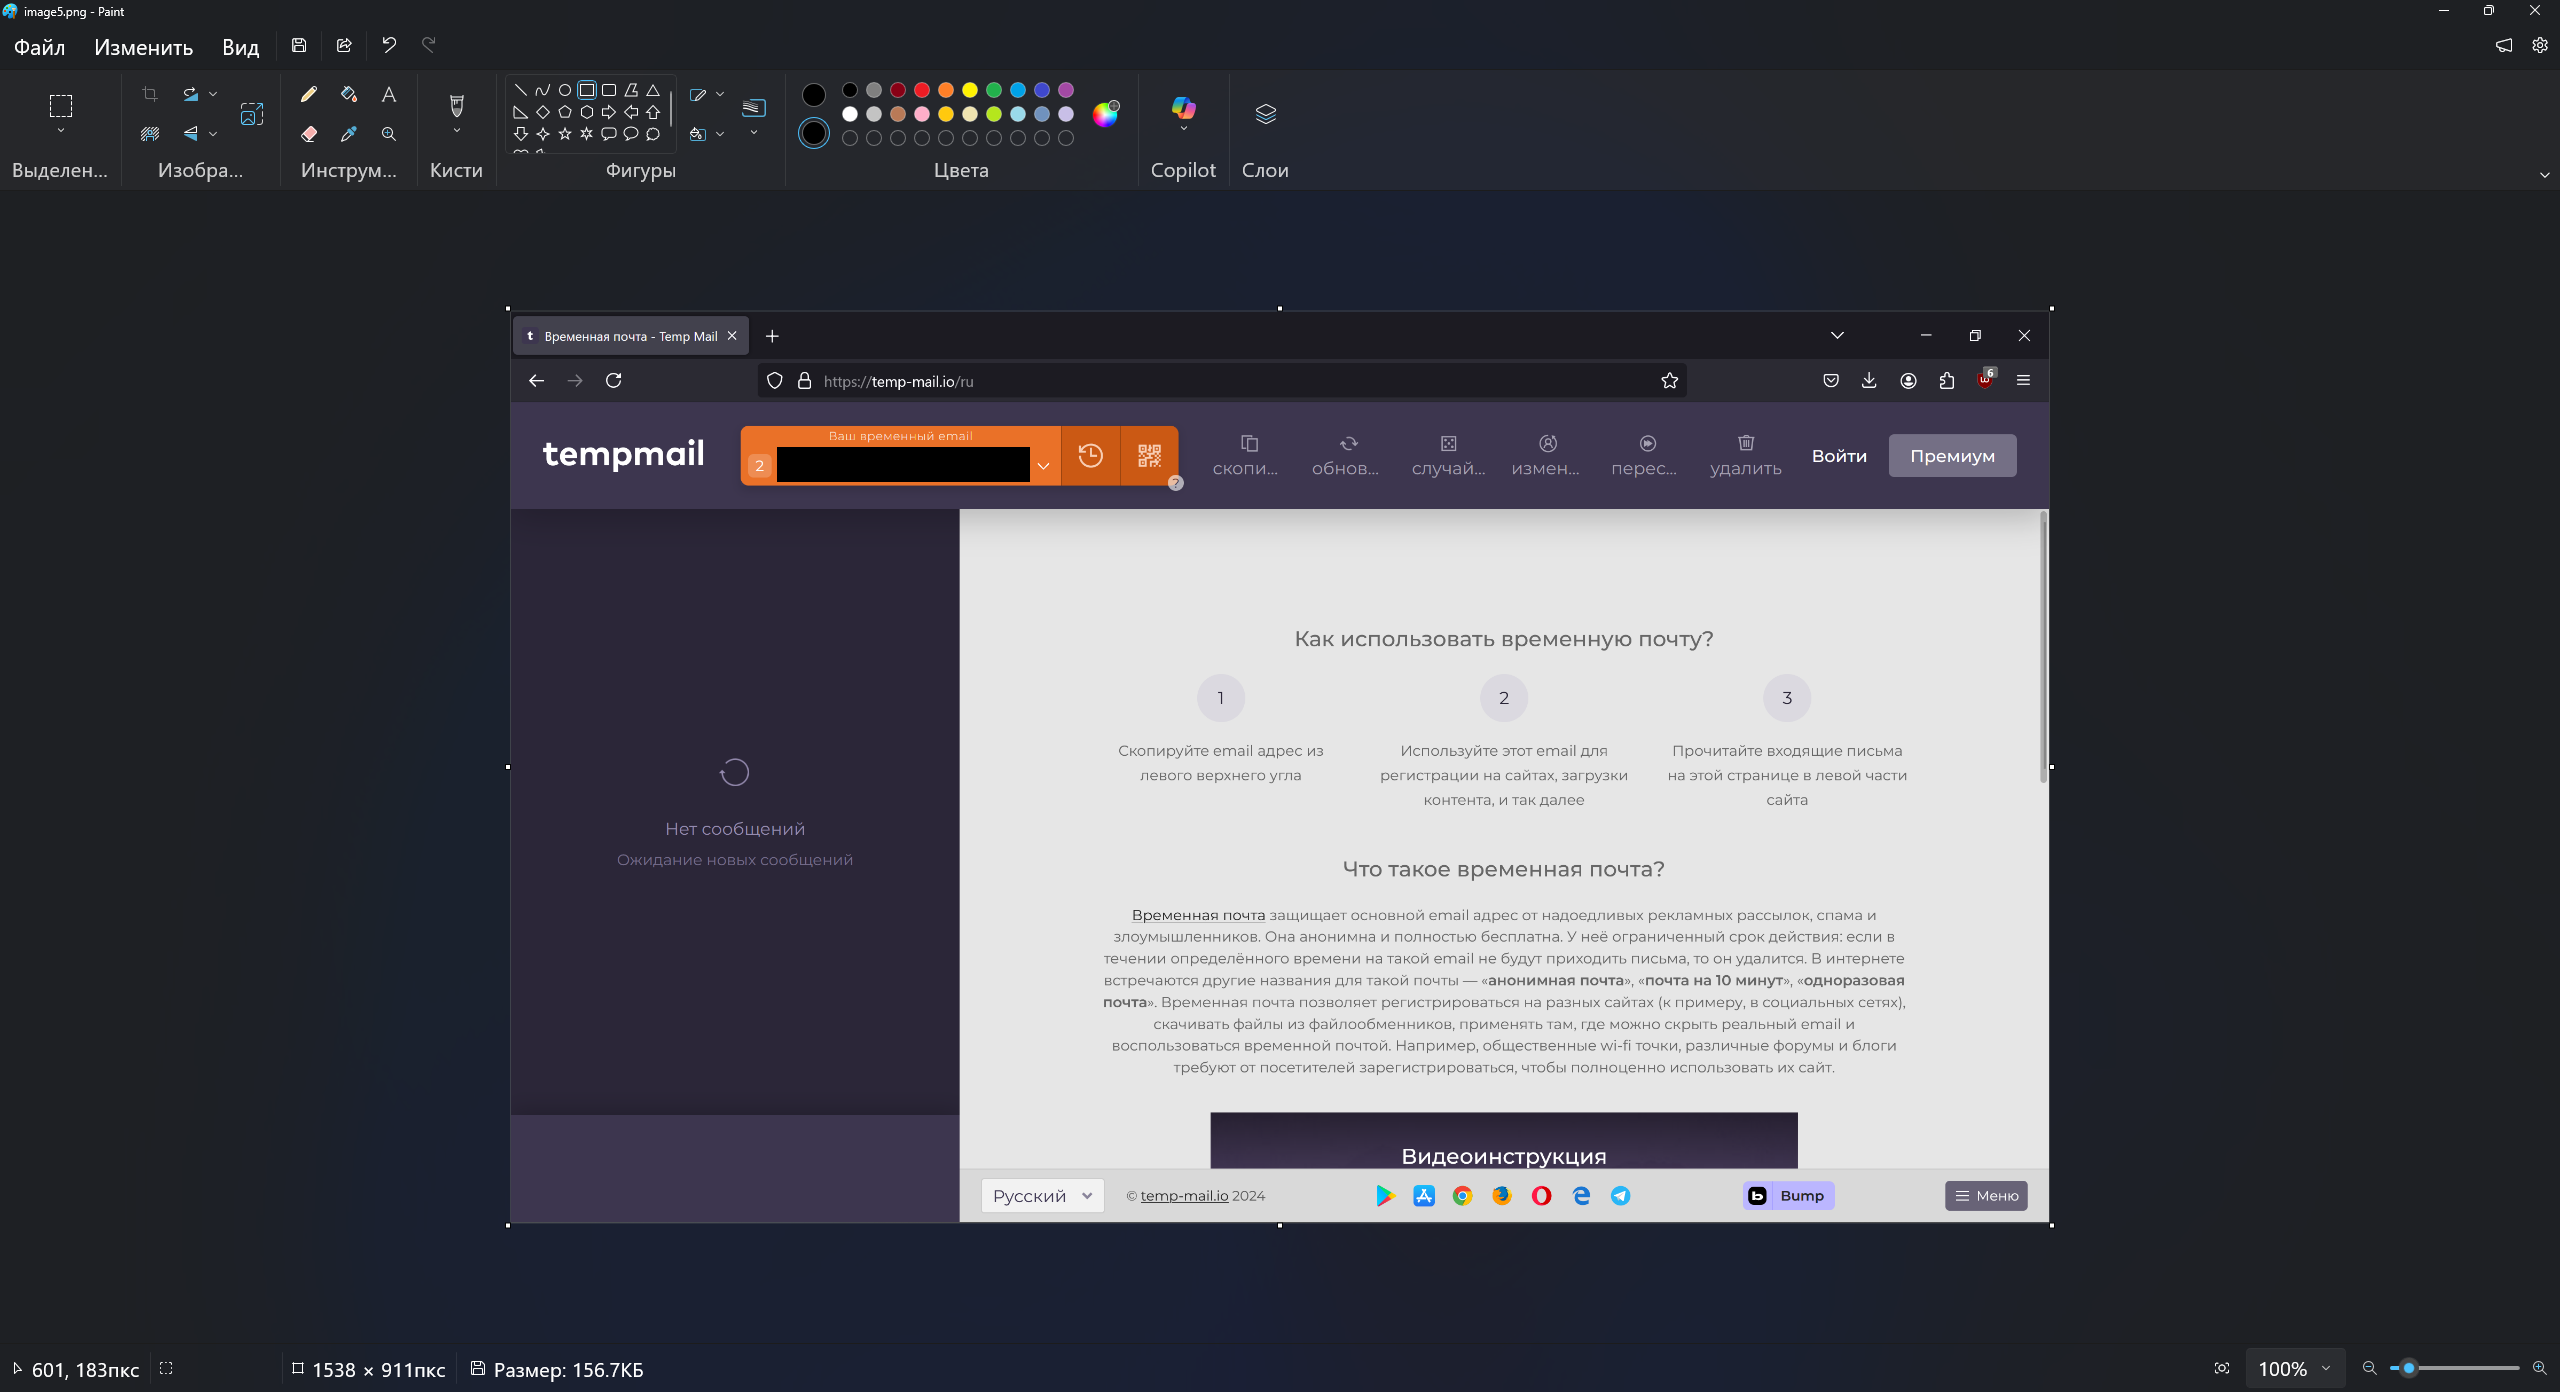
After editing, put the updated media folder back into the word directory inside the archive, replacing the old versions. If you changed only one or two images, you can open word/media in 7-Zip and drag just those files into it.
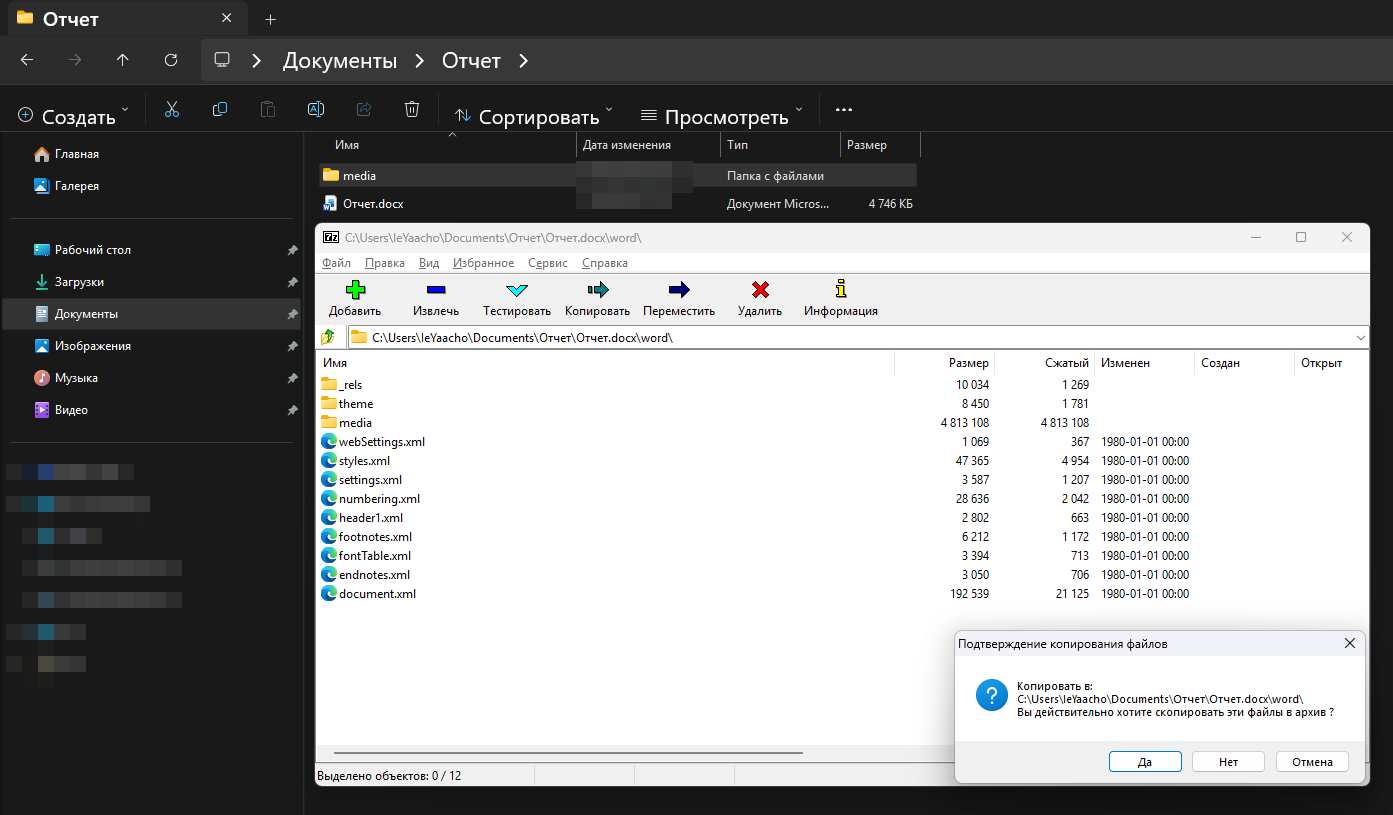
Check that the relevant files inside the archive have been updated.
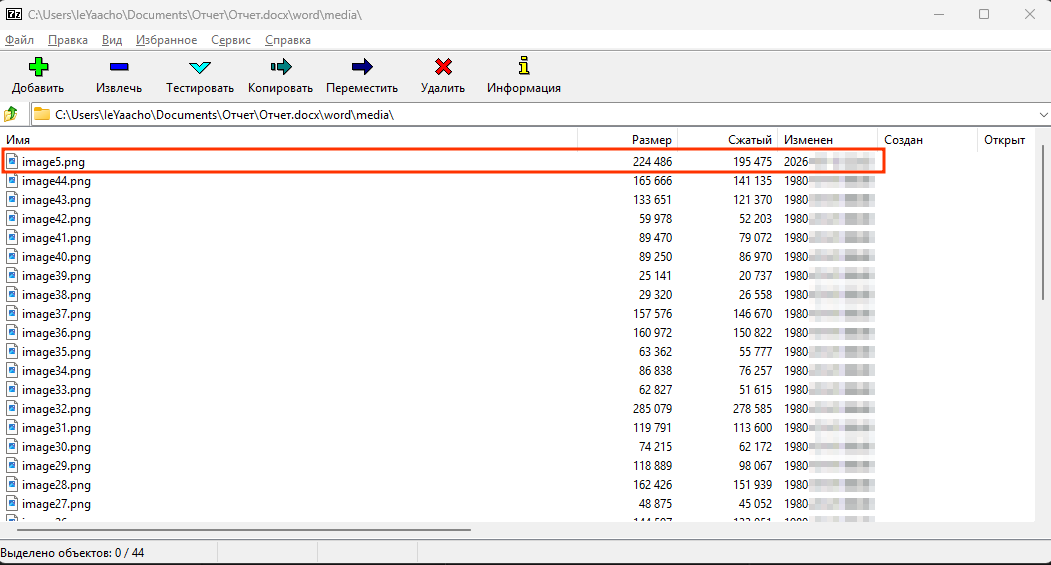
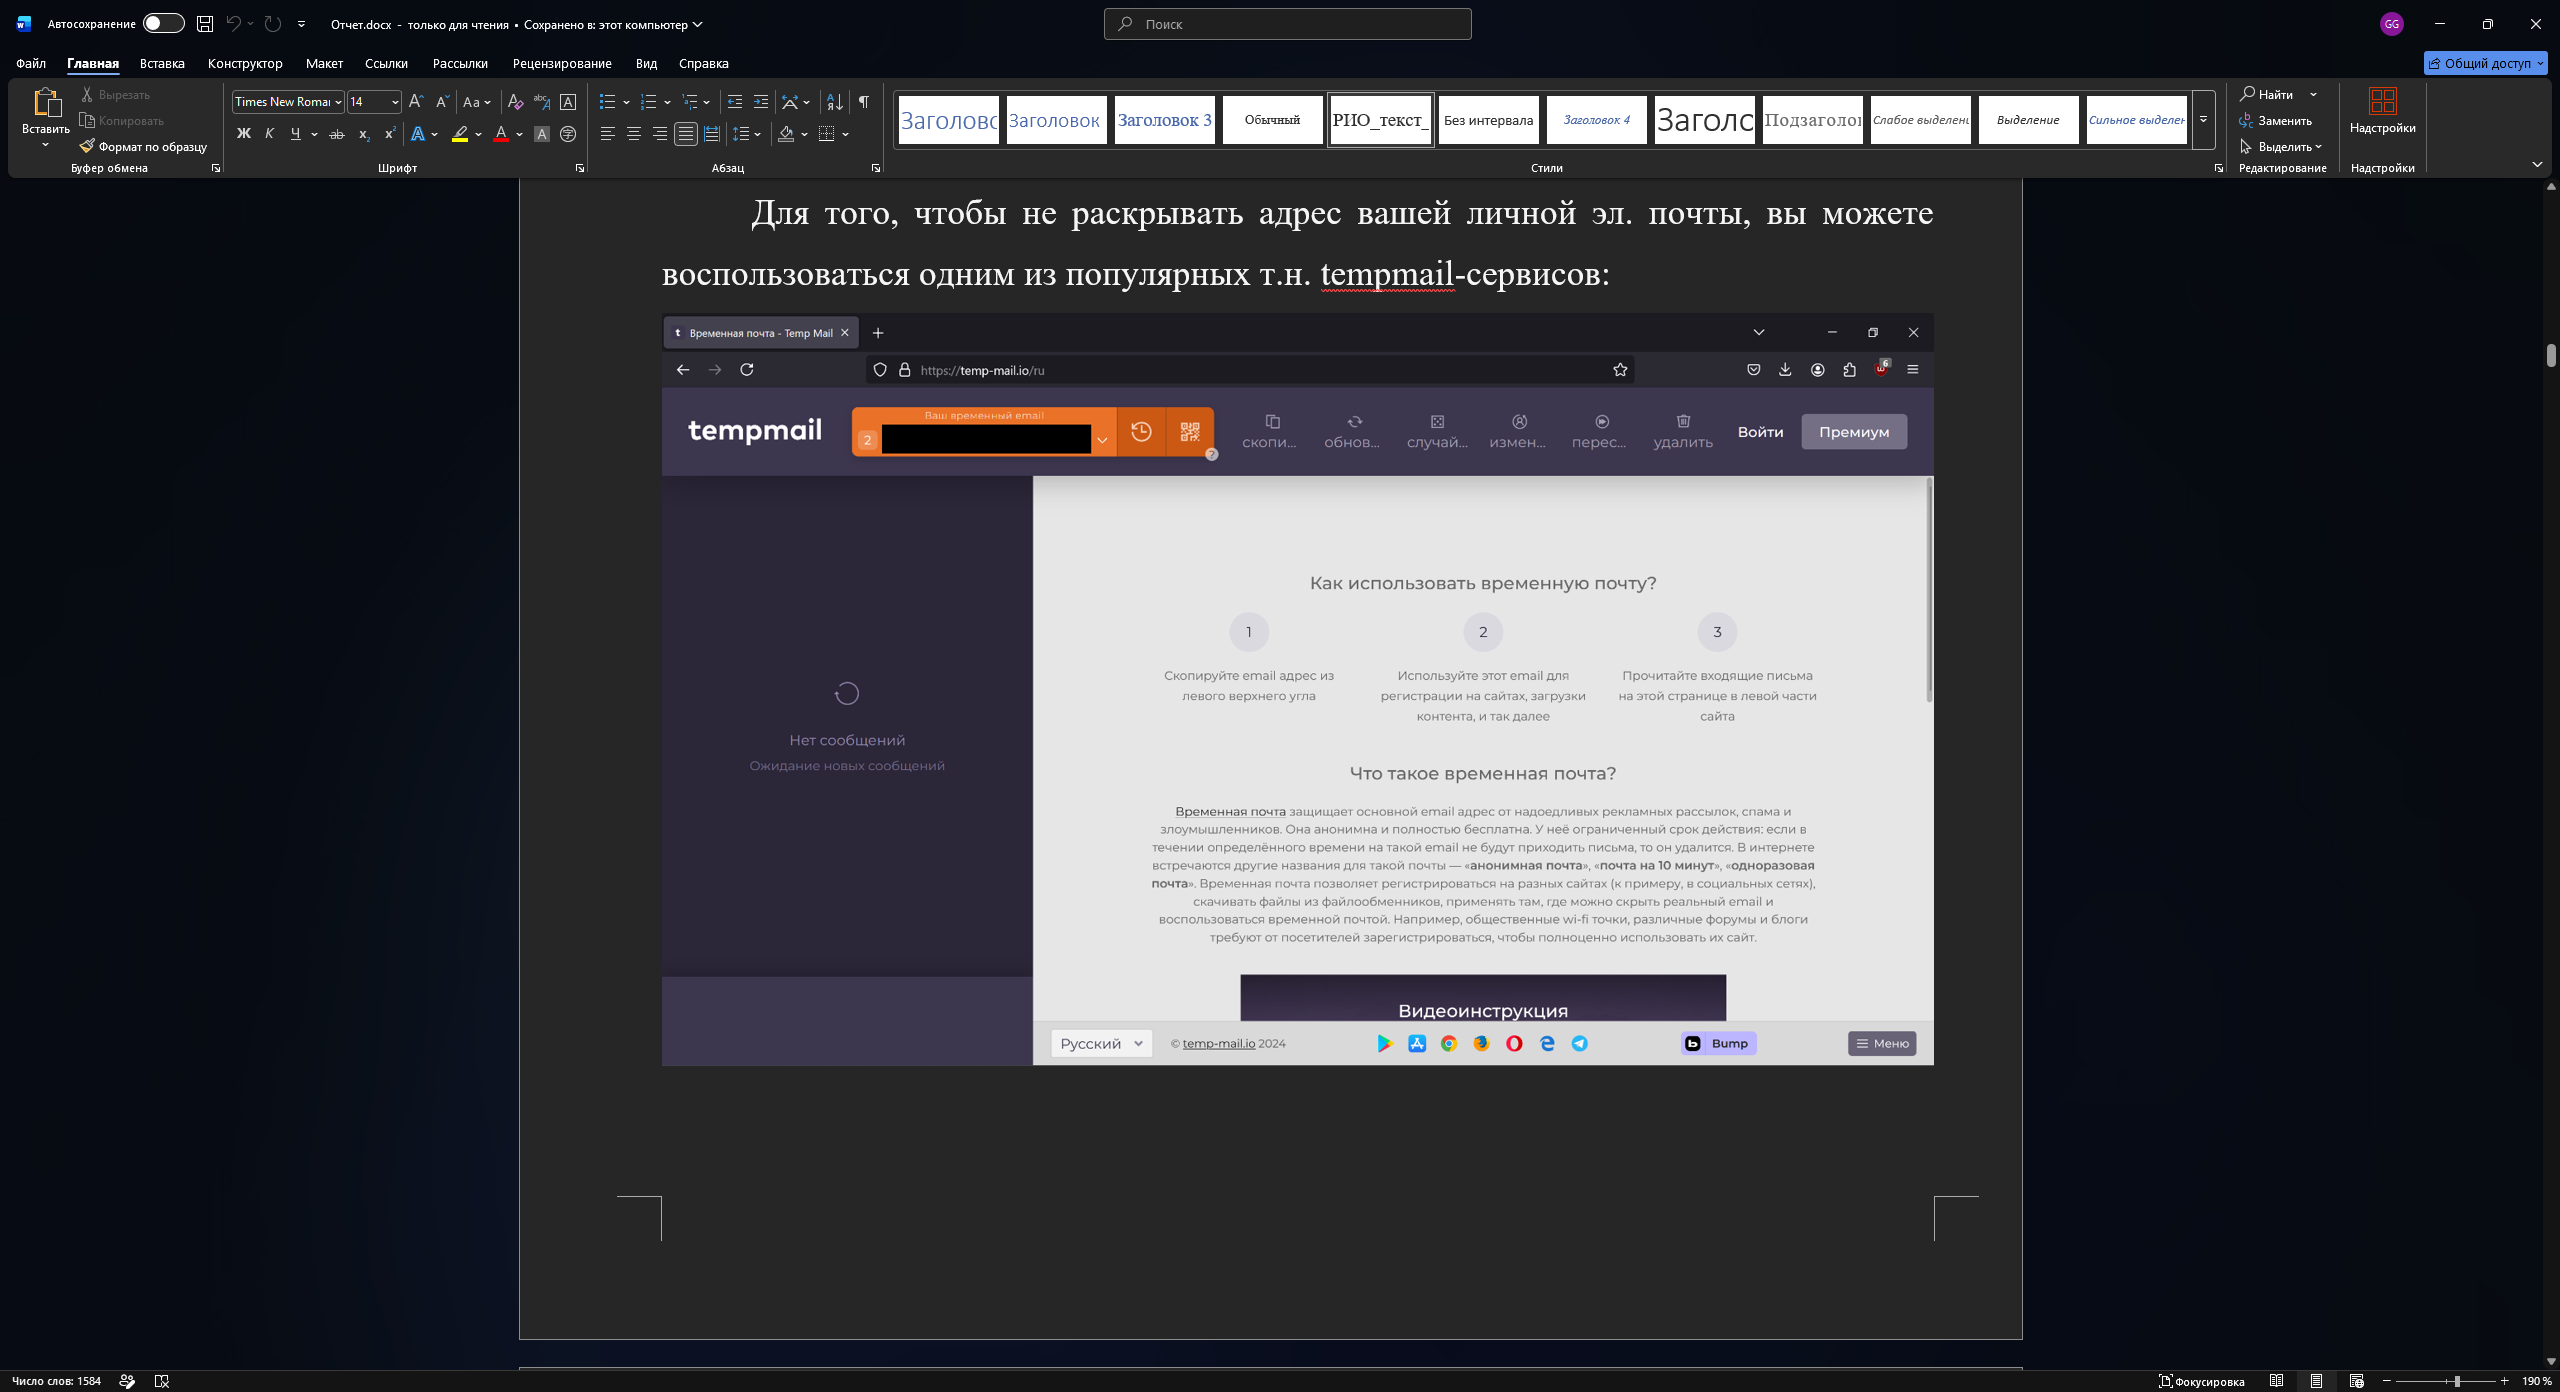
Then close 7-Zip and open the document in Word. If the filenames and archive structure are unchanged, the document will open as usual, now with the updated images.
If your archive manager cannot open .docx directly, use this fallback: rename a copy of the document to .zip, follow the same steps, and restore the .docx extension after replacing the images.
The same approach for PowerPoint
PowerPoint presentations work the same way. A .pptx file is also a ZIP archive, but its images are stored in ppt/media rather than word/media.
Open a copy of the presentation as an archive in 7-Zip. The root contains the Office document's internal directories, including ppt.
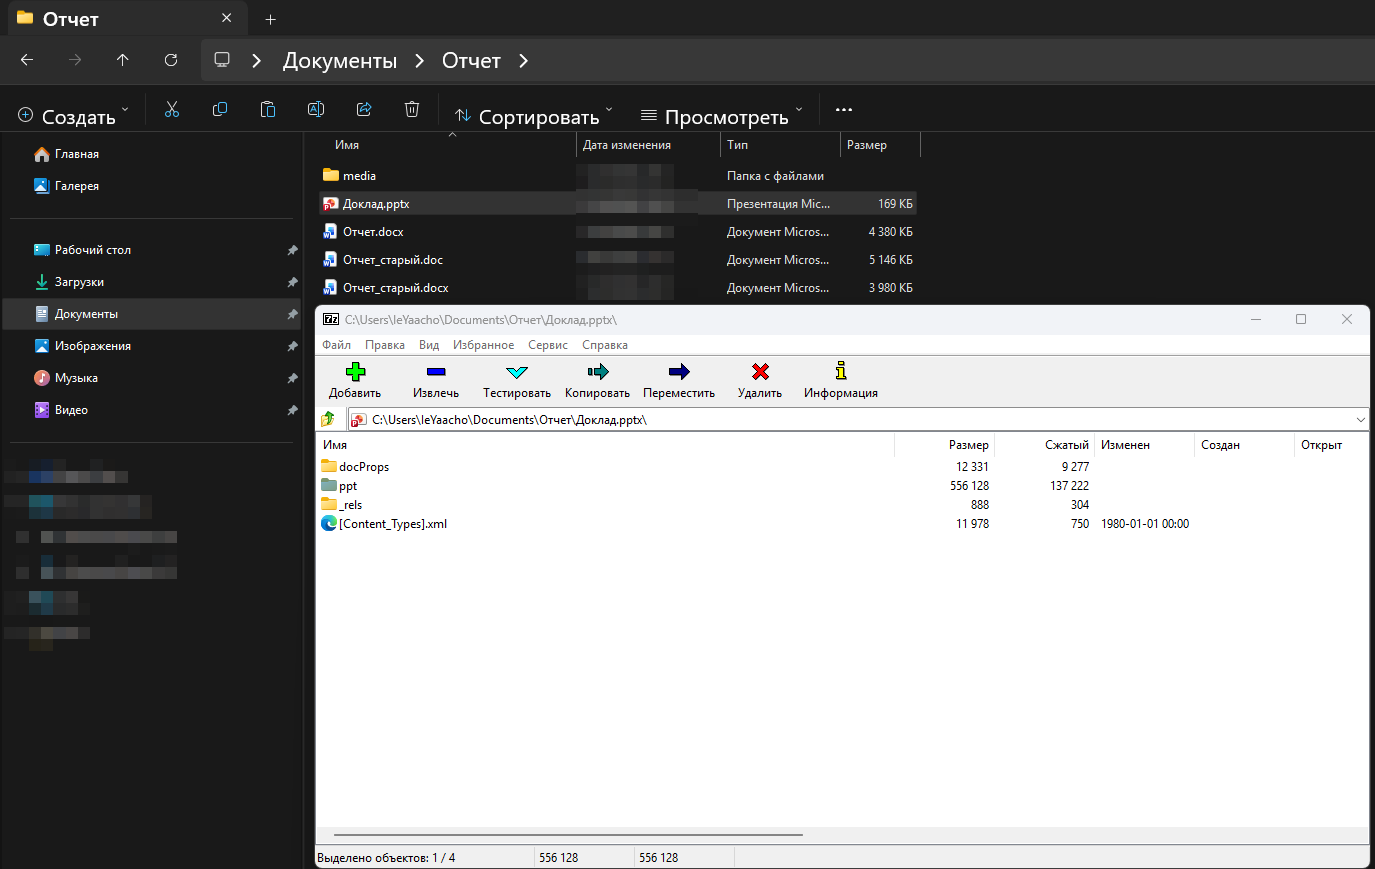
Open ppt, then media.
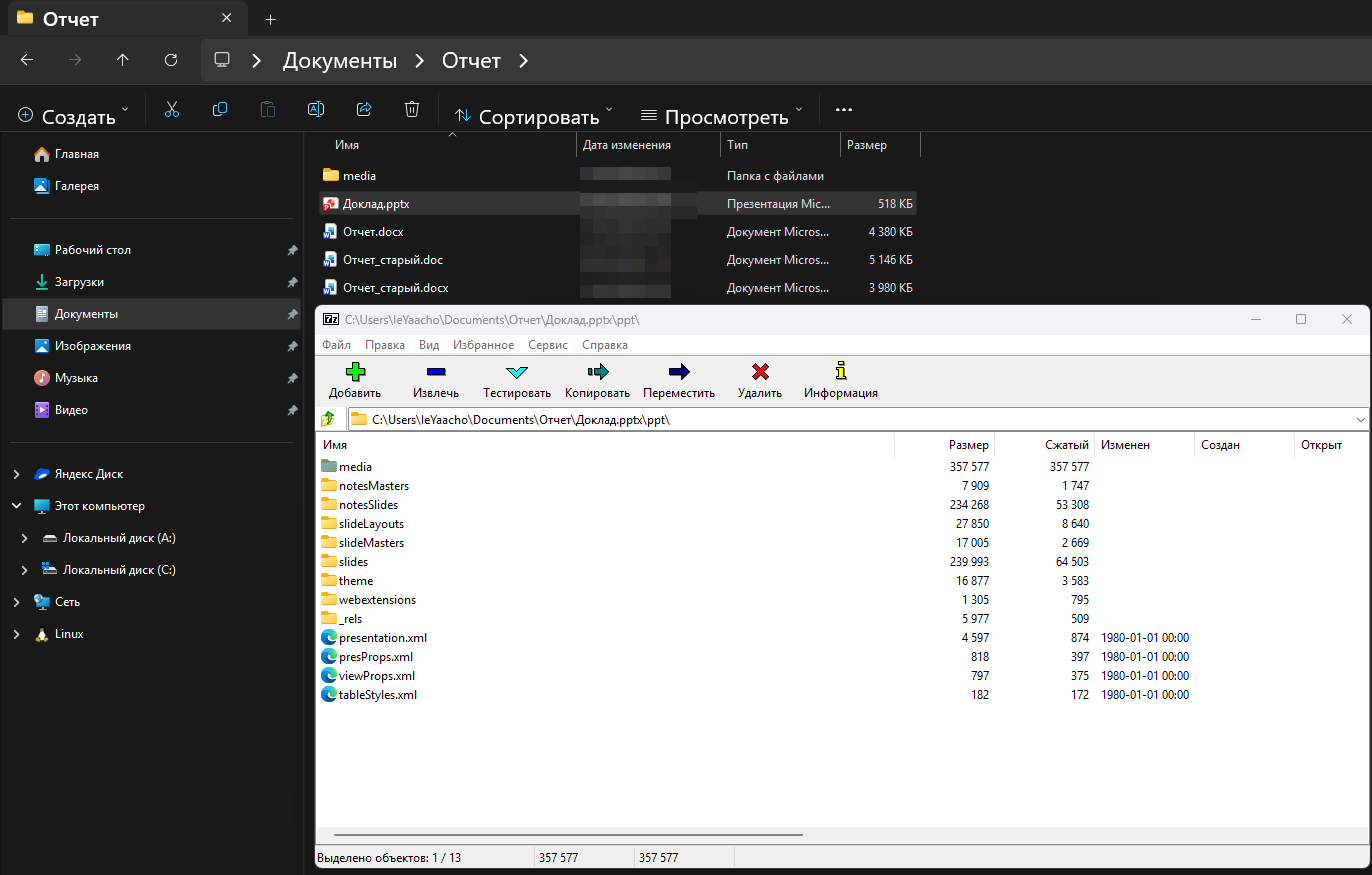
The ppt/media directory contains the images embedded in the presentation. Extract them, edit them, and return them to the archive with the same filenames.
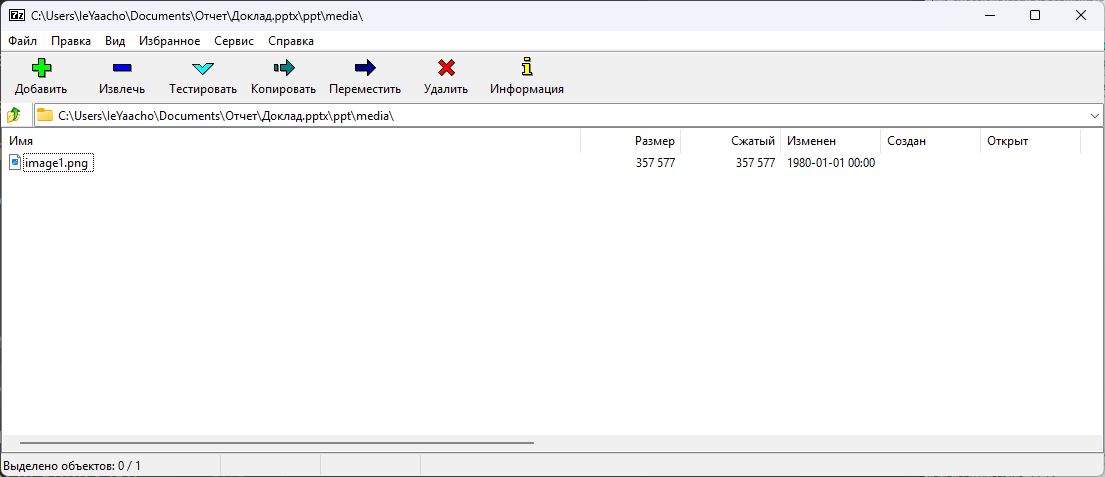
If you need to replace many screenshots in a large report or presentation, this is usually faster and more reliable than finding each image by eye inside Office.
Working with older documents
This approach works with modern XML-based Office formats such as .docx and .pptx. Older binary .doc and .ppt files do not have the ZIP structure with word/media or ppt/media directories.
If you have a report created in an older version of Word, first open it in Word and save it in the modern .docx format. An old .doc file may open in 7-Zip, but it contains a different binary structure rather than the familiar word and media folders.
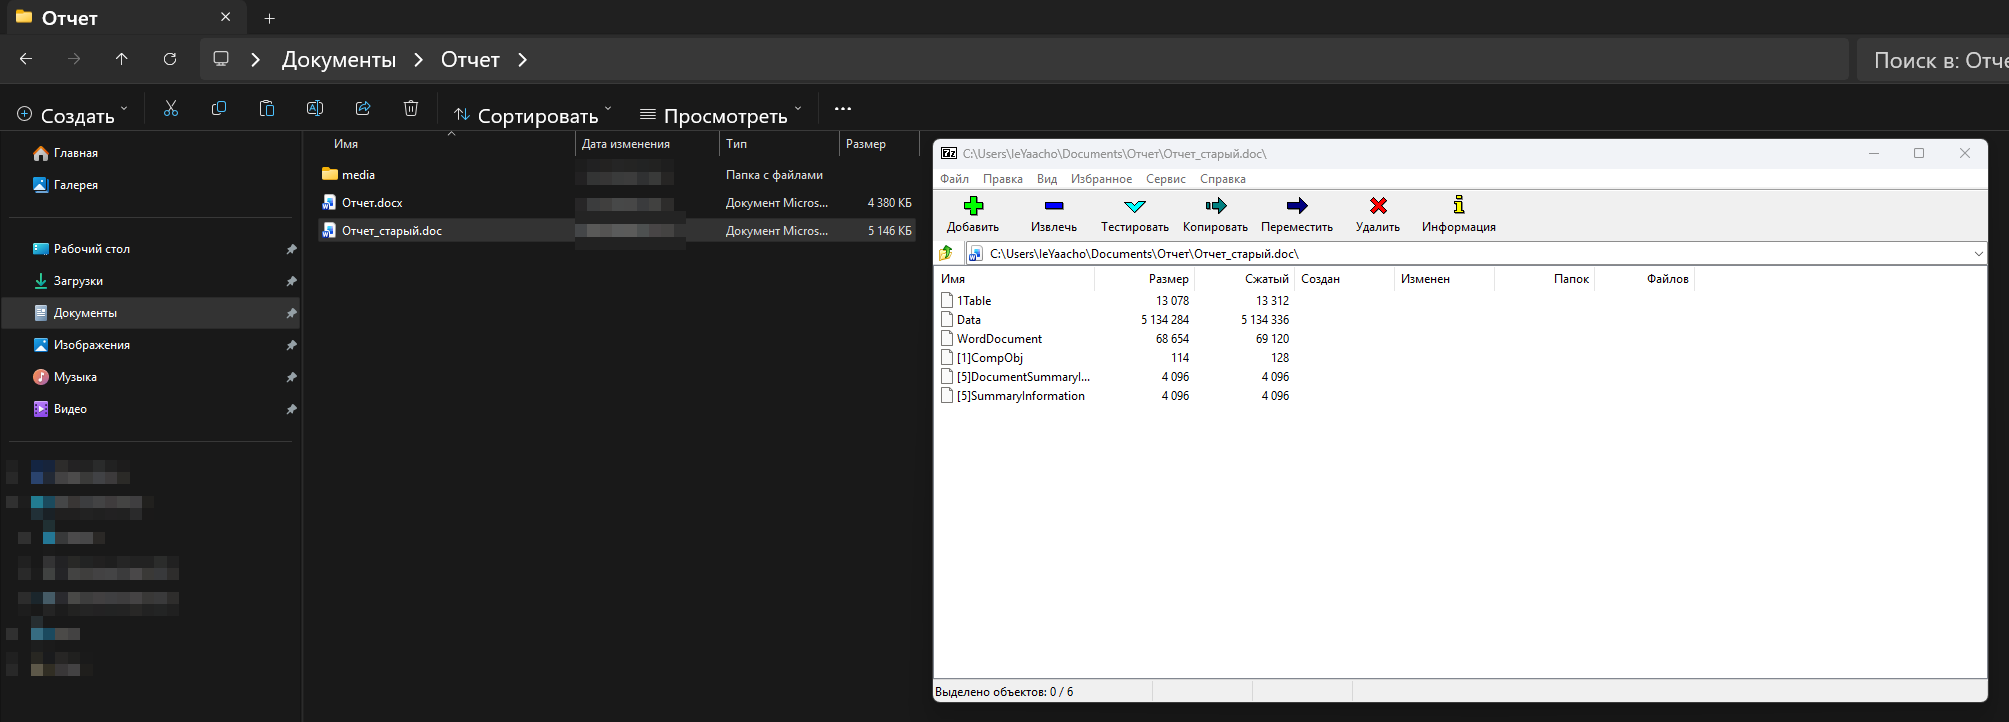
In Word, open the Save As dialog.
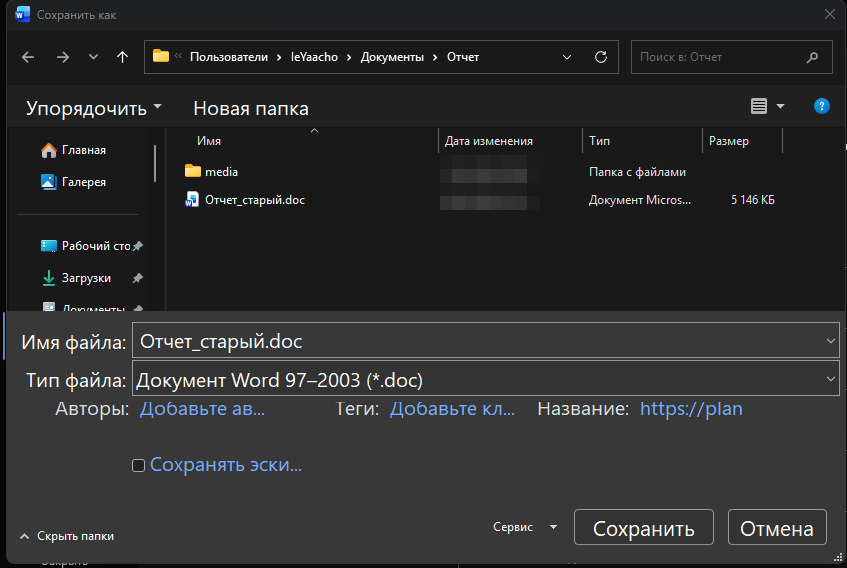
In the file type field, select Word Document (*.docx).
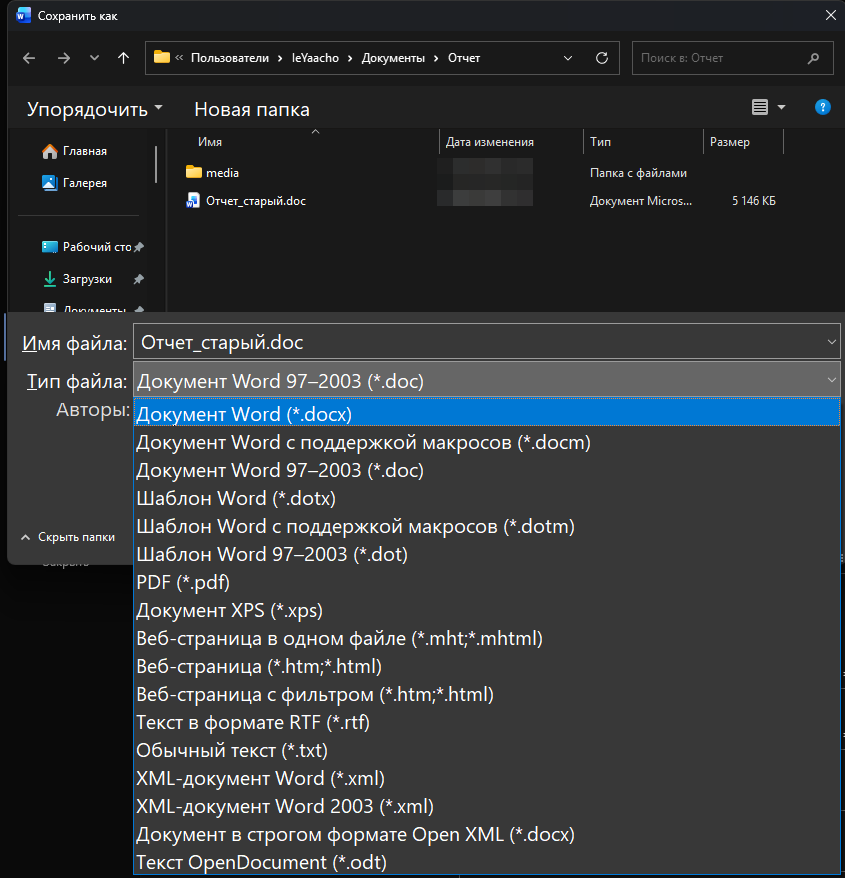
Save the document under a new filename with the .docx extension.
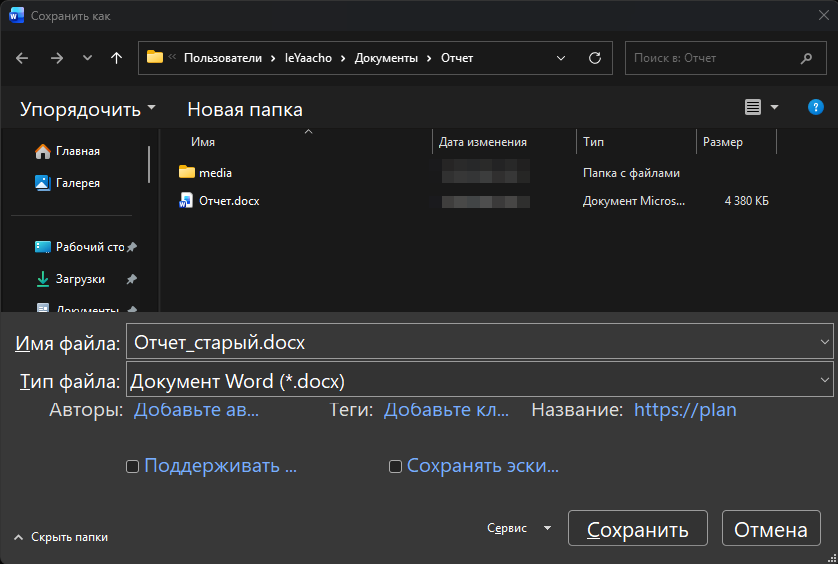
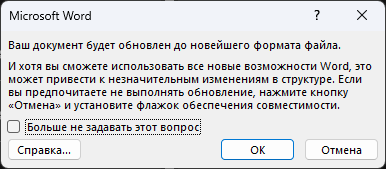
If Word warns that the file will be converted to the new format, confirm the conversion.
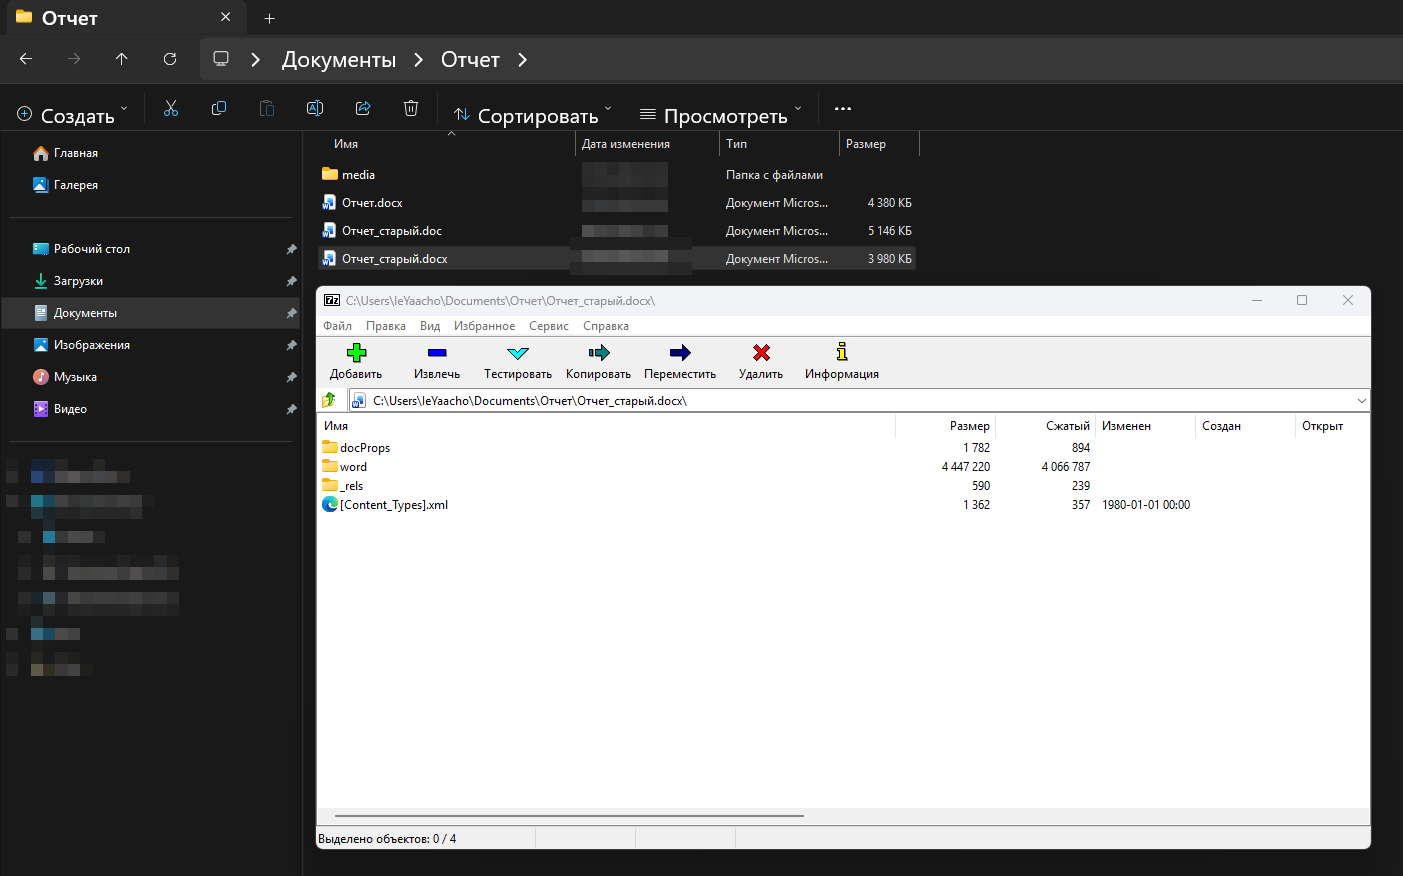
You can now open the new .docx in 7-Zip. It will have the modern structure with a word directory, and you can follow the same workflow described above.
An important note about redaction
This method is useful when sensitive information appears in raster images: screenshots, diagrams, or photographs of an interface. You are changing the images themselves, rather than placing decorative rectangles over them in the document.
A rectangle in Word or PowerPoint is a separate object layered over an image. Someone can move or delete it, or copy the image without it: the original information underneath remains intact. Editing the image file itself removes that possibility.
Use a solid, opaque fill when covering information, rather than blur or pixelation. In some cases, blurred or pixelated areas can be reconstructed.
For more on common mistakes when concealing information in documents, see the NSA's redaction guidance:
Questions or corrections? iam@kgmnotes.com.
Original screenshots and recordings may contain Russian text.